BowTie provides a lightweight and easy way to collect and save information about a user, without using a database. Our User Profiles eliminate the need for a backend and allow you to record and pass information back to your site or to a third party service with ease.
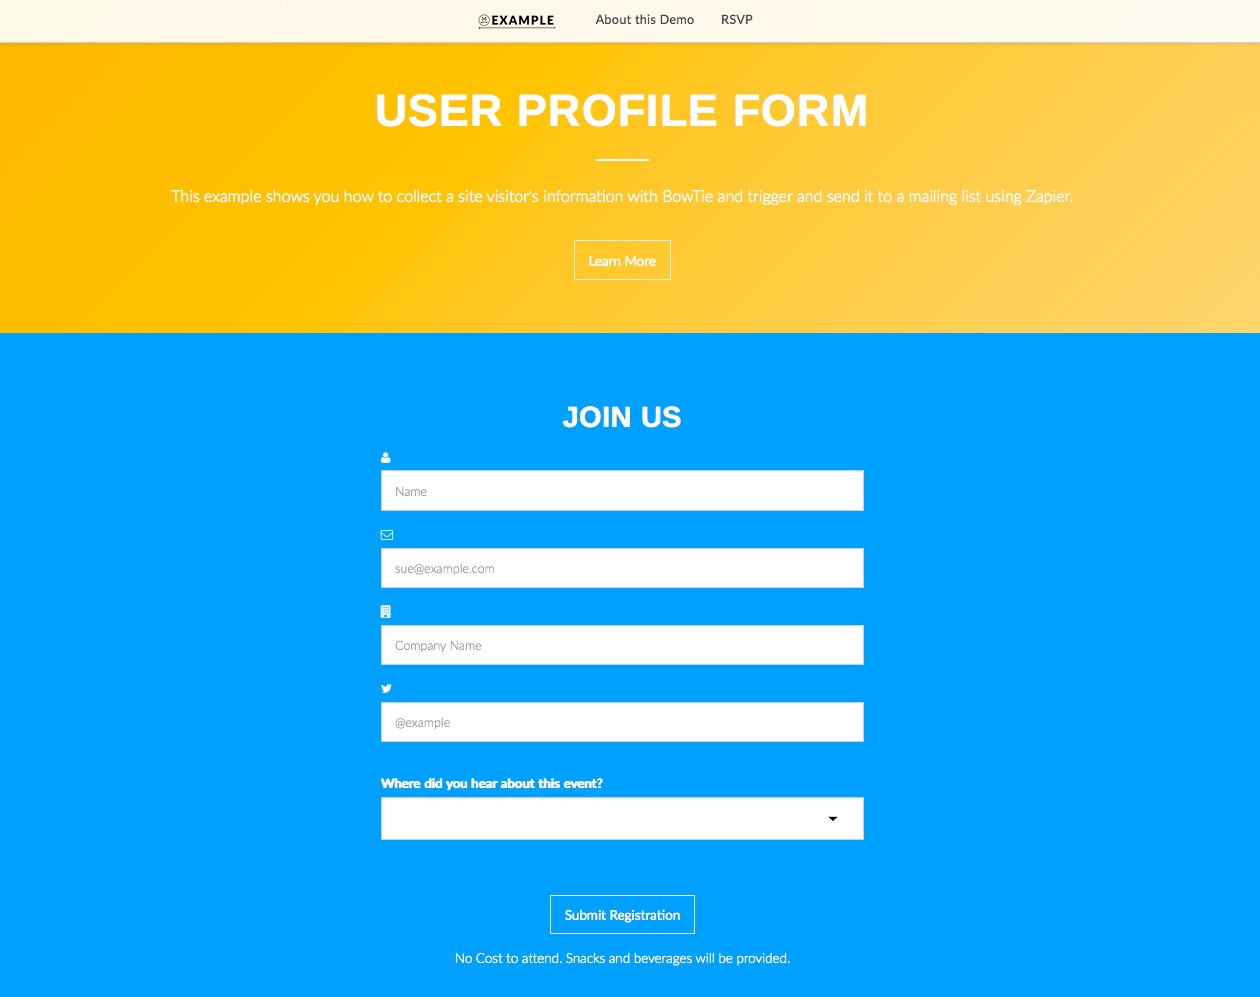
In this example, I will show you how to build a form that collects typical user information and save it to a BowTie Browser Profile. Then, we’ll trigger a Zapier Zap to send the email address from the form submission to a list in Campaign Monitor.
If you’d like to see the demo site this post, view it here.
Example BowTie Blog
Getting Started
As always, if you don’t have a BowTie project, you will need to create one. Pick any template you’d like, or create your own form - the logic is the same. For this example we are using our Jekyll based landing page template.
If you want to build this exact site, you will also need to create an account with Campaign Monitor and Zapier.
Set up the form
There are two elements to make the functionality of this site work - the actual form, and the javascript used to save the form information to BowTie.
HTML Form
The HTML form in this example is a variation of the profile form component included with the BowTIe landing page template I selected. I made slight modifications to capture the specific form fields I needed, shown below. In this case, I’m capturing the user’s name, email, company, twitter handle, and a referral location.
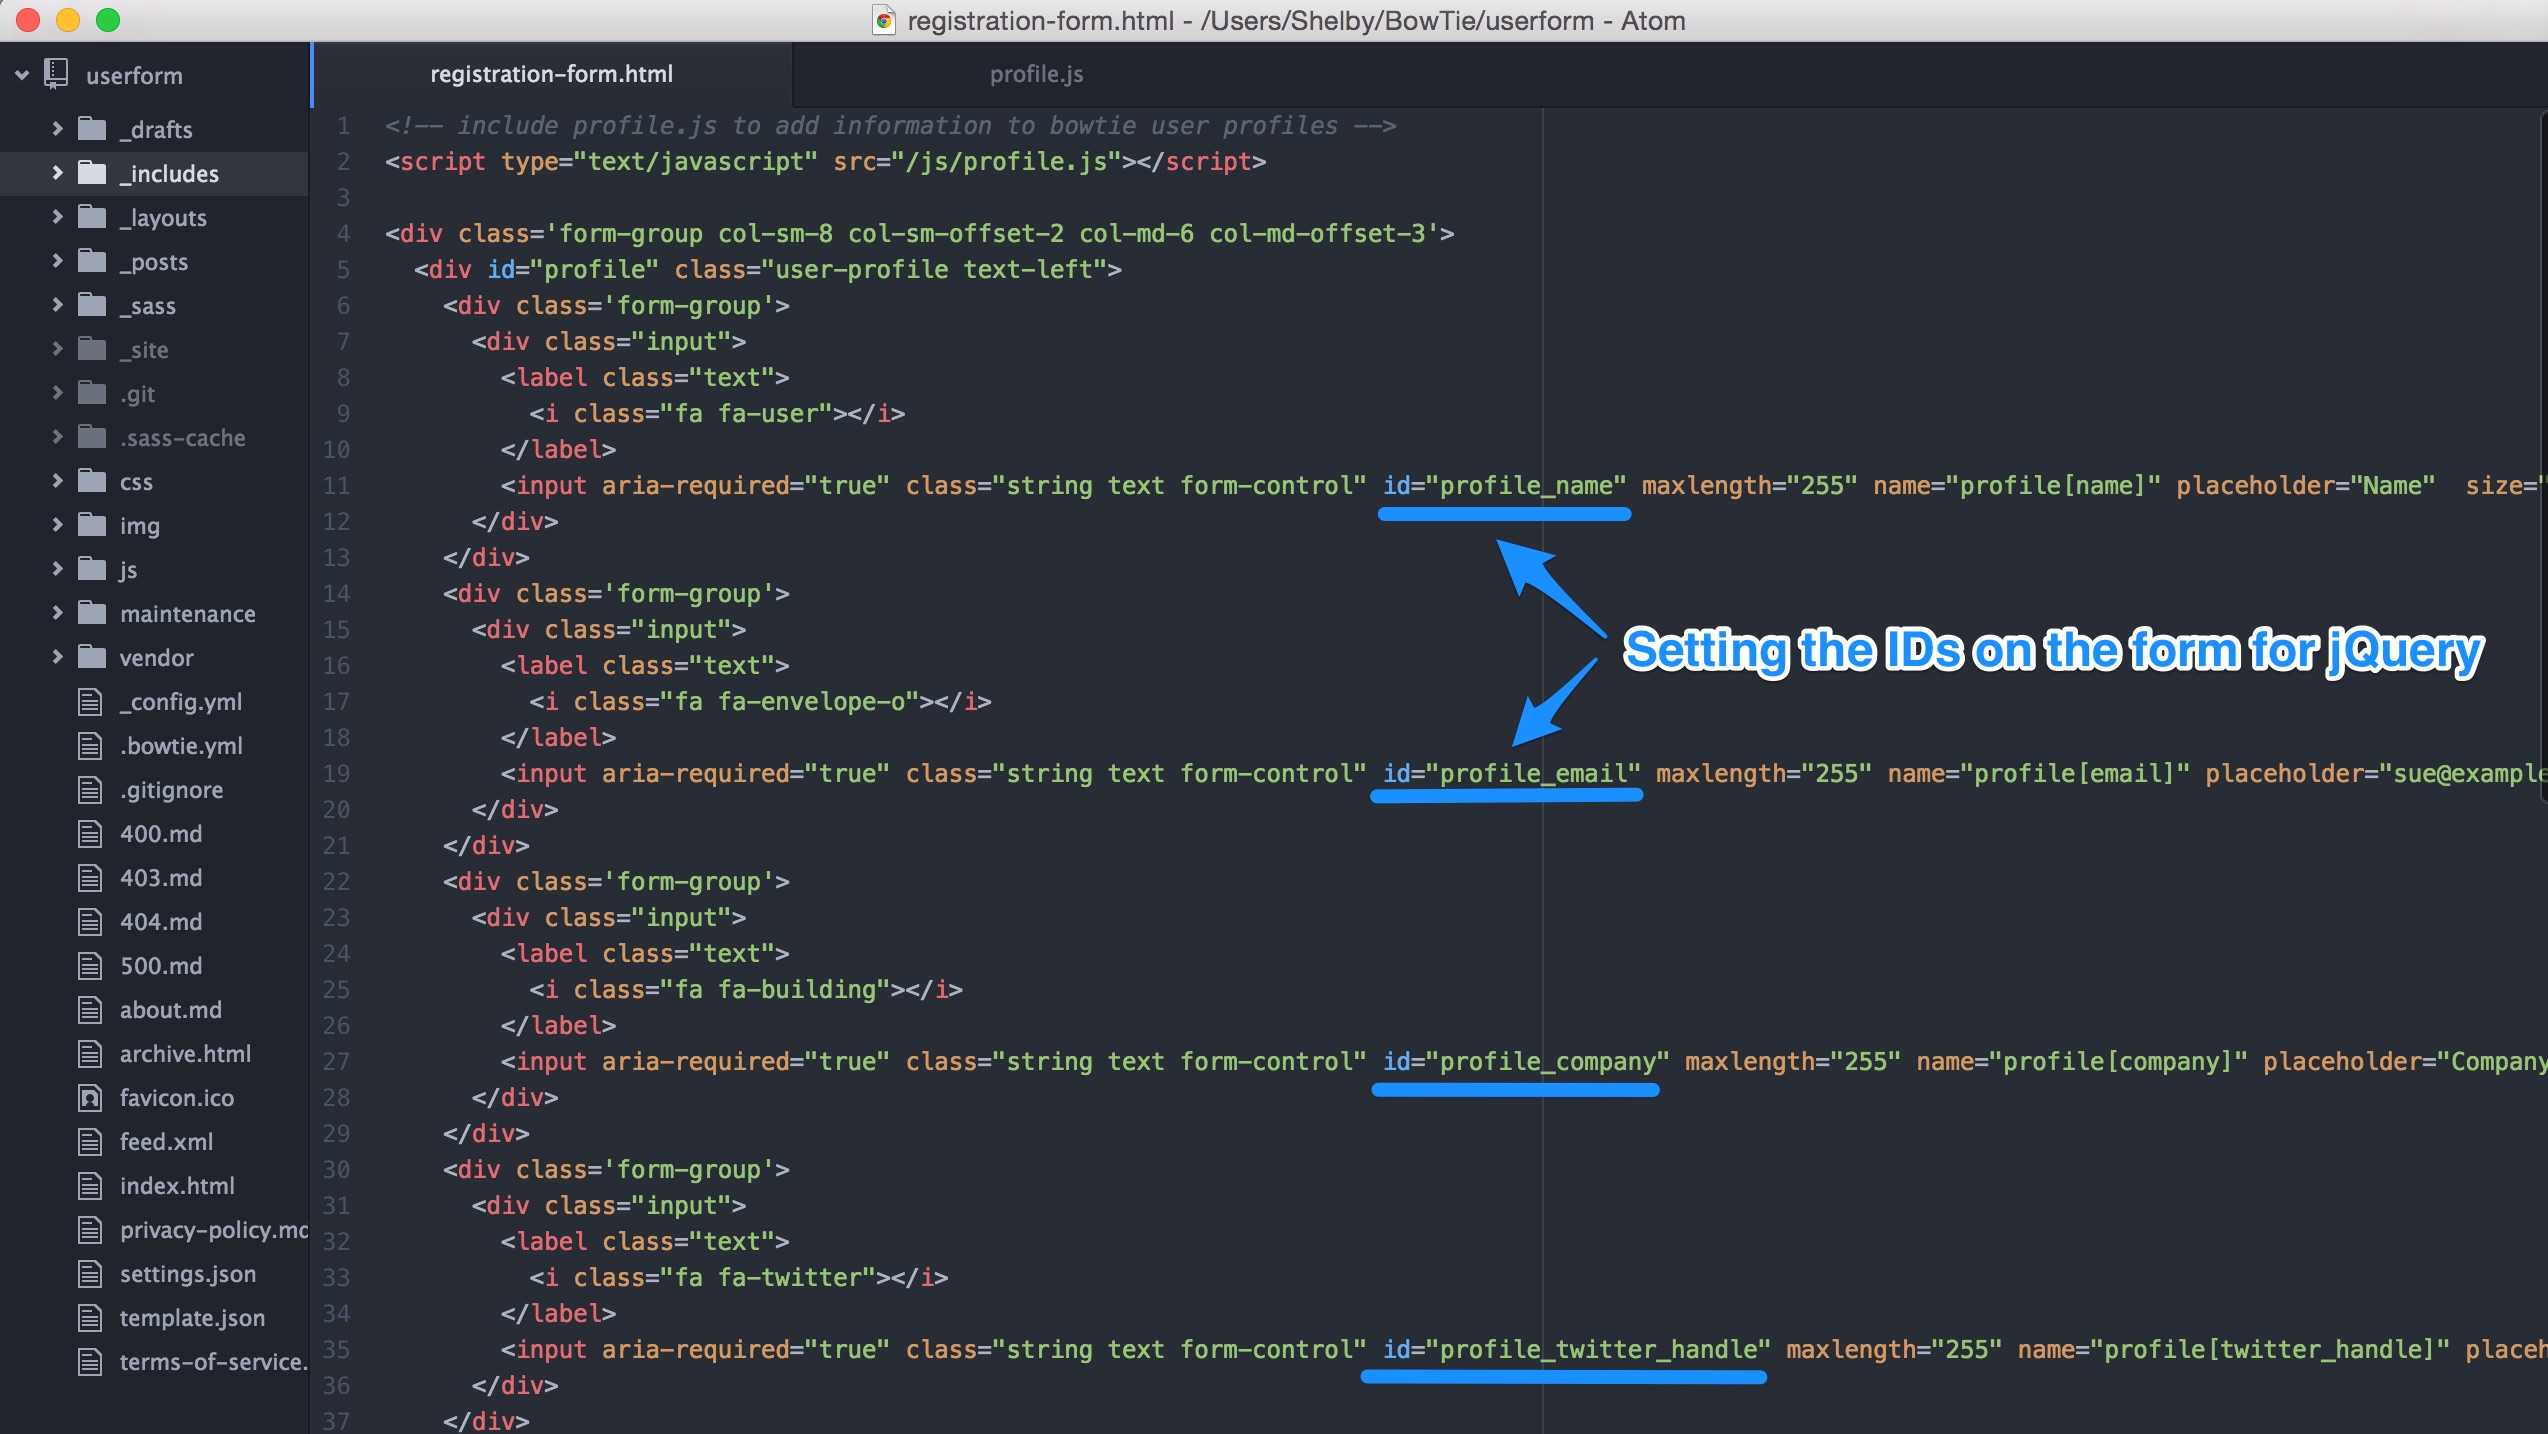
At the bottom of my registration-form.html I have included a little javascript and jQuery to display a user’s information if they have already submitted a form on the site.

This script makes a call to the BowTie JS API, and if there is a profile with associated information, it gets displayed. Inside of the BowTie API call, I locate the form field by its id using jQuery, and then fill the value with the user information by calling .val(profile.ATTRIBUTE).
With the registration-form.html tailored to my use case, I’m half way done. Now I need to move on to sending the information to BowTie through the API.
Send Info the BowTie API with profile.js
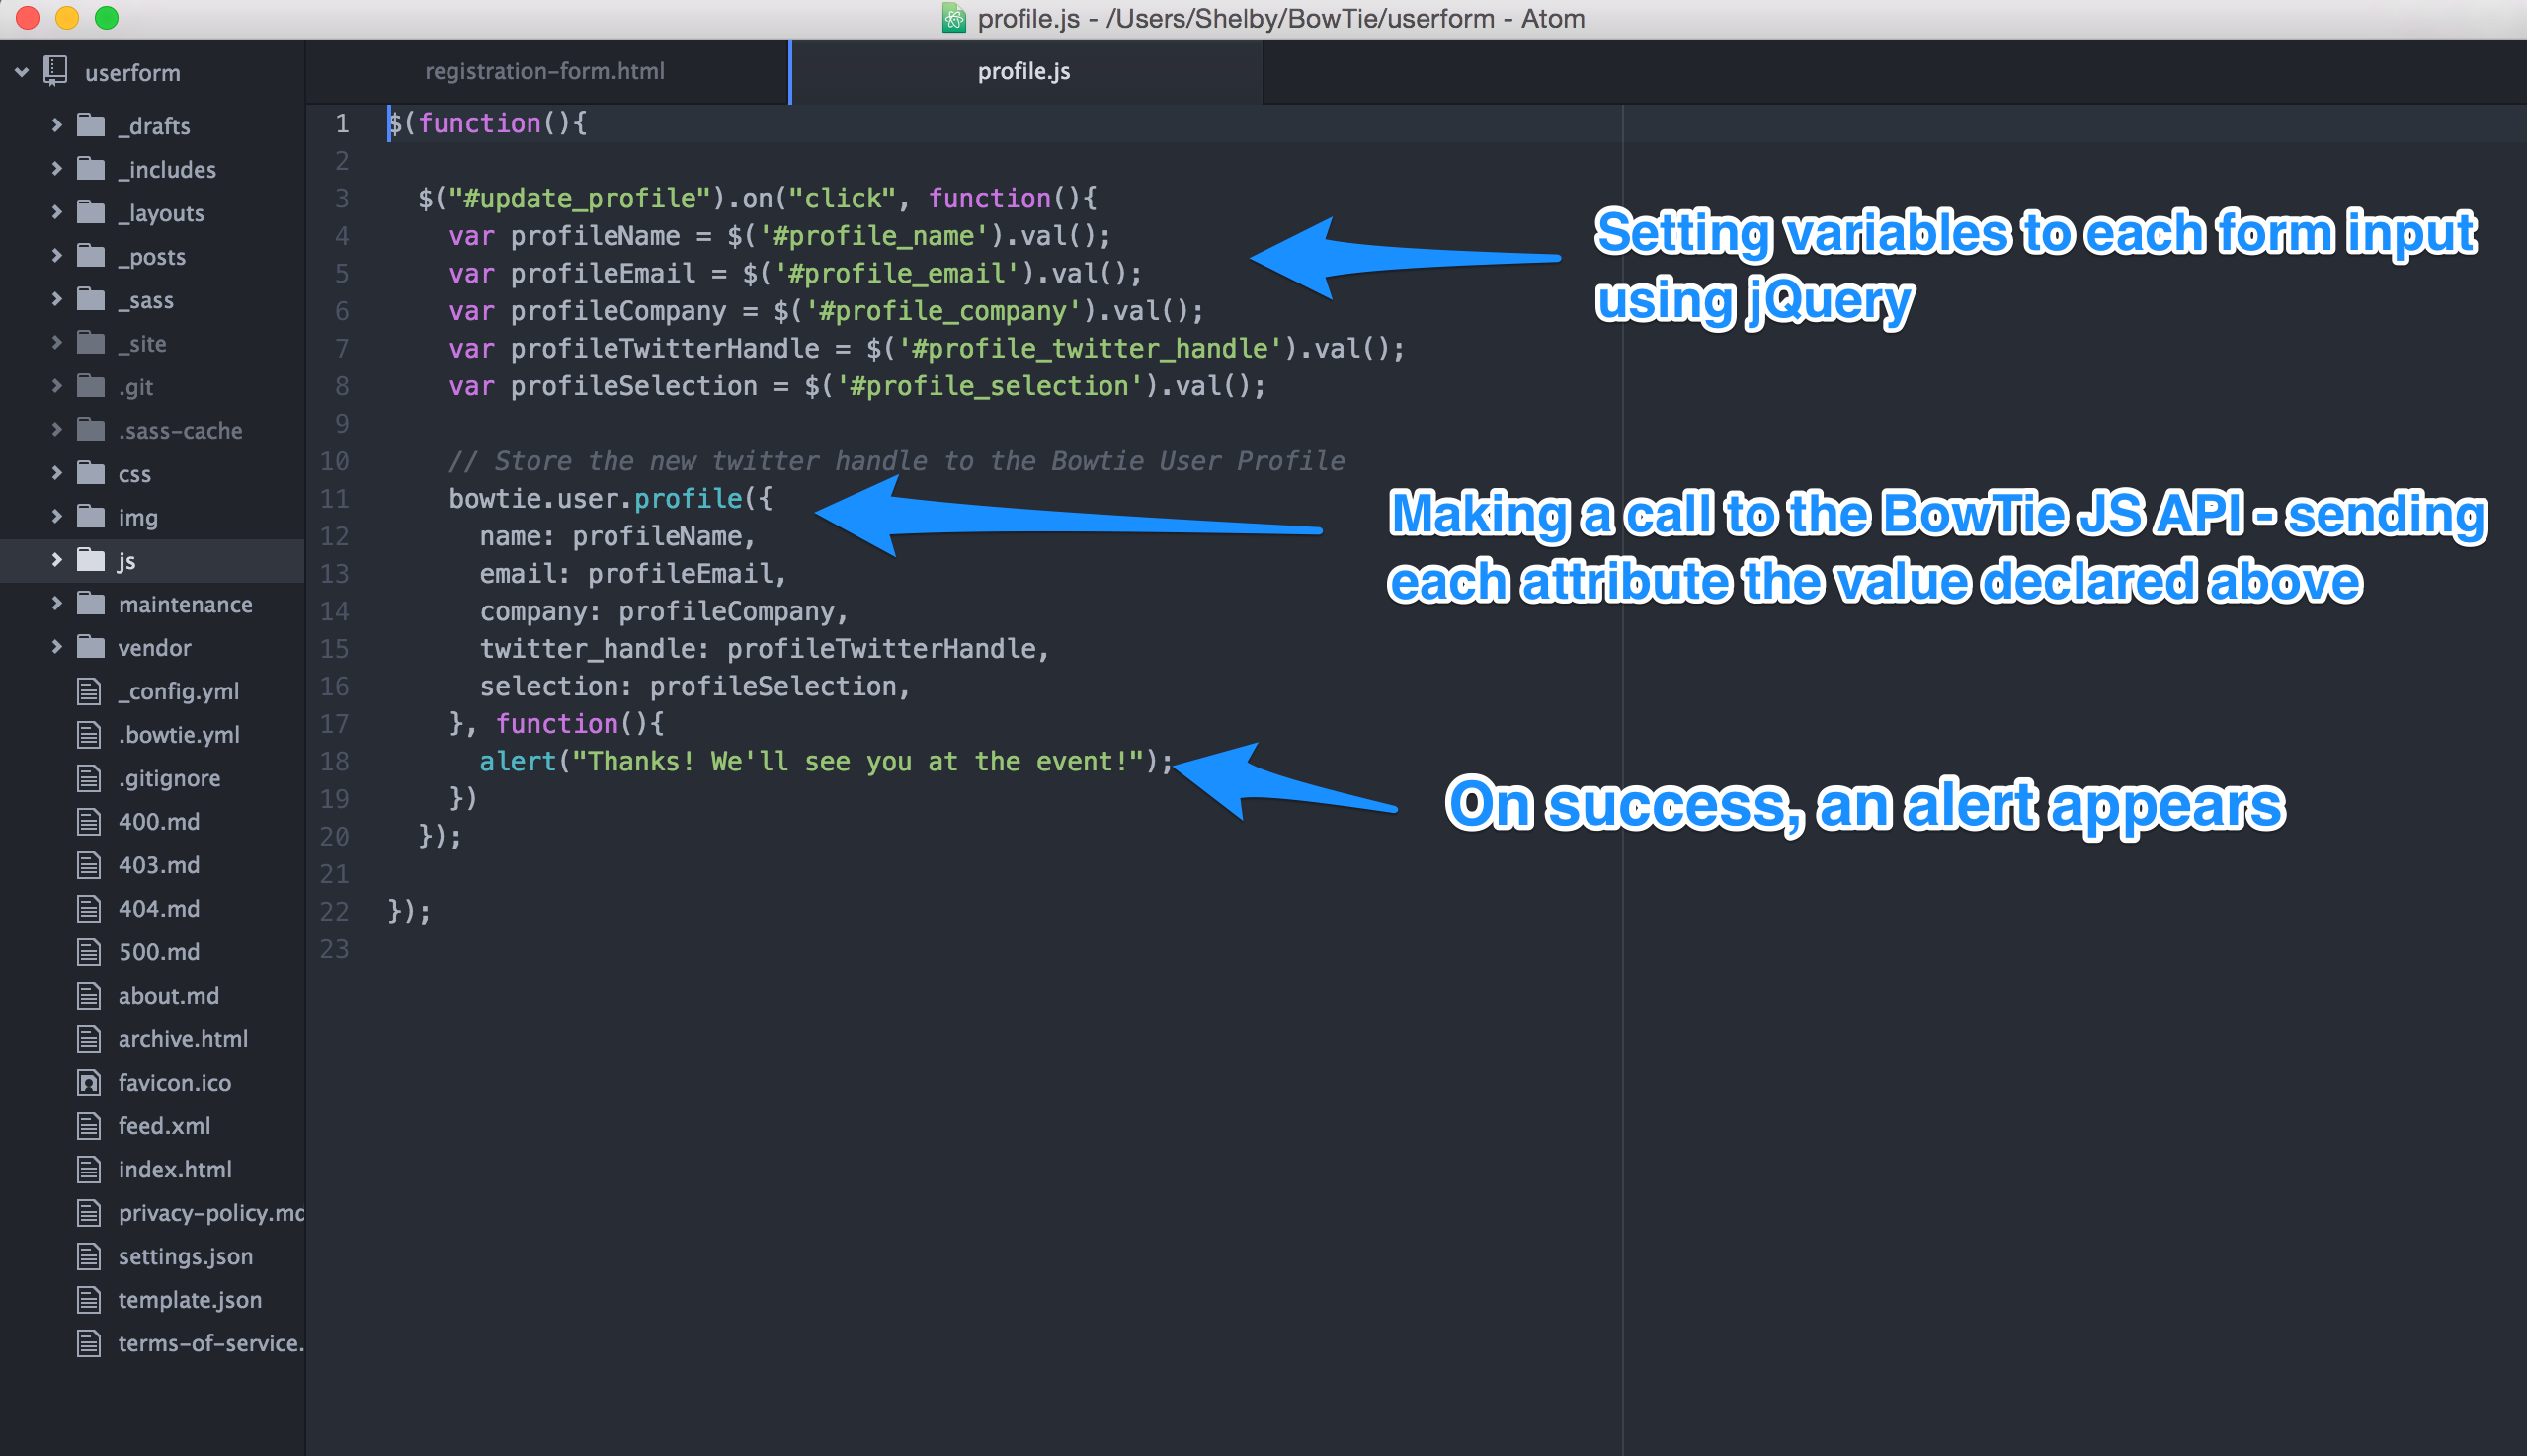
Next, we’re going to need to include some javascript to send the form input to the BowTie API. I’m including mine in inside the /js/profile.js
The first step is locating the data inside the field with jQuery, and the second step is sending it to BowTie to store.
On lines 3-8, we have jQuery capturing the values of the form inputs and assigning them to variables.
Then, on lines 11-20, we have a call being made to the BowTie user profile to store the information. The convention is assigning each BowTie Browser Profile attribute to a piece of information; in this case each attribute is assigned to form input accessed by jQuery.
When the user clicks ‘Submit Registration’, the data will be collected, assigned, and sent to BowTie to save. Then the javascript alert will pop up to alert the visitor.
Browser Profile
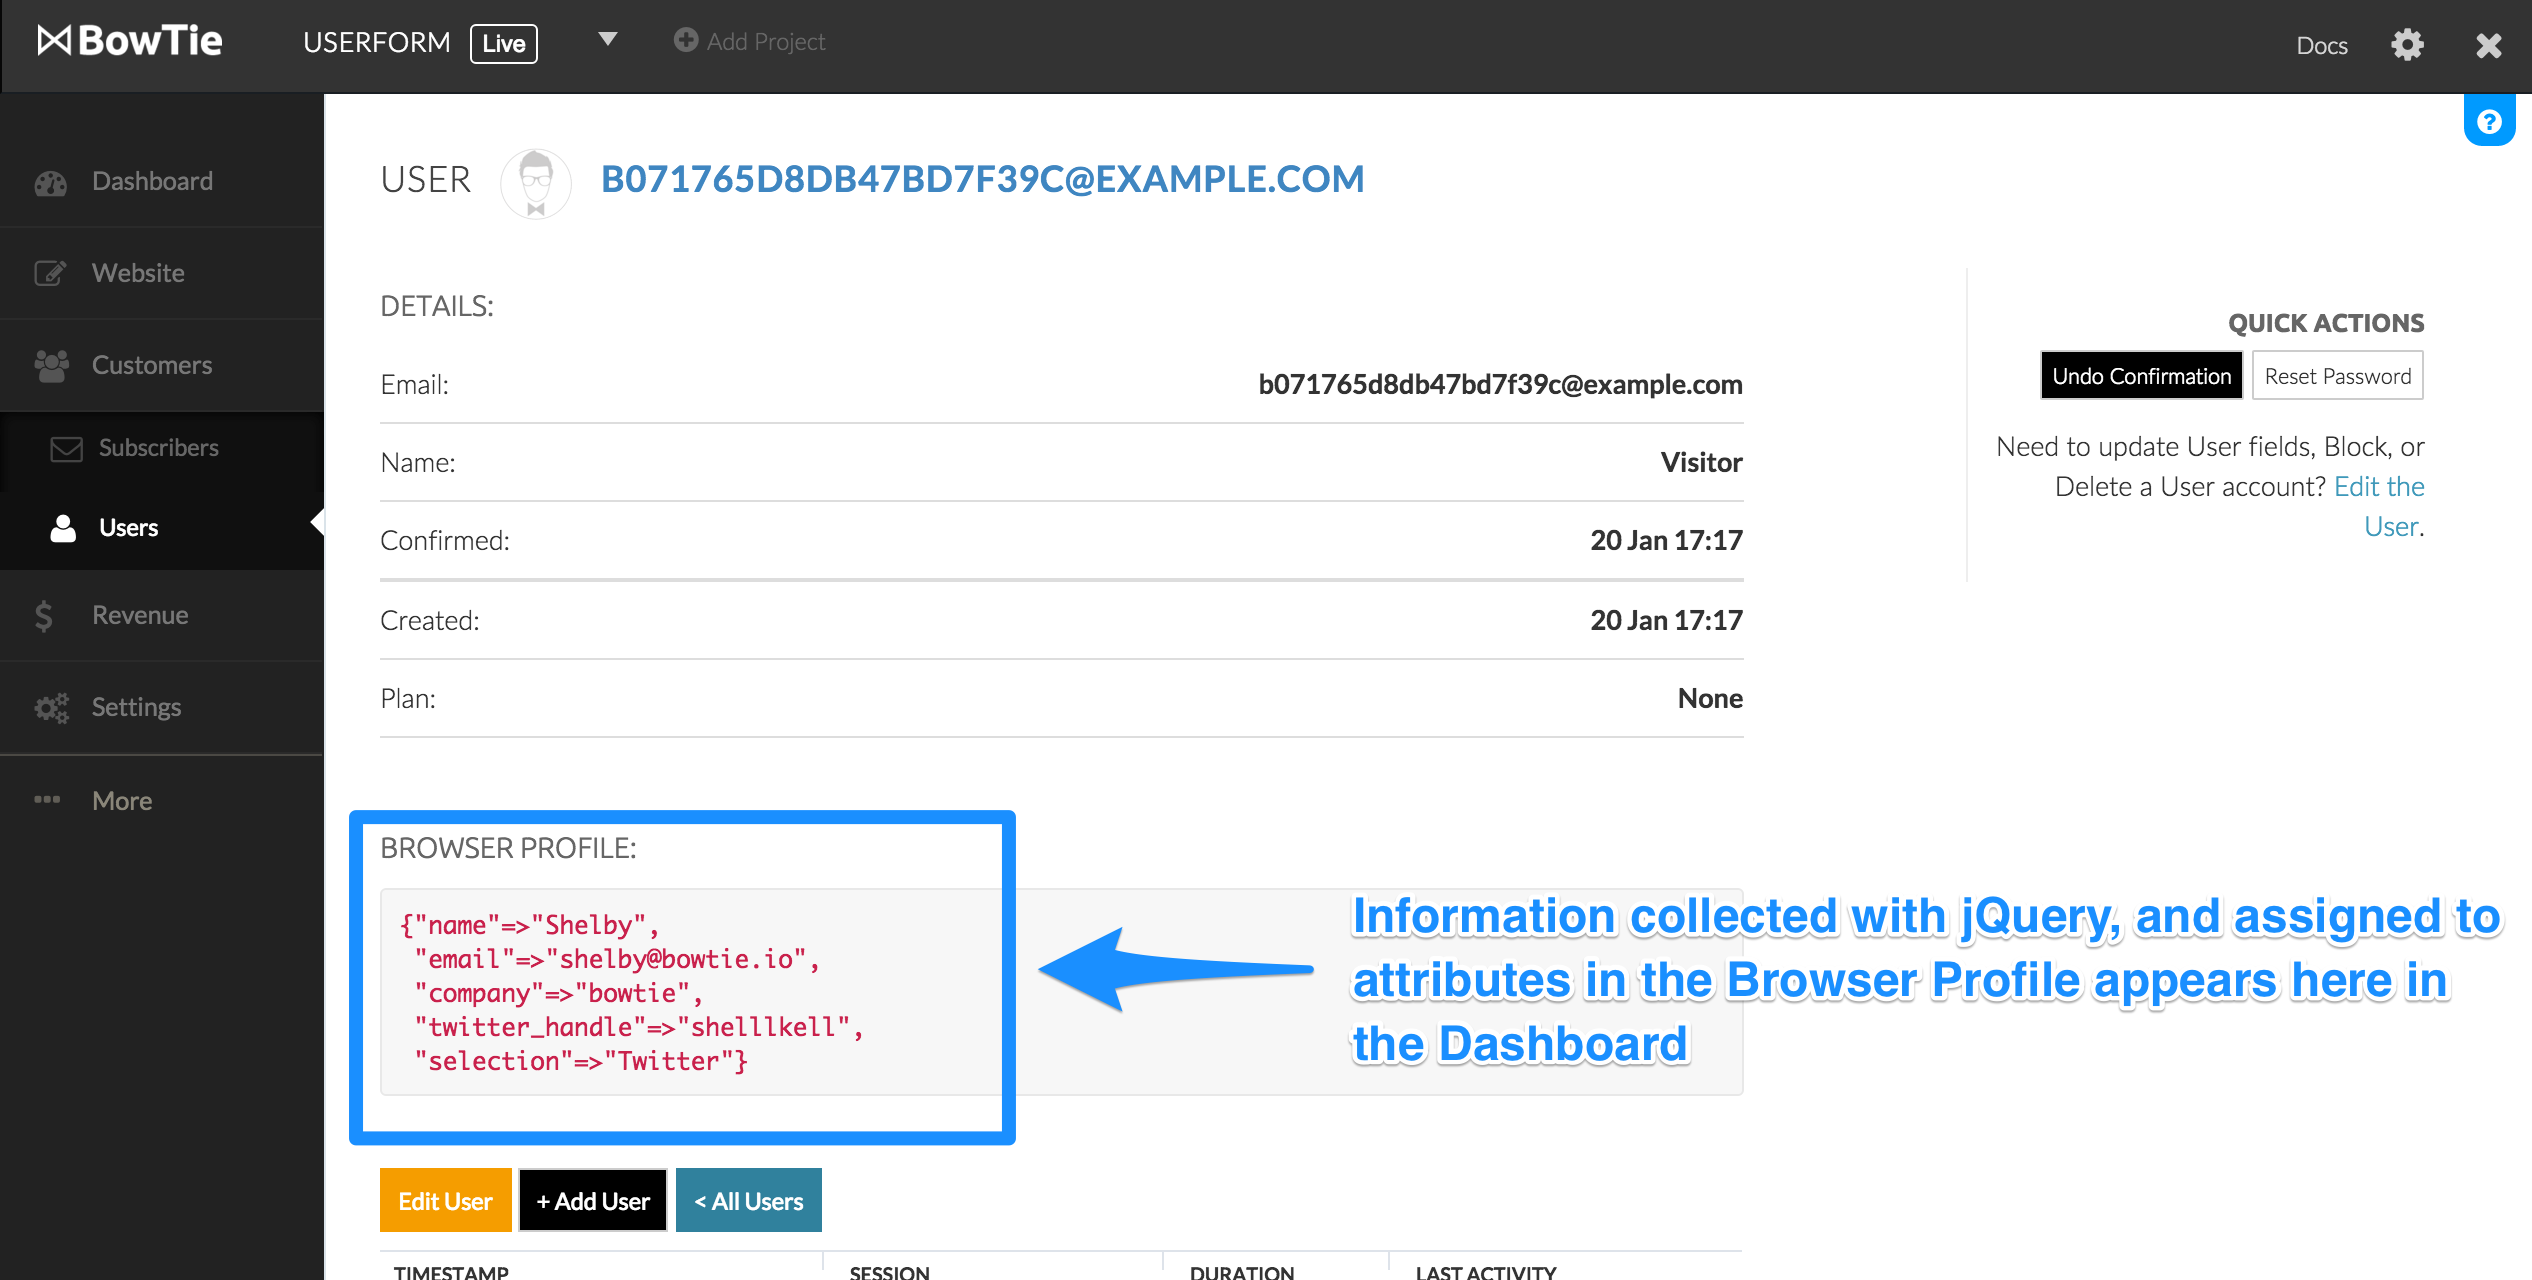
Now if you navigate to your project’s dashboard, you will see the Browser Profile information stored to the user as a json object.
Note: If you’d like to explore BowTie Browser Profiles or API in depth, read our technical Docs or read this user guide.
Triggering Zapier
One of the most powerful features of our User Profiles is the ability to trigger Zapier Zaps on User Creation and Profile Update events.
When the BowTie API updates the Browser Profile information we’re collecting we’ll send some of the information to Campaign Monitor, which could be used for an auto-response.
Login to Zapier and create a new zap. The trigger application will be BowTie.io with a trigger action of an Updated Profile. The action application will be Campaign Monitor with a action of Add Subscriber (although feel free to use any action application, the choices are endless!)

For steps 2-3, follow the onscreen prompts and fill in the necessary information Zapier asks for. You may need to test your application connections and/or send sample data to Zapier to proceed.
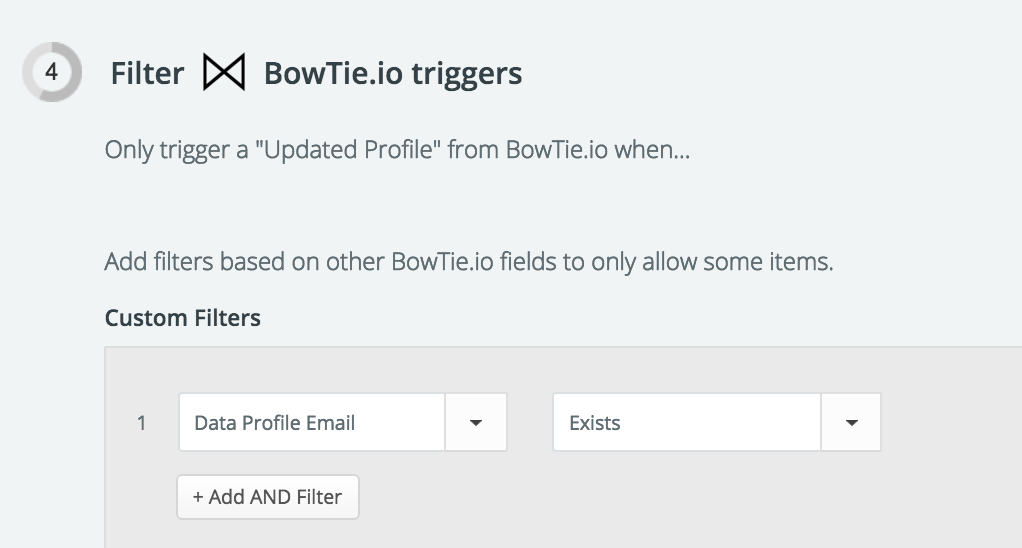
On step 4, I’m setting up a custom filter to limit the Zap to trigger only if an email exists, using the BowTie ‘Data Profile Email’ value.
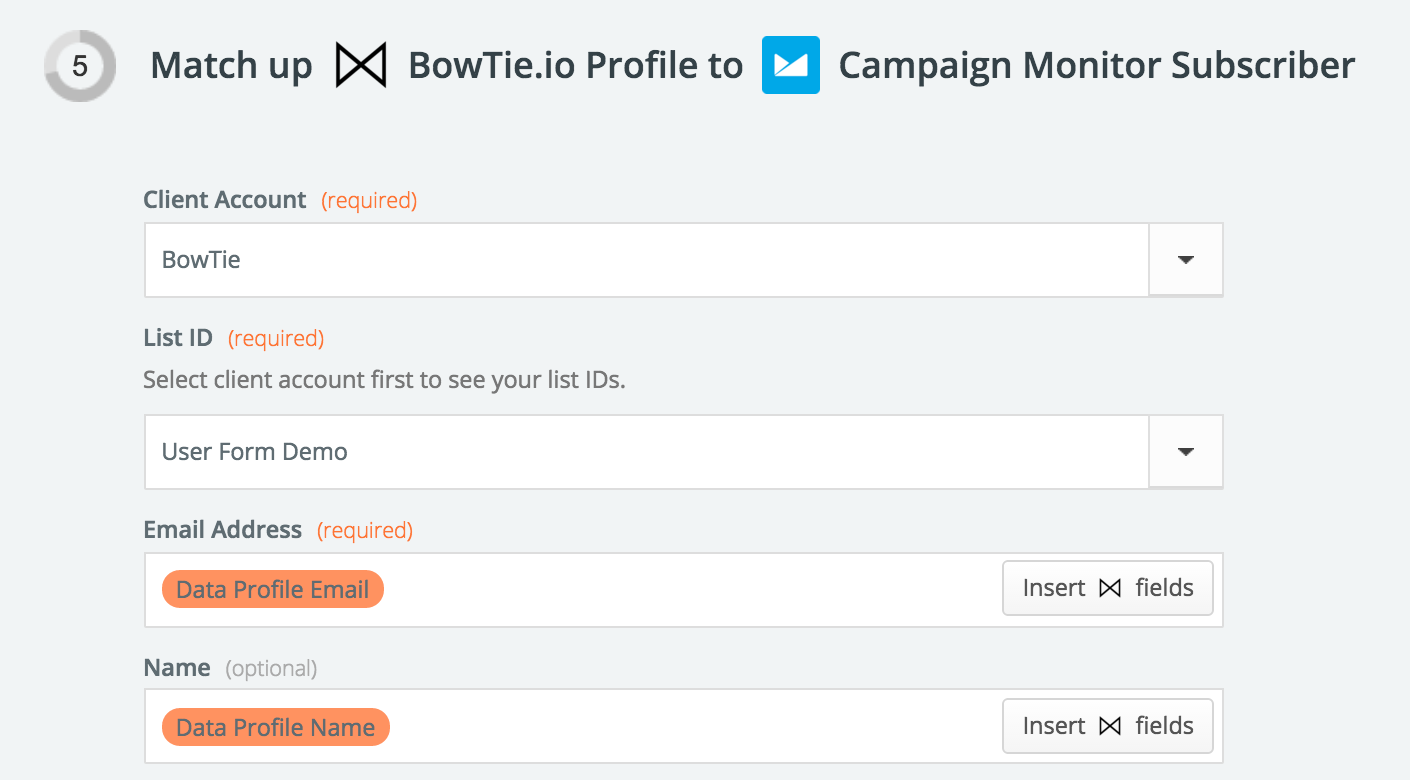
In step 5, match your BowTie data to a list in Campaign Monitor. In my example, since I am using a BowTie-owned Campaign Monitor account, my client account is ‘BowTie’ and my list ID is ‘User Form Demo’. Now I can match the Email Address and Name fields from Campaign Monitor to the Data Profile Email/Name attributes.
Almost there! Now we just need to test it. Go ahead and test your Zap. If there’s an issue, follow Zapier’s prompts to resolving it.
When your test is successful, go ahead and turn the zap on! Now, when someone fills out your form, the email will show up in your Campaign Monitor list.
Campaign Monitor Dashboard
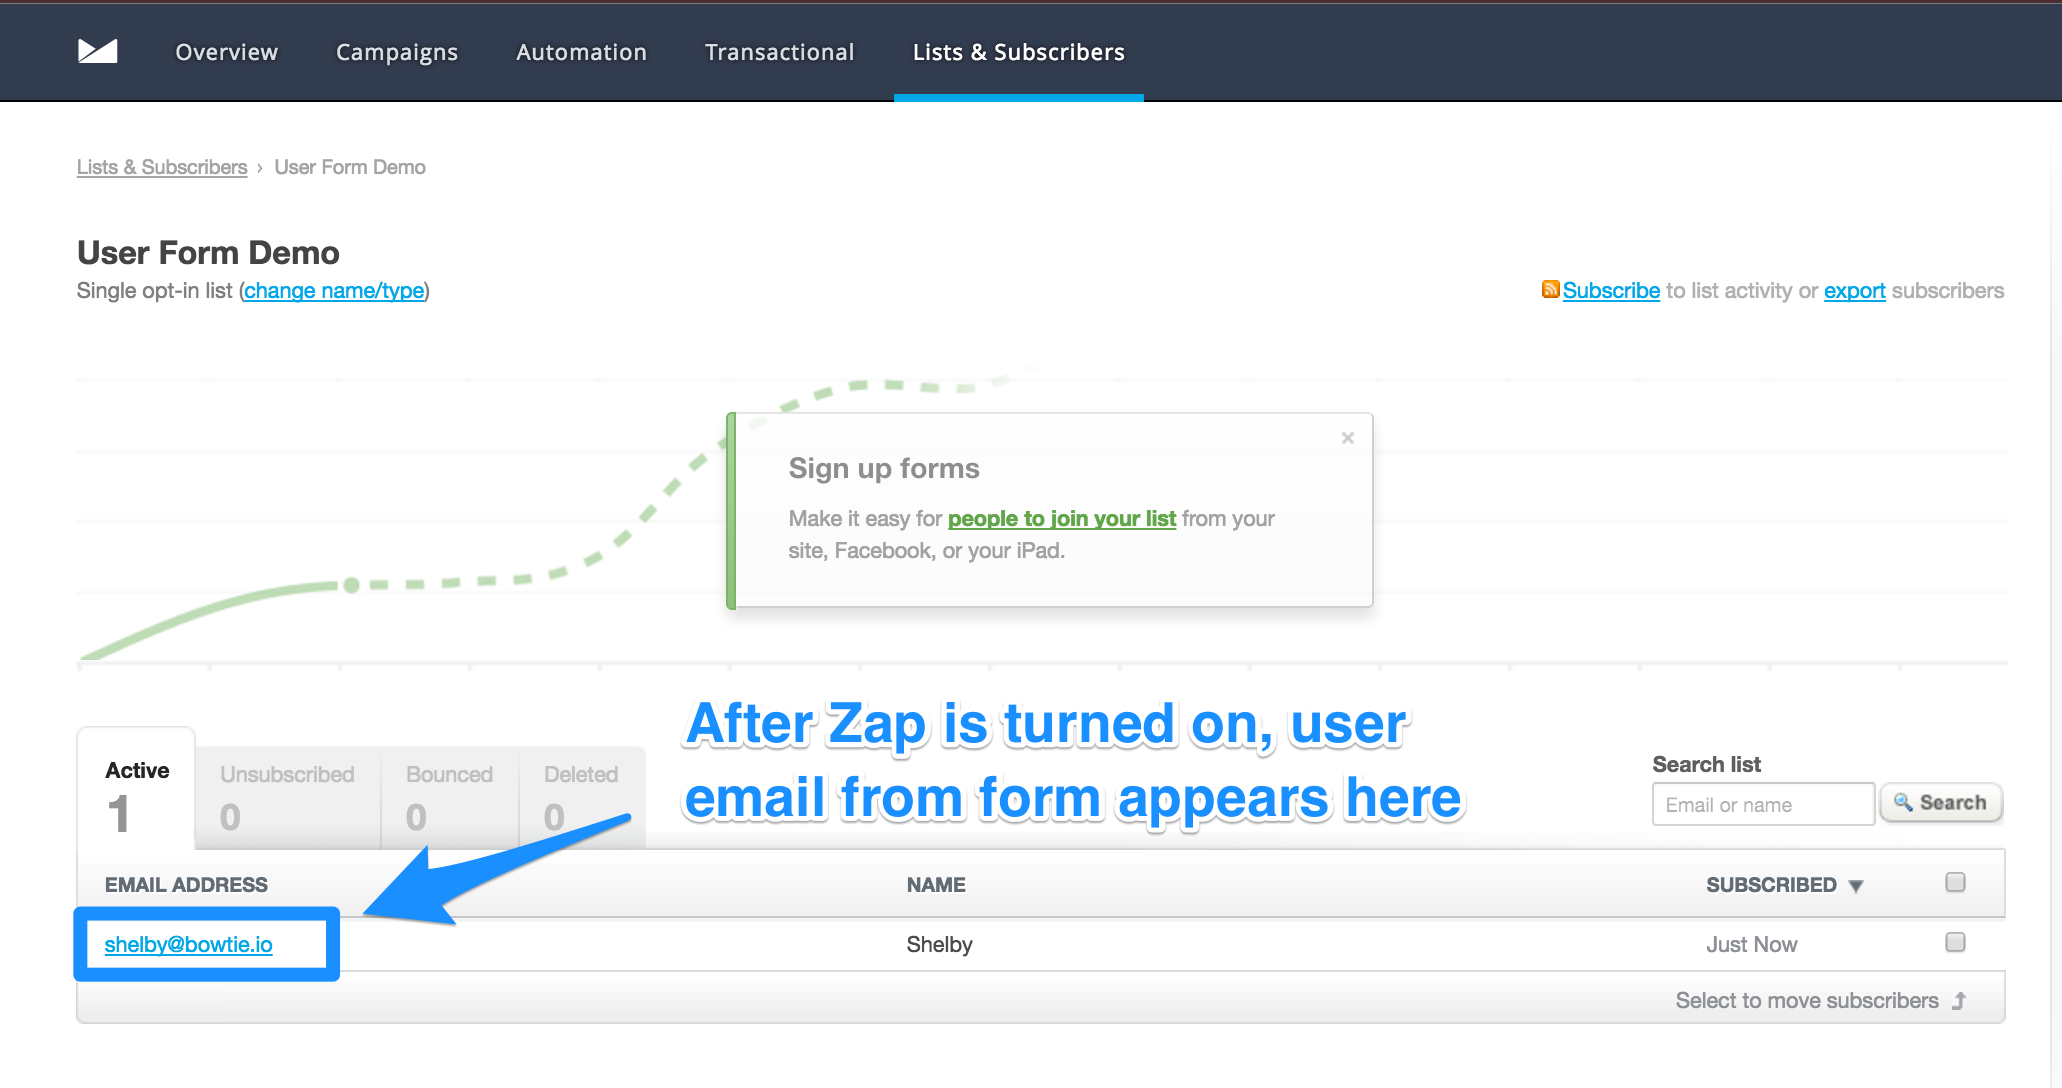
That’s it. You now know how to save any user form input to their Browser Profile along with adding their email address to any list in Campaign Monitor via our Zapier integration.
If you’re not using a BowTie template, and/or Campaign Monitor, the logic used above is the same. This is just one permutation of Zaps within Zapier. Feel free to integrate any other service and send different BowTie user information to it, depending on what you find most useful.
If you are new to BowTie, check out our other Getting Started guides.
Getting Started with BowTie:
- Build a Landing Page in 5 minutes
- Using the BowTie Collection Editor
- Initial Configuration
- Setting Up Custom Domains
- Customizing and Styling BowTie frontend content
- Build a website with a pay wall
- Blogging with BowTie
- Launch a simple donation site
- Using BowTie’s User Profile system
- Build a Daily Deal Site with Jekyll Collections
- Using Jekyll Data to extend your site
- Adding BowTie users to MailChimp with Zapier
To keep up to date, follow us on twitter at @bowtie_io
Questions? Please comment! Thanks for your support and feedback.