
With the recent release of the BowTie Collection Editor, we reworked our daily deal template to utilize collections in place of data files. This version of the template allows you to create and edit offers directly from the BowTie dashboard, making it an ideal option for client hand off.
This guide will walk you through the set up and modification of a ‘special offer’ site. We’ll be using a Jekyll Collection to create offer pages that work with BowTie’s Stripe integration and product management.
You can view the example site using Jekyll collections, and download the source of the template from the BowTie project installation page, or our github.
Static Daily Deal Template

Setting up your Project
The ‘Offer Page’ template is meant as a guide and educational resource. You can use it as is, or replicate the methods used here to build a site with similar functionality.
If you would like to further extend the style and design of this project (which I won’t be covering), Learn to customize your BowTie Site in our help section.
Install the Offer Page template
To begin, select the ‘Offer Page’ template. This will install the exact files used in this guide. This template creates a standardized and easily repeatable ‘offer’ page that leverages BowTie products and Stripe Checkout to allow secure transactions.

Offers are stored as a Jekyll Collection object (markdown file) that you can edit on the BowTie Dashboard or locally with a standard git workflow. I will cover the use of Jekyll Collections as they apply to this example. You can learn more about jekyll collections here.
Following a successful transaction, purchasers are redirected to a ‘thank you’ page, containing details about the purchase. Optionally, you can use BowTie policy files to restrict access to this page (based on a specific product purchase). I explain how to do so at the end of the guide.
Example Offer Page

Connect BowTie to Stripe
If you haven’t done so, sign up for a Stripe account and connect it via OAuth on the /projects/PROJECTNAME/stripe_connection page in your BowTie dashboard. (A successful connection will display an indicator reading ‘Active’ in your sidebar.).
This connection allows you to create and store the tokens needed to use Stripe Checkout, associate purchases with BowTie users, and view and refund payments within your BowTie project dashboard.
Note: Your BowTie project has two environments, Test and Live. Stripe charges and user records are environment specific. Your Live environment is connected to Stripe’s live mode, and Test environment is connected to Stripe’s test mode.
Create a BowTie Product
After connecting to Stripe, you’ll need to create a ‘Product’ record in BowTie. Product records allow users to create charges from the tokens generated by Stripe Checkout without requiring a backend integration.
Navigate to ‘Revenue’ > ‘Products’ on your Bowtie dashboard. Click ‘+Add Product,’ set the attributes required, and save your product. Note the new product’s ‘Identifier’ (e.g. ‘product_000000000’), Price (to the cent) and Address requirements. You’ll need to match this information on the offer you create in the next step. In this template, each ‘special offer’ page requires a unique product record.

Products span environments. This allows you to create a single product record and use it with transactions in test, live and any environments you define.
You’re now ready to make deal pages using the BowTie product record(s) you created above.
Create a New Offer
This template uses Jekyll collection objects to organize your offers. You can use the BowTie Collection Editor to edit, and create new offers in your collection directly from your browser.
Developers: Read how to define new collections and create your own collection editor interface.
Editing an Offer in the Collection Editor

To create a new offer, hit the ‘+’ button or duplicate an existing item, then modify the values accordingly. Each offer will generate a deal page at the permalink defined (e.g. ‘permalink: “/pizza/”’).
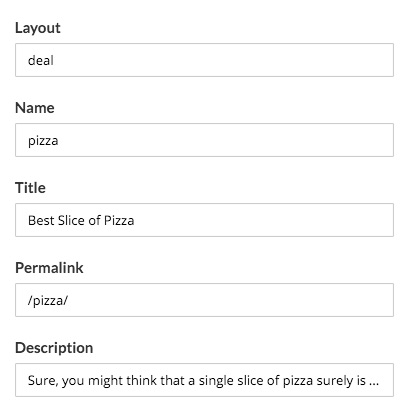
Layout defines which template to use when generating the page. Deal is the default layout for offer pages.
Name is used as an identifier for the offer and is passed to stripe.
Title is the primary headline on the deal page, and is the default SEO title.
Description is a broad explanation used on the deal page and thank you page.
Permalink is the location the deal page will be saved to.
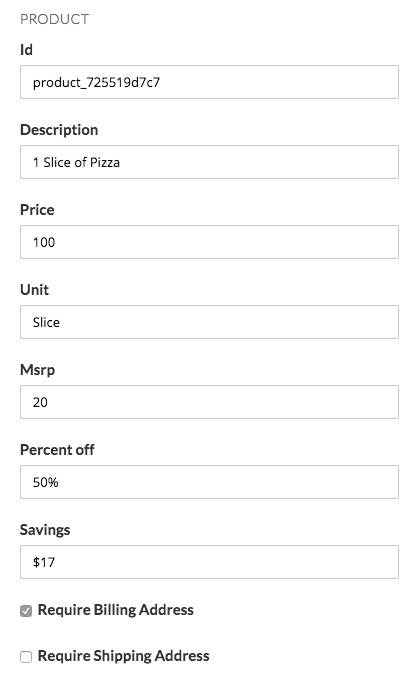
ID and Price are from the Bowtie Product you setup earlier. The price is a value in cents (e.g. $10 = 1000)
Description is a more specific description of what the offer includes. This is used both on the offer page as well as the thank you page.
Units, MSRP, Percent Off, and Savings are displayed on the deal page as they apply to the offer and product.
Check the Require Billing Address and Require Shipping Address boxes to match the settings you applied when creating the product in the BowTie dashboard. If these do not match the product as defined on /projects/PROJECTNAME/products/, stripe will not complete the purchase.
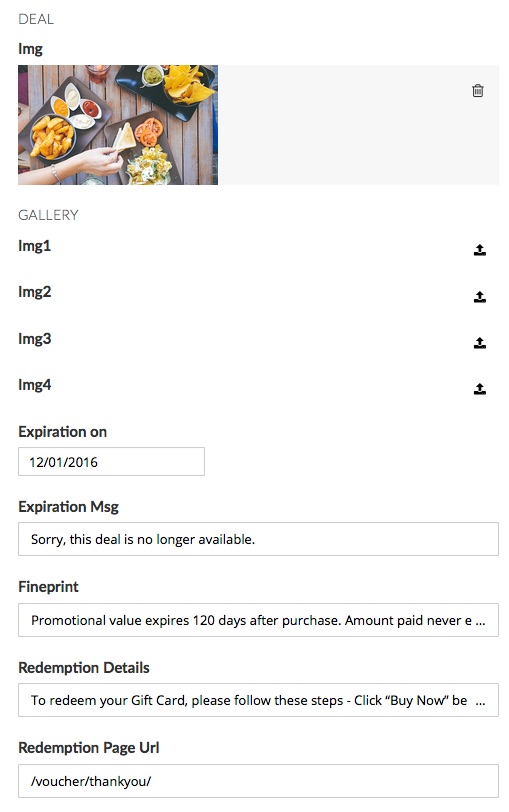
Img is displayed on the page, related offers, and also passed to Stripe checkout.
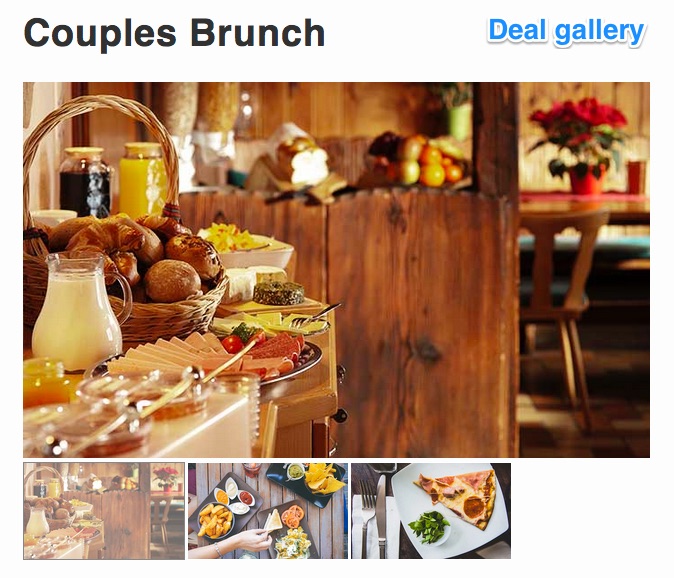
The deal Gallery is an optional way to display up to four images for the offer. As you add images, they will display below your main image as shown below.
Expiration_on is what the countdown uses to calculate time left on the deal. When the date is reached, the checkout button is hidden and the Expiration Message is displayed in place of the countdown.
Fine Print and Redemption Details are displayed with the offer and also on the thank you page explaining how to redeem the offer.
Redemption Page URL is the location a customer is sent to when the offer is purchased. This can be any page on/off your site. By default it will point to the thank you page we have setup for this template (/voucher/thankyou/).
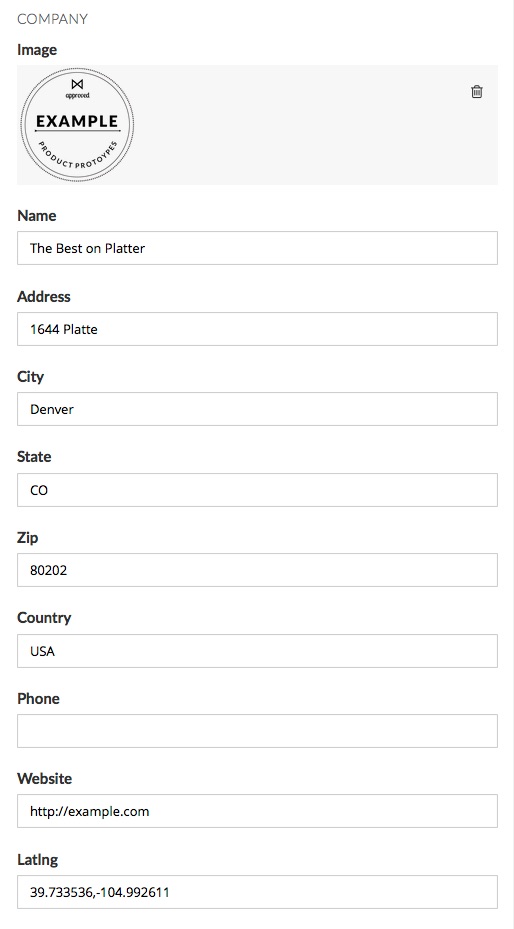
The Company section contains options to set your logo, location of your business, contact information, and links to social media. These settings are typically set in the _config.yml, or included in the offer _fields.yml. Setting them on the offer page will overide any existing defaults.
Company Image is the logo displayed on the page.
Name, Address, City, State, Zip, Country, Phone, and Website are displayed on the page when entered.
Latlng is used to display the Google Map to your location. Use the latitude and longitude settings from the URL in Google maps (e.g. ‘39.733536,-104.992611’).

If included, we will create links to your company social media profiles for Twitter (e.g. ‘yourhandle’), Facebook (e.g. ‘yourhandle’), Instagram (e.g. ‘yourhandle’), LinkedIn (e.g. ‘company/yourhandle’), and Youtube (e.g. ‘channel/yourhandle’).
Clicking Show Related will show a list of other deal pages in this project at the bottom of the deal page.
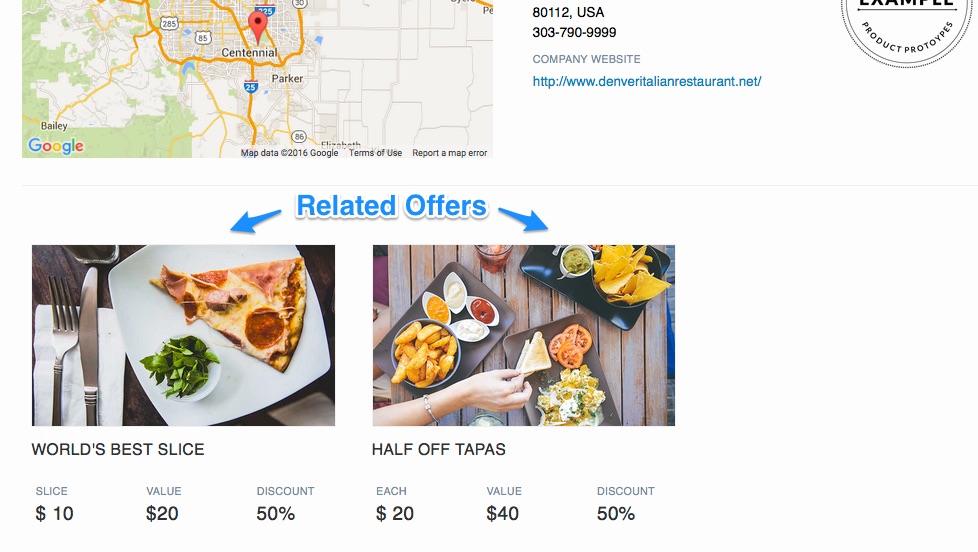
Page Generated from the Collection Object

Thank you page
When a purchase is completed, the user will be redirected to a thank you/receipt page defined for that offer. BowTie automatically stores purchase details in a visitor or user profile. You can use profile information to trigger zaps, or to post information elsewhere on your site. We use this stored profile information to populate the receipt page included in this template.

The redemption details can be edited in the redemption details and fine print fields of the collection editor.
Our Zapier integration allows you to pass profile information to third party services. For example, on purchase you could automatically add the user to a mailing list and deliver an auto responder (such as a receipt or email voucher).
Advanced Settings
Protecting Content After a purchase
In some cases, you may wish to protect the directory a user is sent to following a purchase (unique codes, digital downloads, etc.). To protect a directory following a purchase, use the BowTie Access Control system as shown in this guide.
Note: If you choose to implement a protected receipt page, be sure to set your new page as the redemption page url on the corresponding offer.
Looking for Subscription restrictions? Learn how to build subscription driven paywalls using Stripe plans in this guide.
Setting Collection defaults
Deal pages are generated from a collection named /_offers/. Inside this folder you will see two types of files. The _fields.md file is used to define fields available in the BowTie collection editor.

The remaining markdown files are individual offers that can be edited using the Bowtie Collection Editor.
To learn more, read our post on configuring the BowTie collection editor.
Modify the Deal Page Layout
Deal pages are assembled using the ‘deal’ layout. To modify the layout, locate _layouts/deal.html in your repo and update the layout as desired.
Most of the components used to build the offer page exist in a subdirectory called _includes/deal-sections. You’ll see page.variable used to call data from the markdown files. For more information on working with Jekyll variables, visit jekyllrb.com
We also use the checkout-button.html include to generate the Stripe Checkout button.
Modify the Stripe Checkout Button
We include a sample checkout-button.html in this template. This can be used as is, replicated, or deconstructed as a guide. This button consumes information from the offer.md files, triggers a Stripe Checkout payment, stores the purchase details to the user.profile for receipt generation, and includes a redirect to a receipt page.

Stripe API Keys
BowTie will auto-populate your Stripe API key into the checkout-button.html. Keys are environment specific, either test or live, and are updated automatically.
If you need access to your Stripe keys, you can find them listed on the ‘Settings’ > ‘General’ page for your selected project environment, or in your Stripe account.

If you’d like to see the code for our offer page template, check it out on GitHub.
If you are new to BowTie, check out our other Getting Started guides.
Getting Started with BowTie:
- Build a Landing Page in 5 minutes
- Using the BowTie Collection Editor
- Initial Configuration
- Setting Up Custom Domains
- Customizing and Styling BowTie frontend content
- Build a website with a pay wall
- Blogging with BowTie
- Launch a simple donation site
- Using BowTie’s User Profile system
- Build a Daily Deal Site with Jekyll Collections
- Using Jekyll Data to extend your site
- Adding BowTie users to MailChimp with Zapier
To keep up to date, follow us on twitter at @bowtie_io
Questions? Please comment! Thanks for your support and feedback.