
The Collection Editor allows you to create, modify, or remove content on your project site from any browser. It’s ideal for content that changes often, marketing content and blog posts, and content with a similar format that is frequently repeated.
We’ve also made it easy for developers and designers to customize the editing interface for clients and non-technical collaborators. This guide will show you how to do both.
How it Works
The editor will detect any valid collection defined in your site _config.yml file and make it editable from your BowTie dashboard. Markdown files can be modified using an intuitive markdown editor. Or, you can use the collection editor to create and edit templated content using a form-based interface.
Changes made in your browser are saved as git commits, and will trigger a new site build on the BowTie server, making it easy to collaborate with less technical users while maintaining a git workflow.
There are two editing modes, for markdown and form-based content:
Markdown Editor
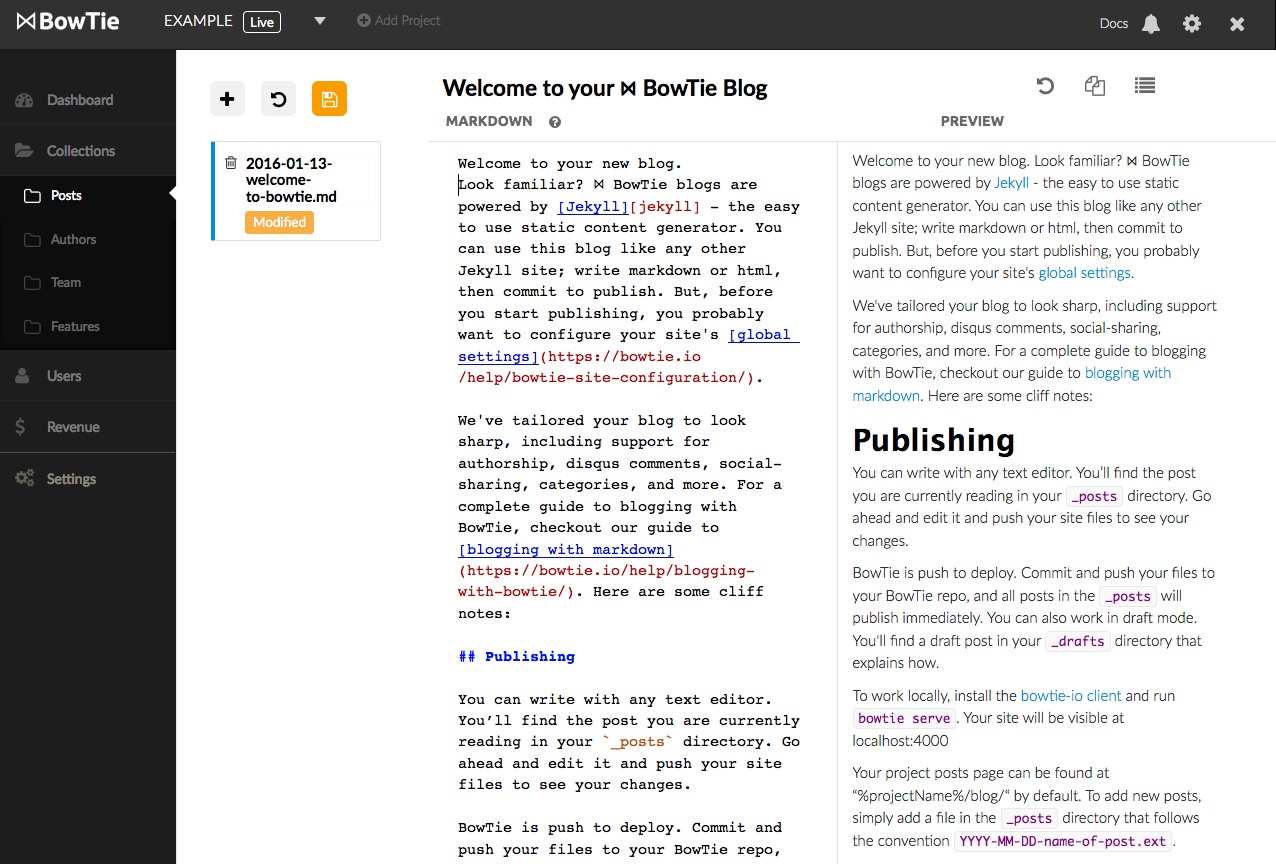
Form Editor
Getting Started:
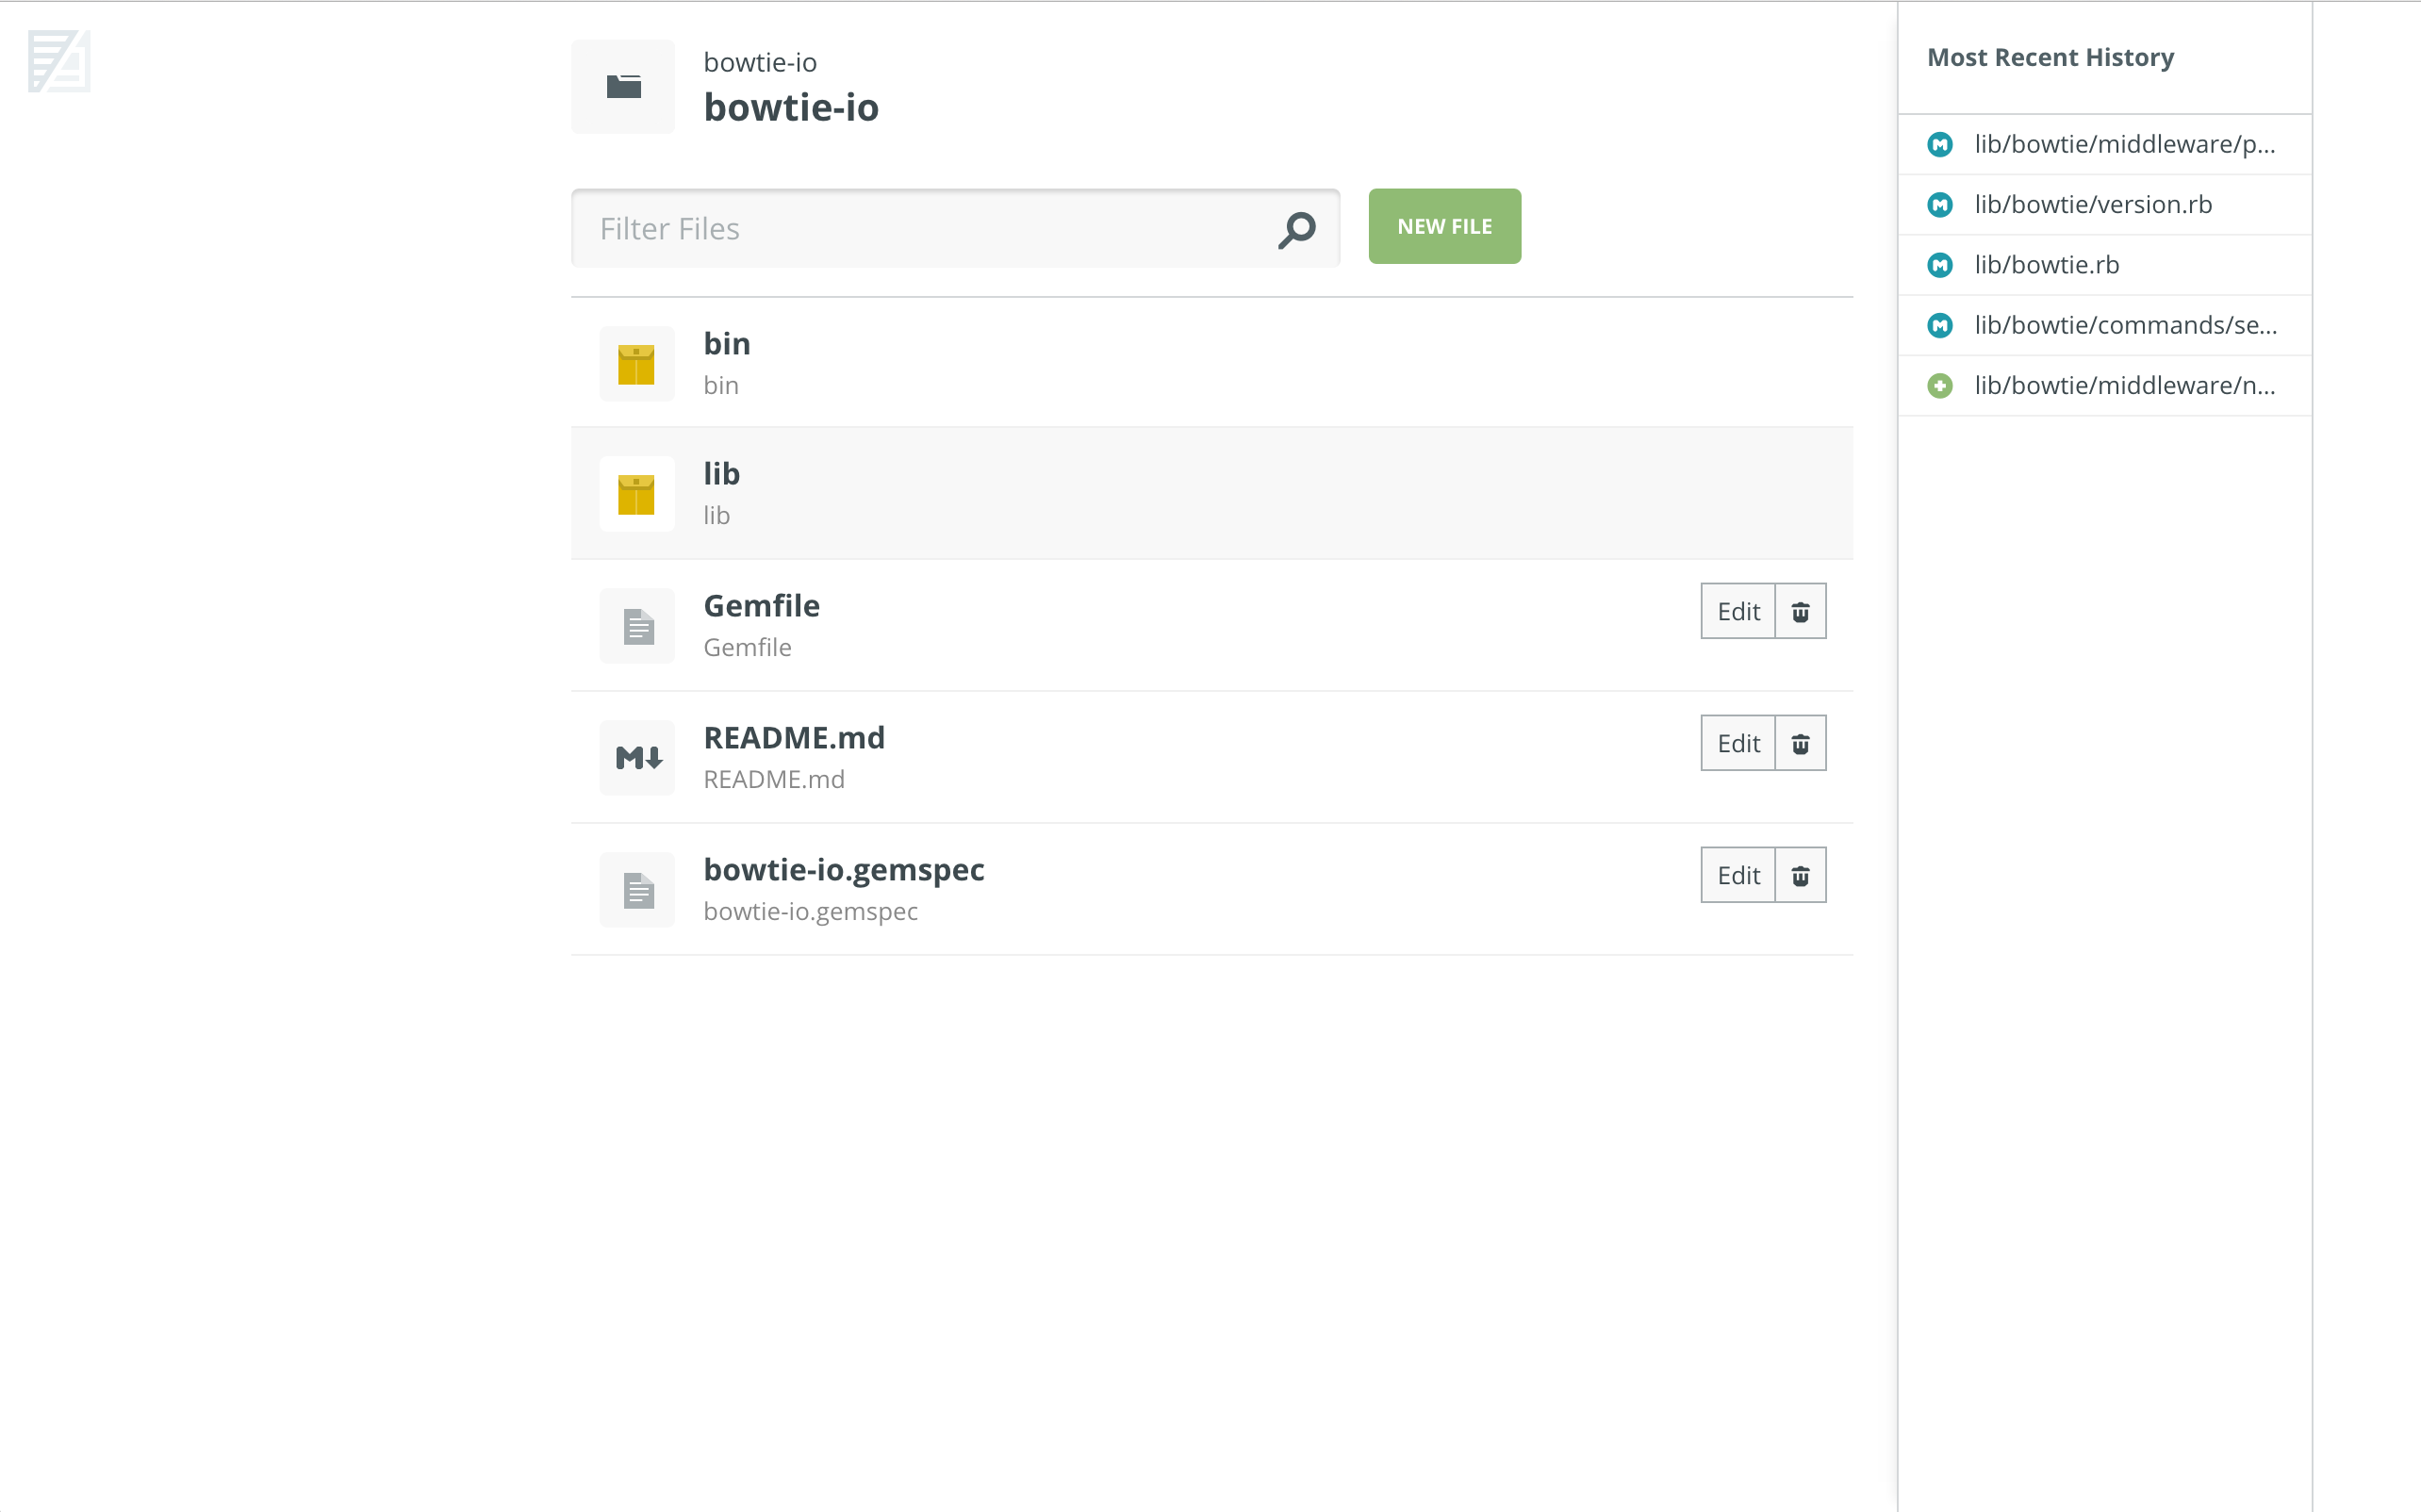
In order to use this feature, your site must be made with Jekyll and use Jekyll collection objects (including posts). If you started from a BowTie template, collection-based content will be present by default.
Step 1: Defining a Collection
To define a collection, include it in your _config.yml as shown below. For more information on Jekyll collections, see their docs.
collections:
  lander-1-col:
    output: true
  services:
    output: false
Once a collection has been defined, it will appear in the BowTie dashboard similar to ‘Features’ as seen above.
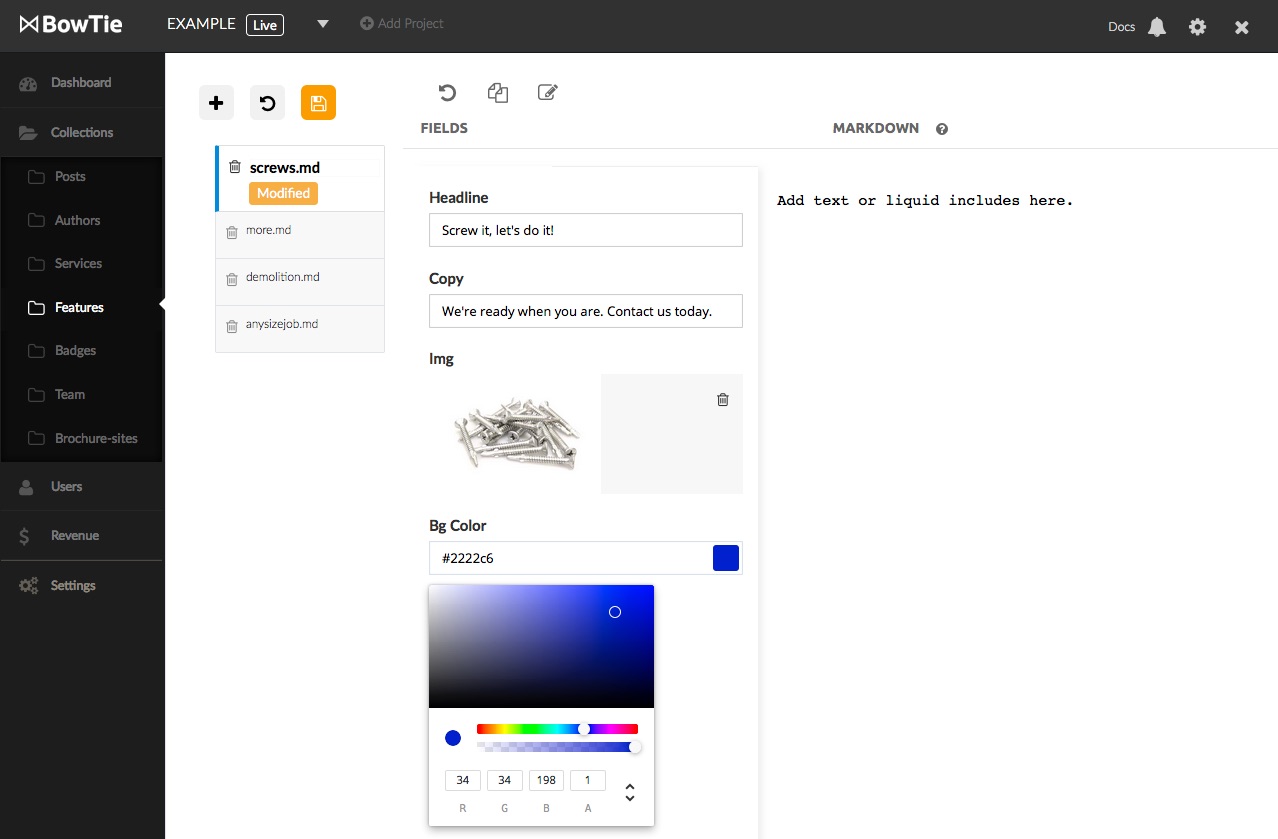
Step 2: Set up the form defaults
Building a custom form for content or post front matter is easy. The collection editor will generate a dynamic form from a _fields.md file in the root of the collection. Entry type and defaults are specified in yaml front matter. You can configure the form for strings, dates, timestamps, file uploads, color pickers, and more.
Example ‘_fields.md’ File
---
name: null
members_only: true
date:
ending_on:
starting_at:
featured_img_path:
header_color:
---
Add text or liquid includes here.
Generated Form:
Each form field is defined from a key/value pair in the front matter of the _fields.md file. Read on for a full list of options.
Step 3. Provide Access
If you are providing access to a client or collaborator, visit the Team page found in ‘Settings’ > ‘Team’ and enter your collaborator’s email address in the ‘Add Team Member’ field.
New team members will receive an email invitation, and now see your project listed in their project drop down*. Collaborators do not need to register an SSH key if they’re only working with the collection editor.
Add a Contributor

*If the email address you attempt to share your project is not connected to an active BowTie project, the ‘Add User’ button will not appear. Shared projects do not count against your total available project count (set by your BowTie subscription plan).
Field conventions:
Any text you enter as a value in the _fields.md file will be used as a default. We recommend wrapping text in quotes (e.g. “Jack Dorsey”). A blank value, or the use of ‘null’ will render the option null.
Keys unique to a collection item and not present in the _fields.md will only appear in new items cloned from the item containing the unique values.
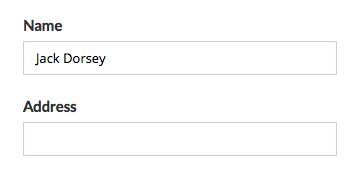
Strings:
Most key/value pairs will render simple string variables you can use in your templates (e.g. name: “value” ). This will produce a text input in your form:
---
name: "Jack Dorsey"
address: null
---
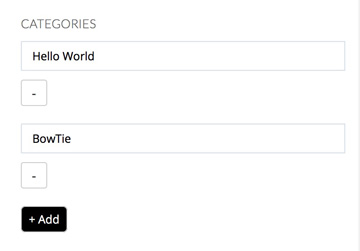
Array:
To produce an editable array of strings, simply nest the variables in your front matter as show below. This will output an editable list of variables in the form:
---
categories:
  - Hello World
  - BowTie
---
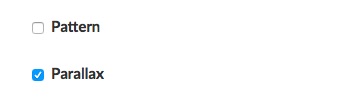
Boolean values:
Adding a value of ‘true’ or ‘false’ following the key in the yaml will produce a checkbox.
---
pattern: false
parallax: true
---
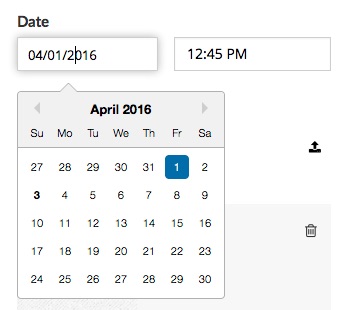
Date entry:
Using a key of ‘date:’, or appending ‘_on’ to the end of a key will add a datepicker to the form. Additionally, using ‘date:’ as a key value will add a time-stamp entry field. Using ‘_on’ alone will produce the datepicker only (e.g. registered_on: “” ).
---
date:
---
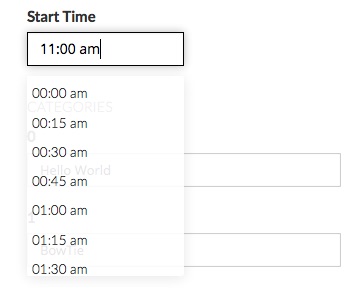
Time:
Appending ‘_at:’ to the end of a key will create a time selector (e.g. starting_at: “”).
---
start-time_at:
---
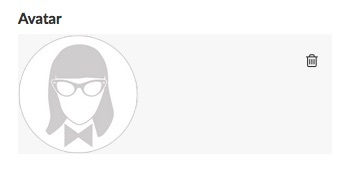
File uploads:
If you want to produce a file upload interface, append ‘_path’ to the key value (e.g. featured_img_path: “” ). This will provide a file upload interface.
---
avatar_path:
---

Image files will generate a preview:
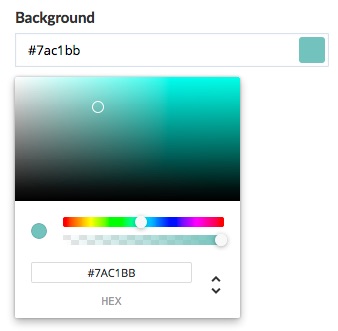
Color picker:
To provide a color picker interface in your form append ‘_color:’ to your the key (e.g. header_color: “” ). Selections are returned as six character hex values.
---
background_color:
---
Other Editing Options:
Working locally
BowTie allows you to work locally using the editor of your choice. Simply clone your repo and push commits via git. You can also install our local client by running $ gem install bowtie-io. For more information check out our getting started guide.
Admin Editor
If you need full cloud access to your project’s BowTie repo, consider installing and using the Prose editor in your frontend.
Registered Users can access the admin editor by adding your project’s secret key to their browser profile. To install the key download this Admin Authorization plugin, or follow the directions in our Prose guide.
Tips for using Prose on BowTie:
- Use ‘null’ to represent empty values when defining fields.
- Don’t use comments in the front matter (e.g. ‘# this is a comment’ )
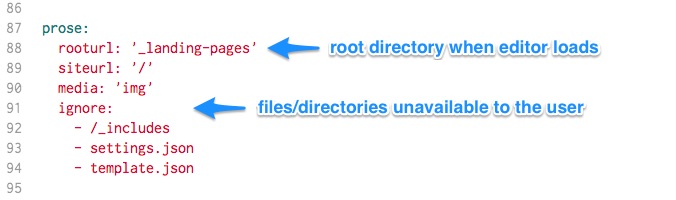
- Prose allows you to restrict access to specific parts of the project’s repository. You can configure this in your
_config.ymlas shown below:
Restricting access in Prose
For more information on configuring the Prose editor, see their docs.
If you are new to BowTie, check out our other Getting Started guides.
Getting Started with BowTie:
- Build a Landing Page in 5 minutes
- Using the BowTie Collection Editor
- Initial Configuration
- Setting Up Custom Domains
- Customizing and Styling BowTie frontend content
- Build a website with a pay wall
- Blogging with BowTie
- Launch a simple donation site
- Using BowTie’s User Profile system
- Build a Daily Deal Site with Jekyll Collections
- Using Jekyll Data to extend your site
- Adding BowTie users to MailChimp with Zapier
To keep up to date, follow us on twitter at @bowtie_io
Questions? Please comment! Thanks for your support and feedback.