If your site or web app includes content or functionality that you would like to secure or monetize, you can benefit from BowTie’s policy management and payment microservices. BowTie allows you to set and restrict access within your frontend environment with incredible ease.
Example Paywall Site
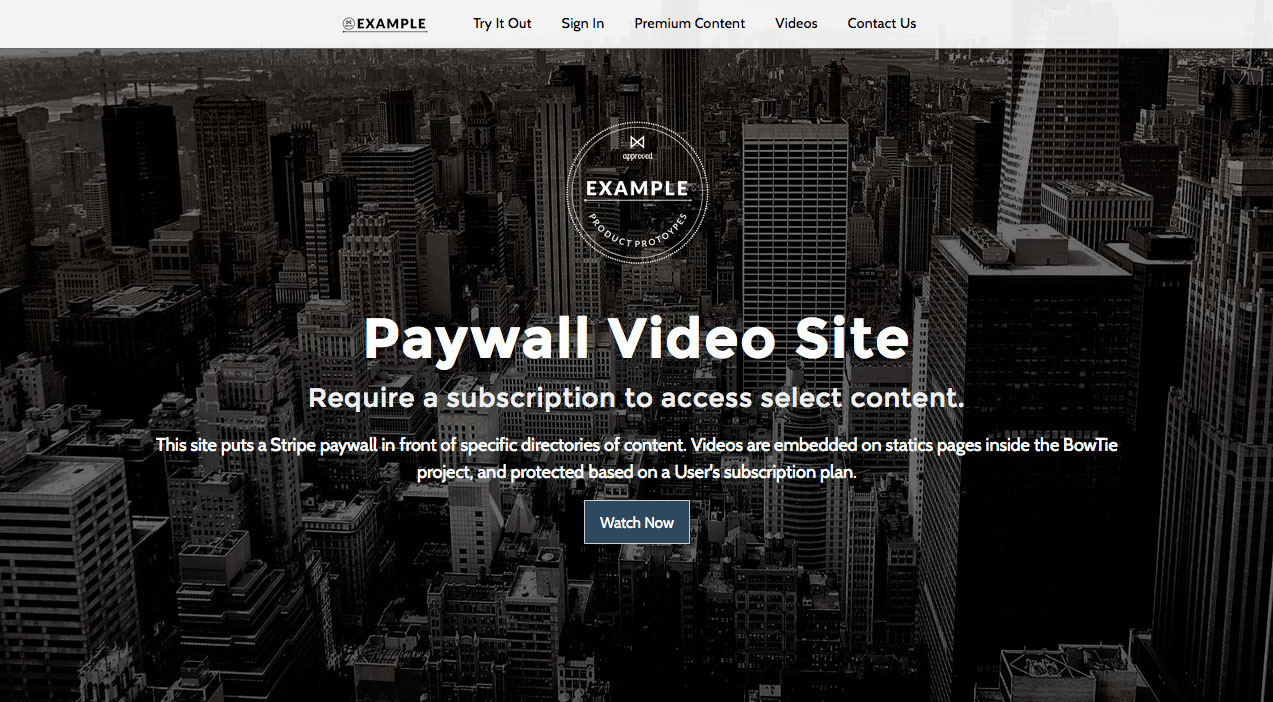
A paywall is a way to monetize digital content and close access to a part of your site or blog based on a User’s current subscription status.
This post will show you how to add a Stripe subscription-based paywall to your BowTie project. This example illustrates a premium video subscription site. You can view the example project on BowTie, and download the templates from our github page.
To see a real world application, visit Handshakin’ Videos.
Setting Up Your Project
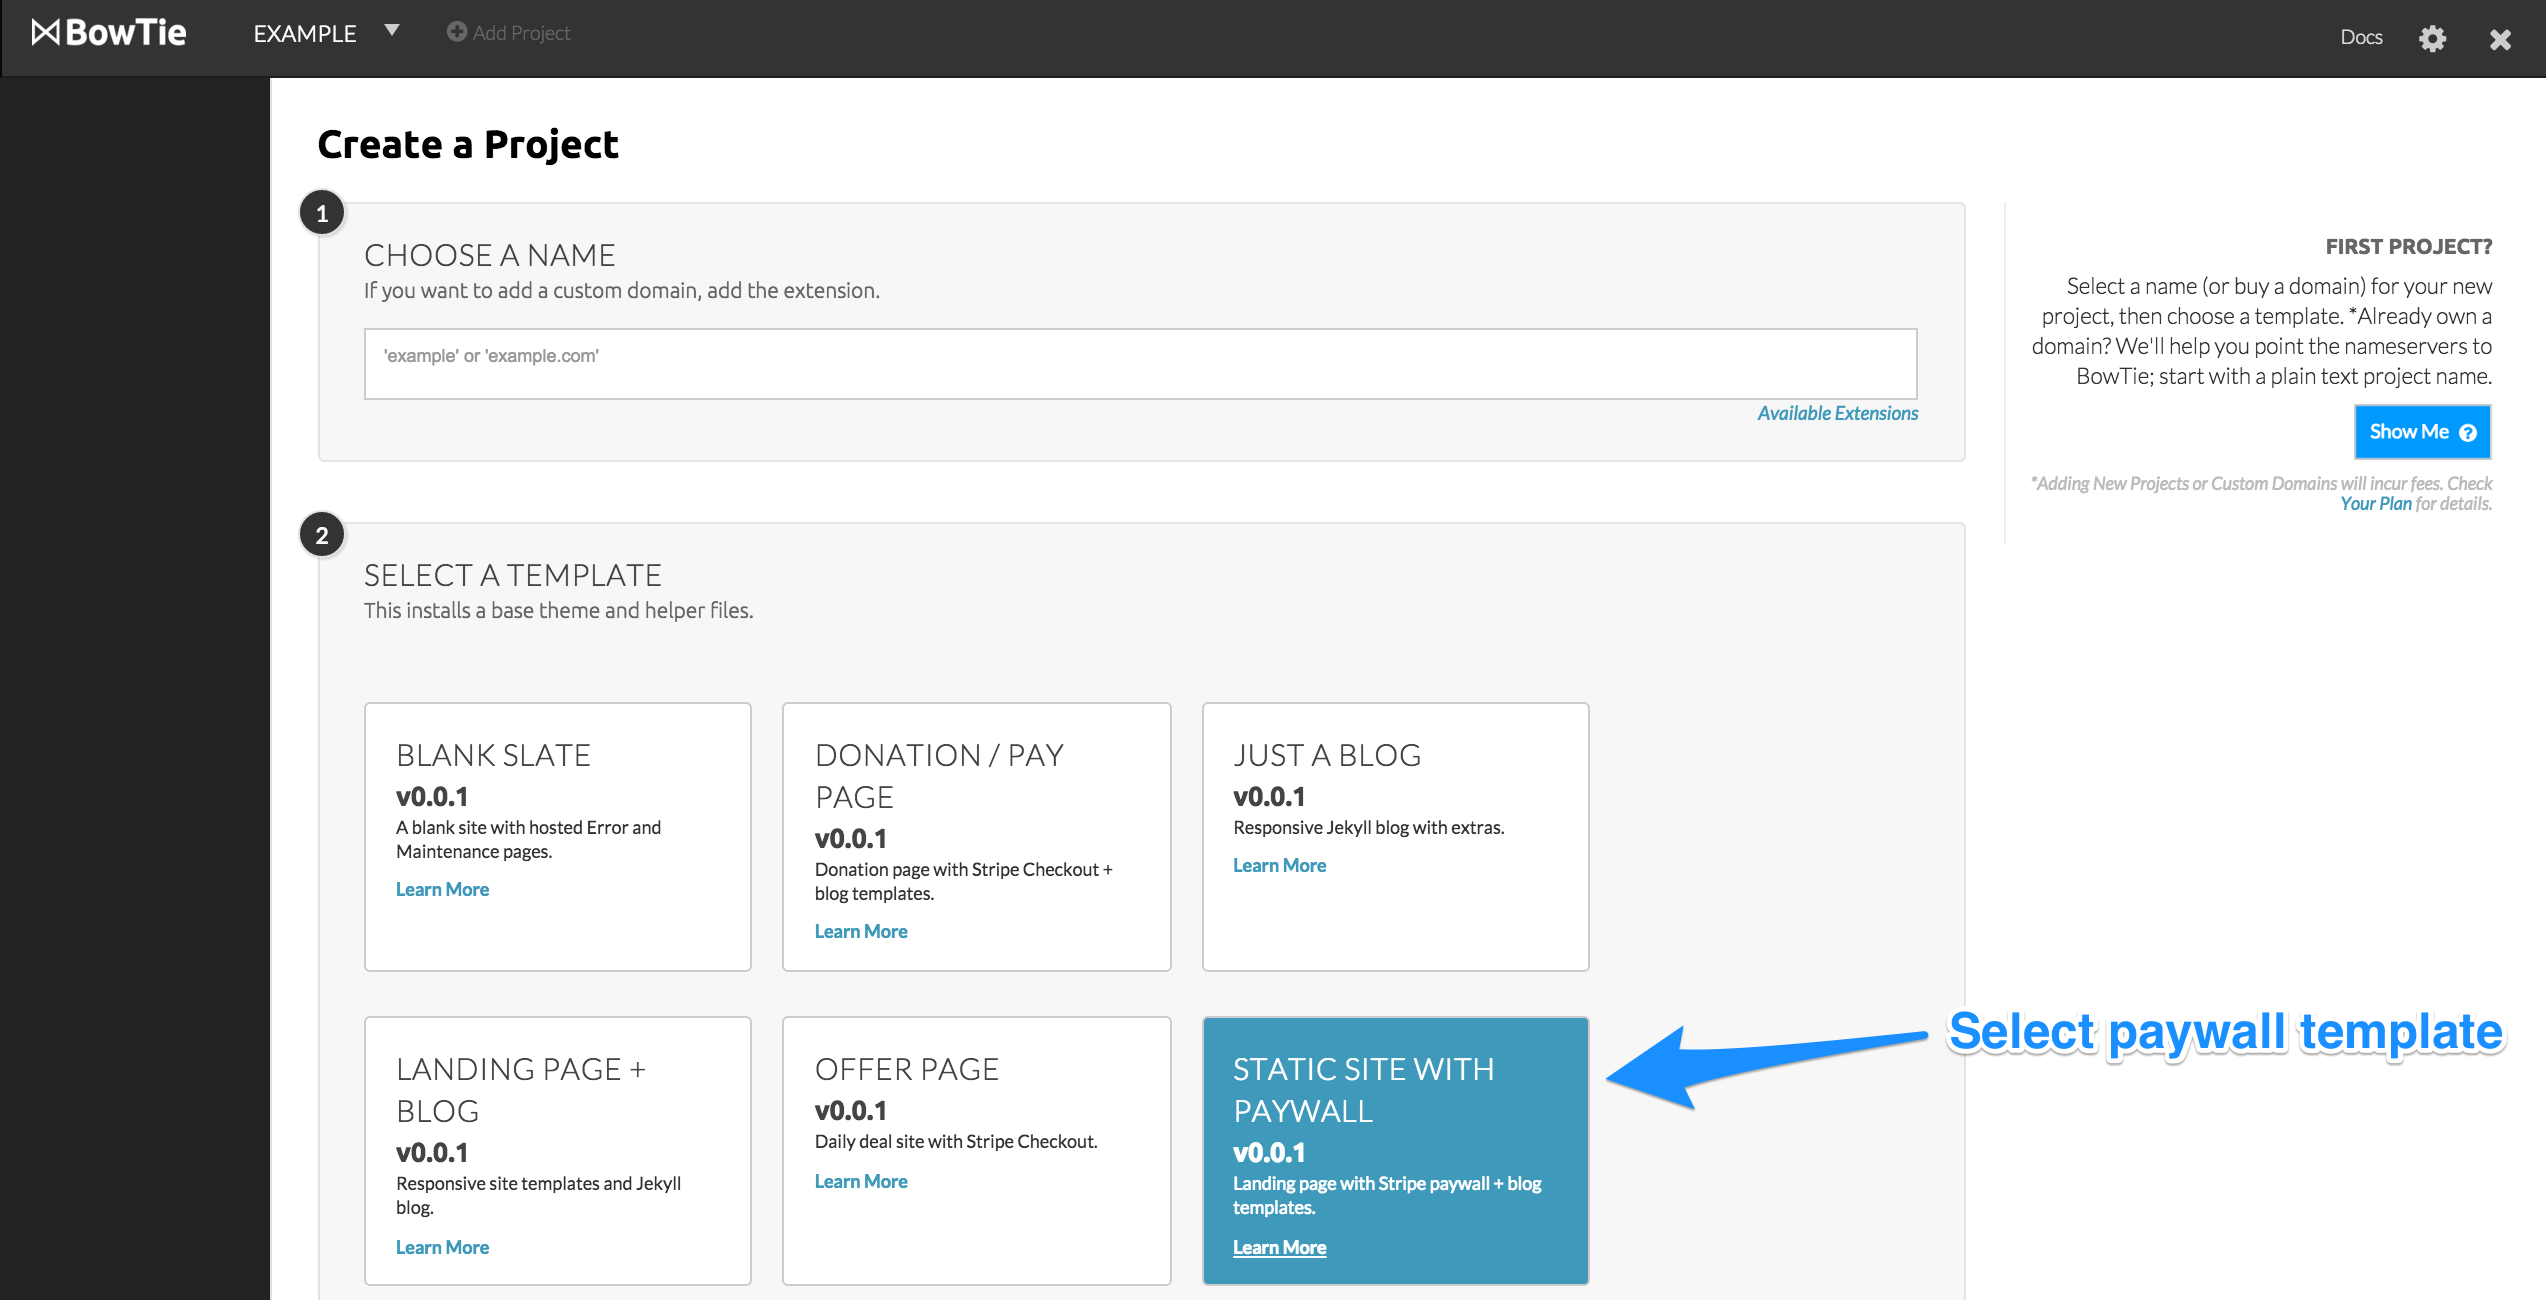
To begin, select the ‘Static Site with Paywall’ template. This will deploy the exact files used in this post. However, you can create policy files and build a similar paywall in any BowTie project. BowTie’s user registration and Stripe payment forms are hosted by our application - independent of your Project repository, and policy management is universal.
Install the Paywall template
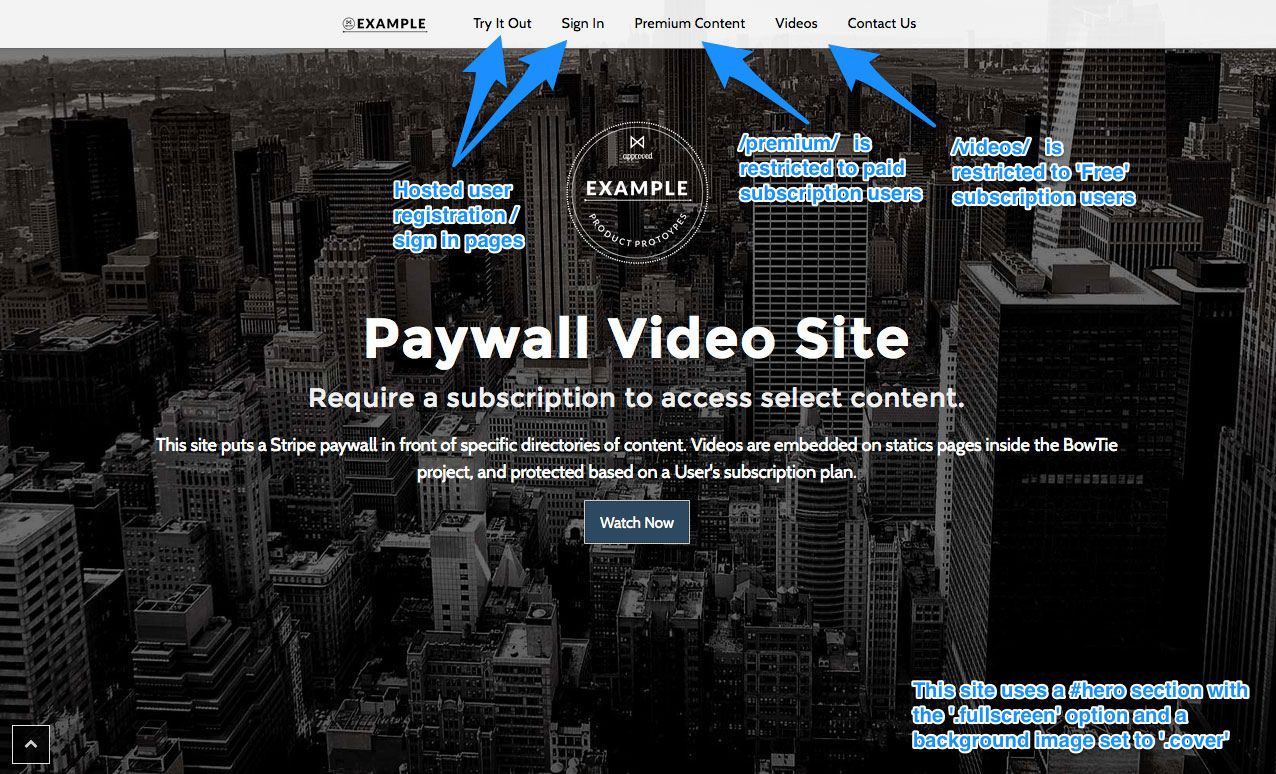
Before diving into the paywall structure I want to explain the desired behavior. For this example, we are using BowTie to deploy a simple landing page with a teaser video, and two distinct upgrade paths. The first path is to register ‘free’ users, who will be granted access to a limited set of videos. The second path allows ‘paid’ users to view additional premium content.
The site uses the default Bowtie theme with a few custom image assets and style modifications. Read this post to learn more about theming your BowTie site.
Example Paywall Behavior
Policies are controlled by adding .bowtie.yml files to your project in the directory you would like to limit access. In this example, you will be limiting access based on specific Stripe plan subscriptions. Before you create the policy files, you will need to create the appropriate plans in Stripe, and associate them with your project.
Connecting BowTie to Stripe
If you haven’t done so, sign up for a Stripe account and then connect it by accessing the /projects/PROJECTNAME/stripe_connection page in your BowTie dashboard. This process is done via oAuth. A successful connection will display an indicator reading ‘Active’ in your sidebar, with accompanying links you can use to manage the connection.
Next, login to your Stripe dashboard and create the plans you intend to set policies against. Note the Stripe Plan ID for each plan you create.
It’s important to note - each BowTie project has two environments, Test and Live. Stripe plans will be environment specific, meaning if you create a plan in your stripe dashboard on live mode, those plans will be found only under Plans in your Live environment. Alternatively, if you create plans on your Stripe dashboard in test mode, those plans will be found in your Test environment.
Create Stripe Subscription Plans
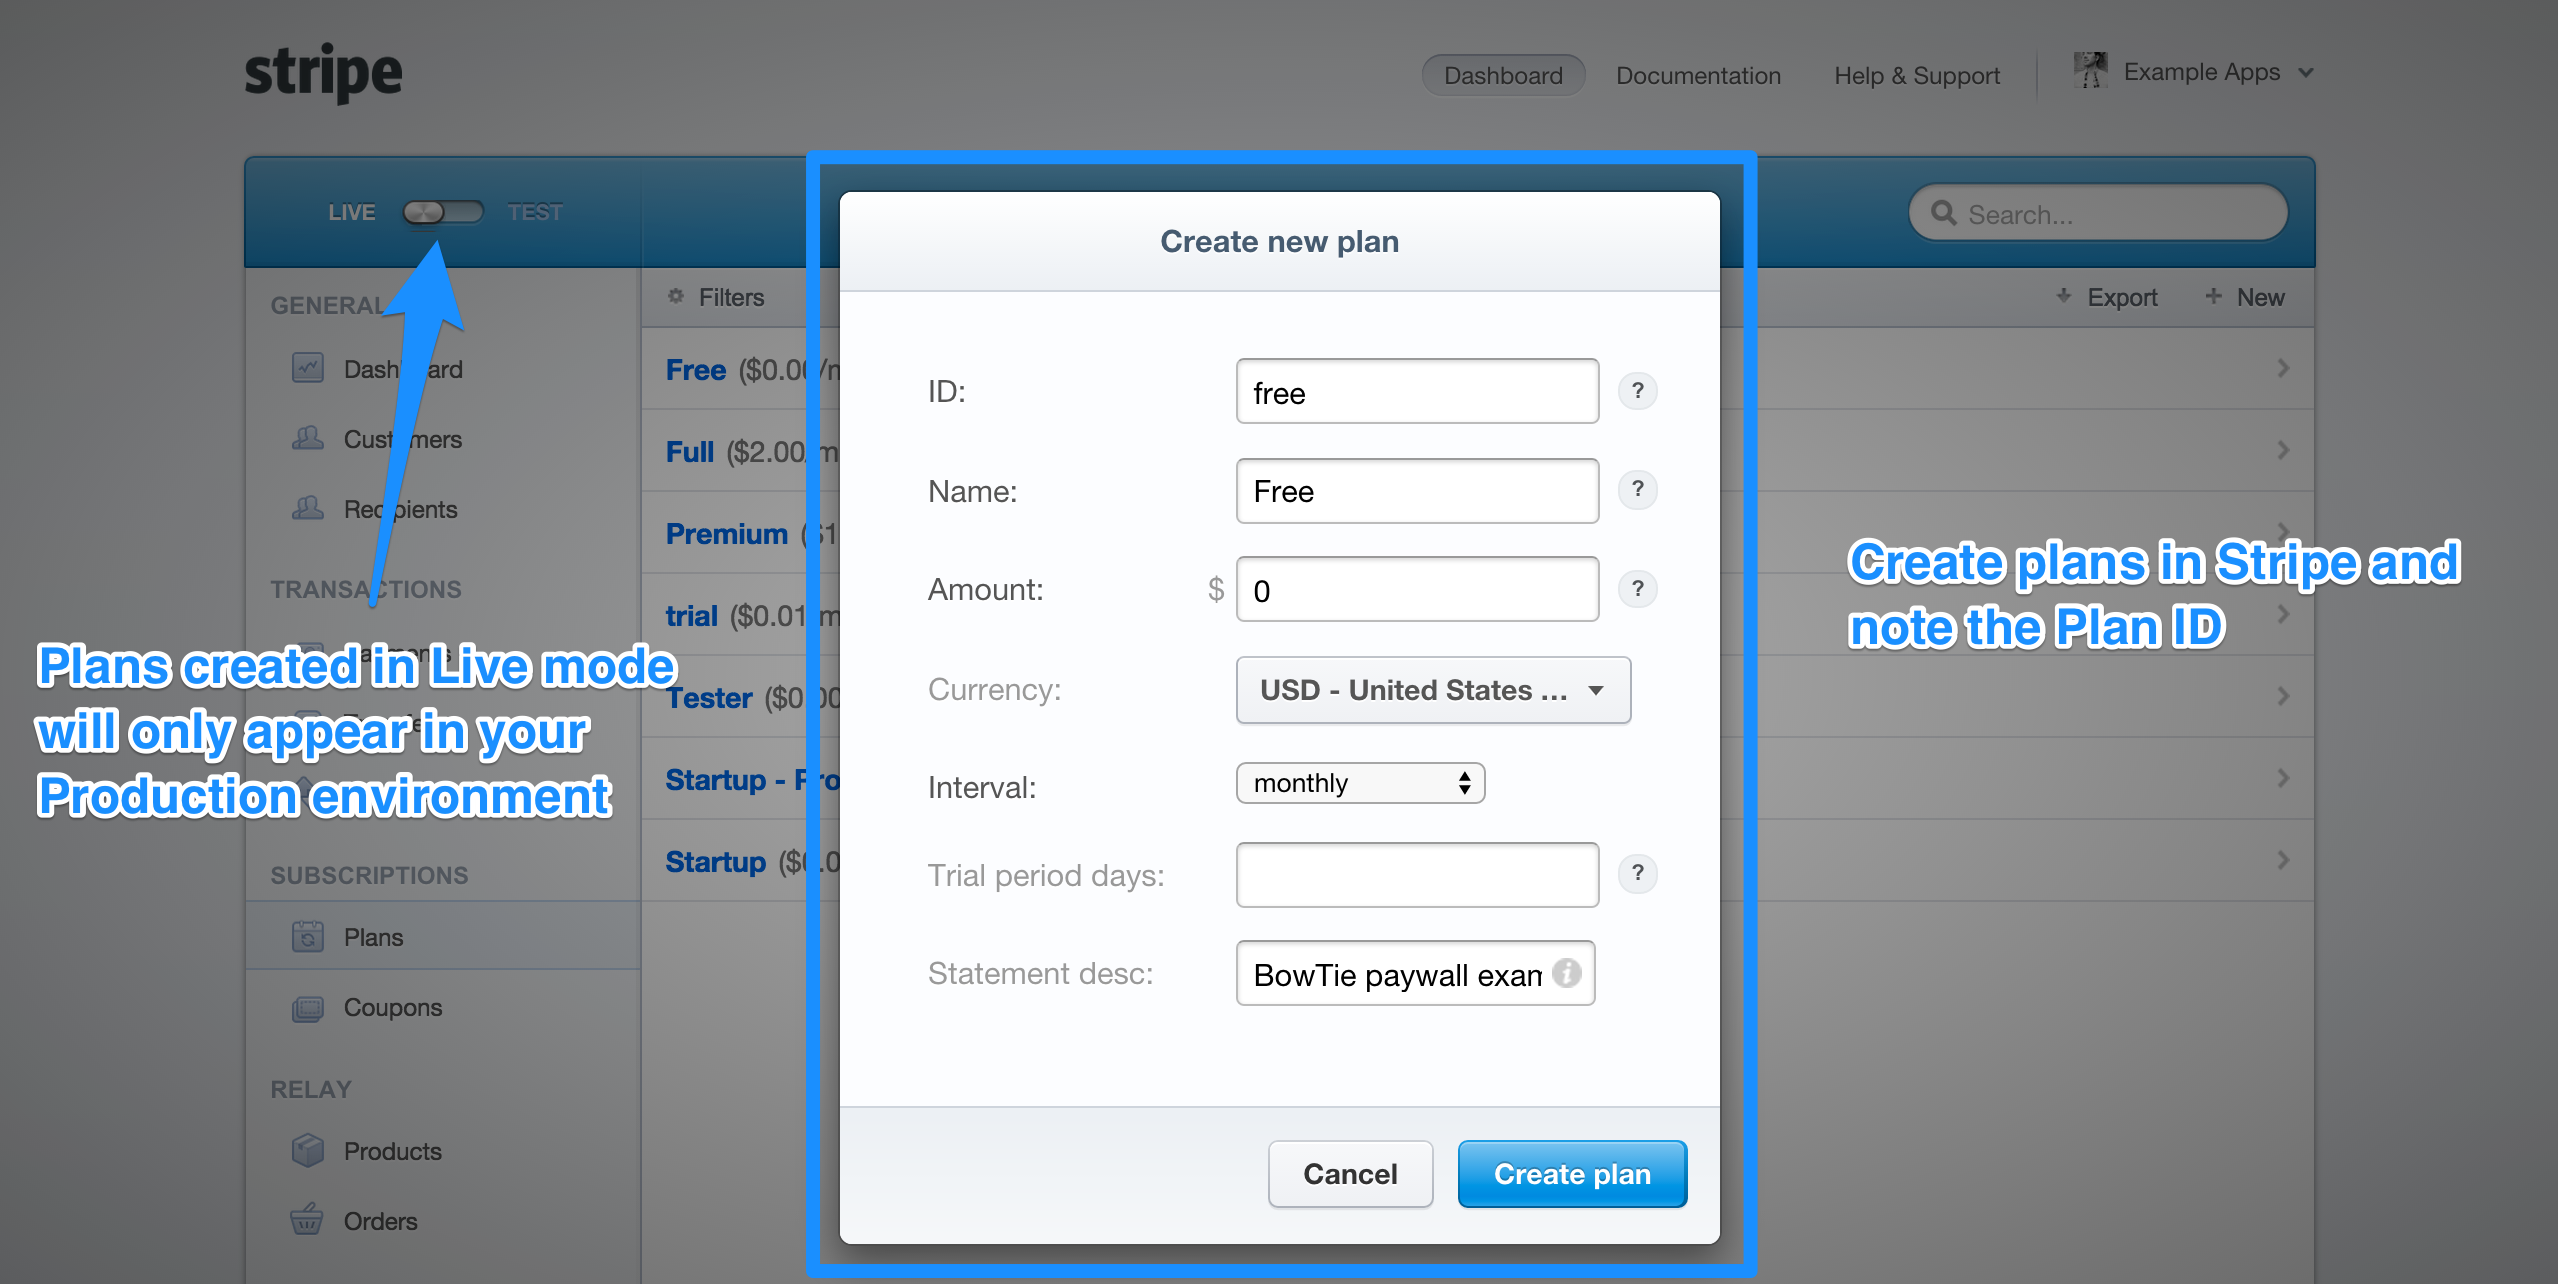
In the above example, I created a ‘Free’ plan.
Now, return to your BowTie dashboard and visit the /projects/PROJECTNAME/plans page. If your Stripe connection is active, you will see a list of your existing Stripe plans specific to that environment.
Click ‘+ Track’ next to any plan you wish to associate with this project.
‘Track’ Stripe Plans in your Project
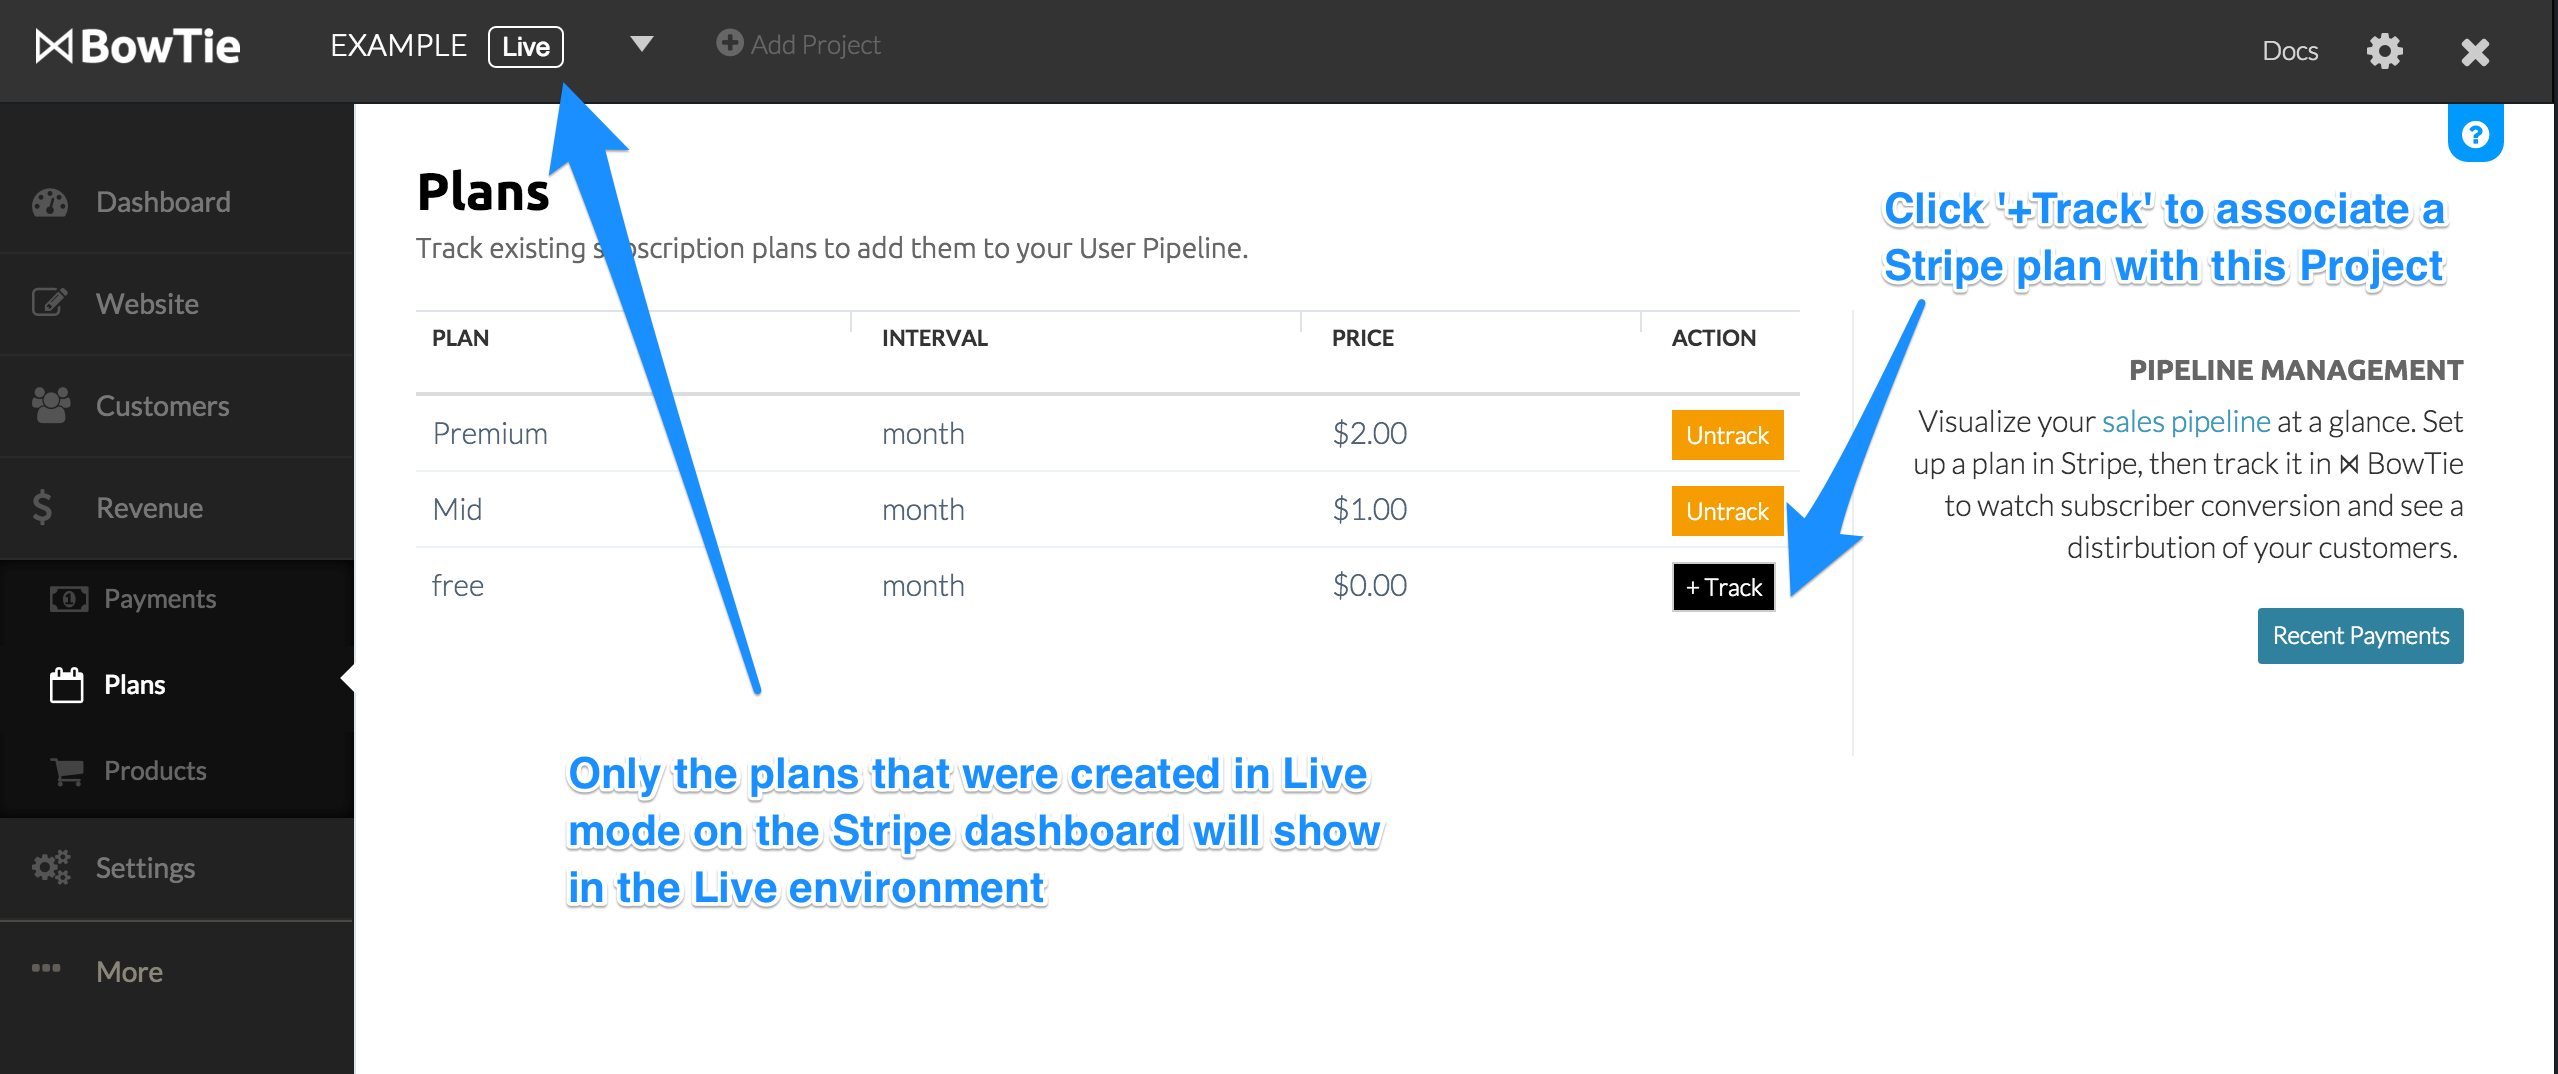
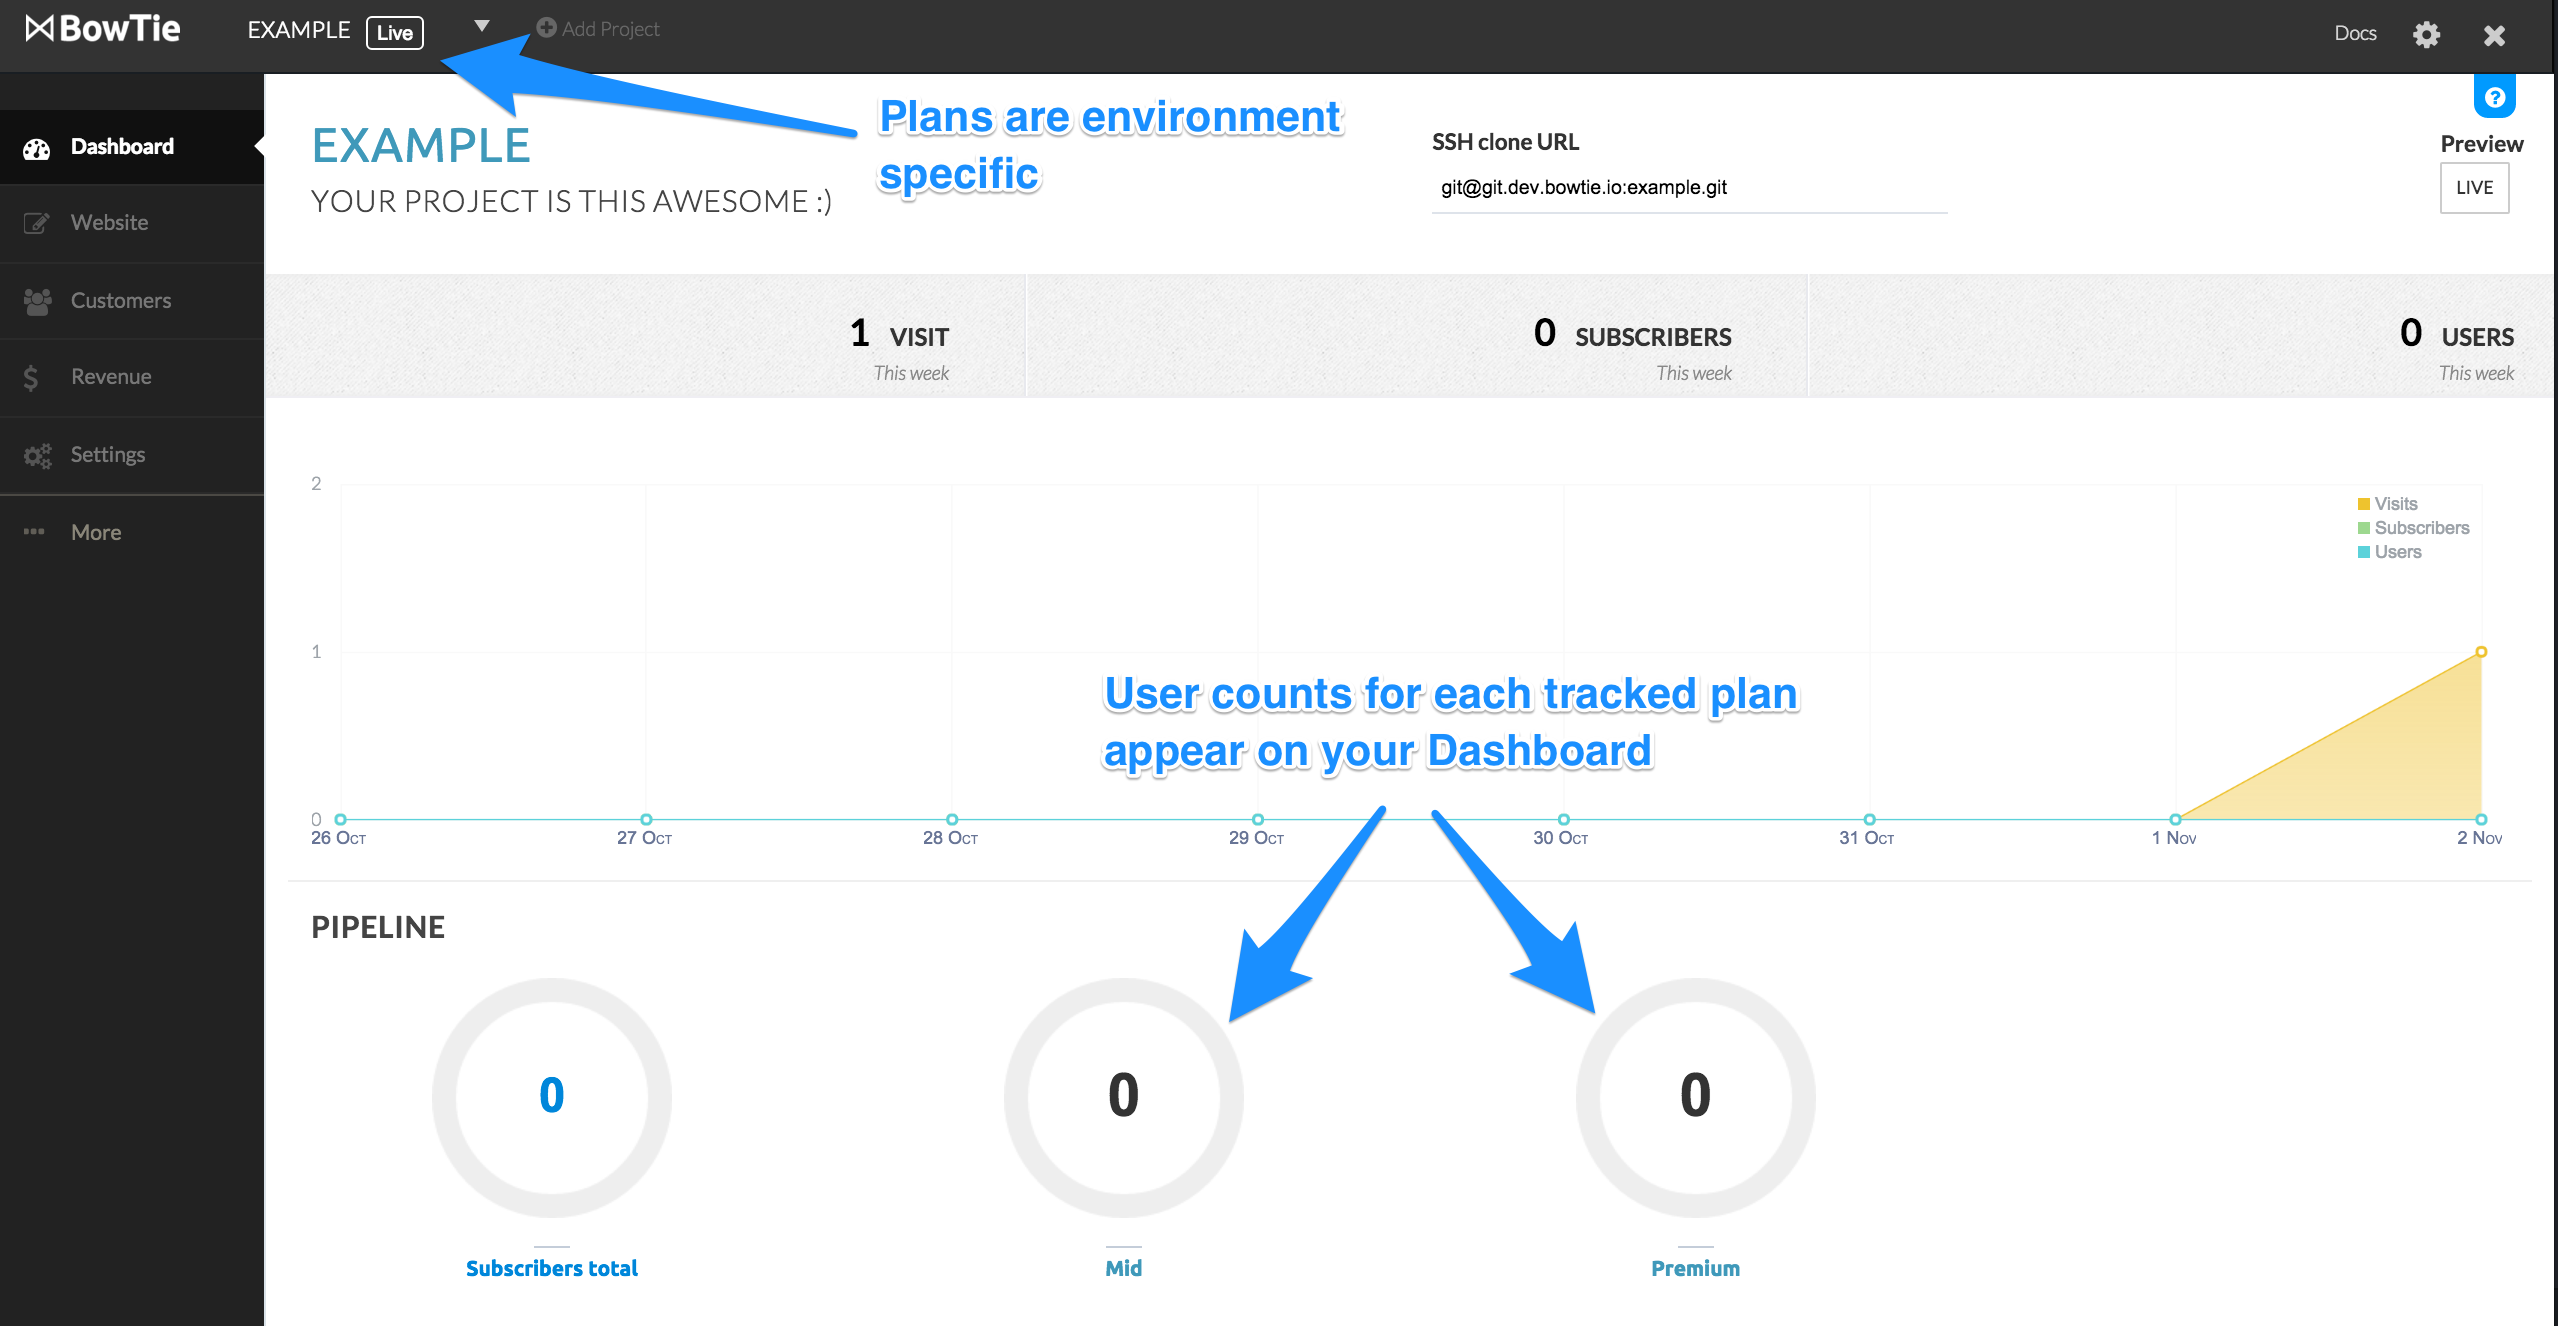
Tracking plans within your selected environment associates them with this BowTie project. When you track a plan in either environment, the plan name will appear as an option in a selection dropdown on the hosted user registration page. Additionally, a chart will appear on your BowTie dashboard, displaying user counts for this plan.
Working with BowTie Policy Files
With plans in place, you are ready to add policy files. Policies are enforced by adding a .bowtie.yml file in the directory you wish to limit access to. Policy files can be created with any text editor. In the starter template, several example policy files have been provided.
A policy file includes the following information: what type of restriction/access exists, and to which files. For Example:
/videos/.bowtie.yml
permits:
  plans:
    - Free
    - Premium
    - Full
Currently, access control can be limited by user profile information, subscriptions, method, and path. For a detailed list of policy options, read our Docs.
In our example, a user is required to register for the ‘Free’ plan we created in Stripe in order to access the /videos/ directory and content contained within. Attempting to access that the directory will redirect unregistered/signed out users to the hosted Sign In and Registration options.
User Registration Form
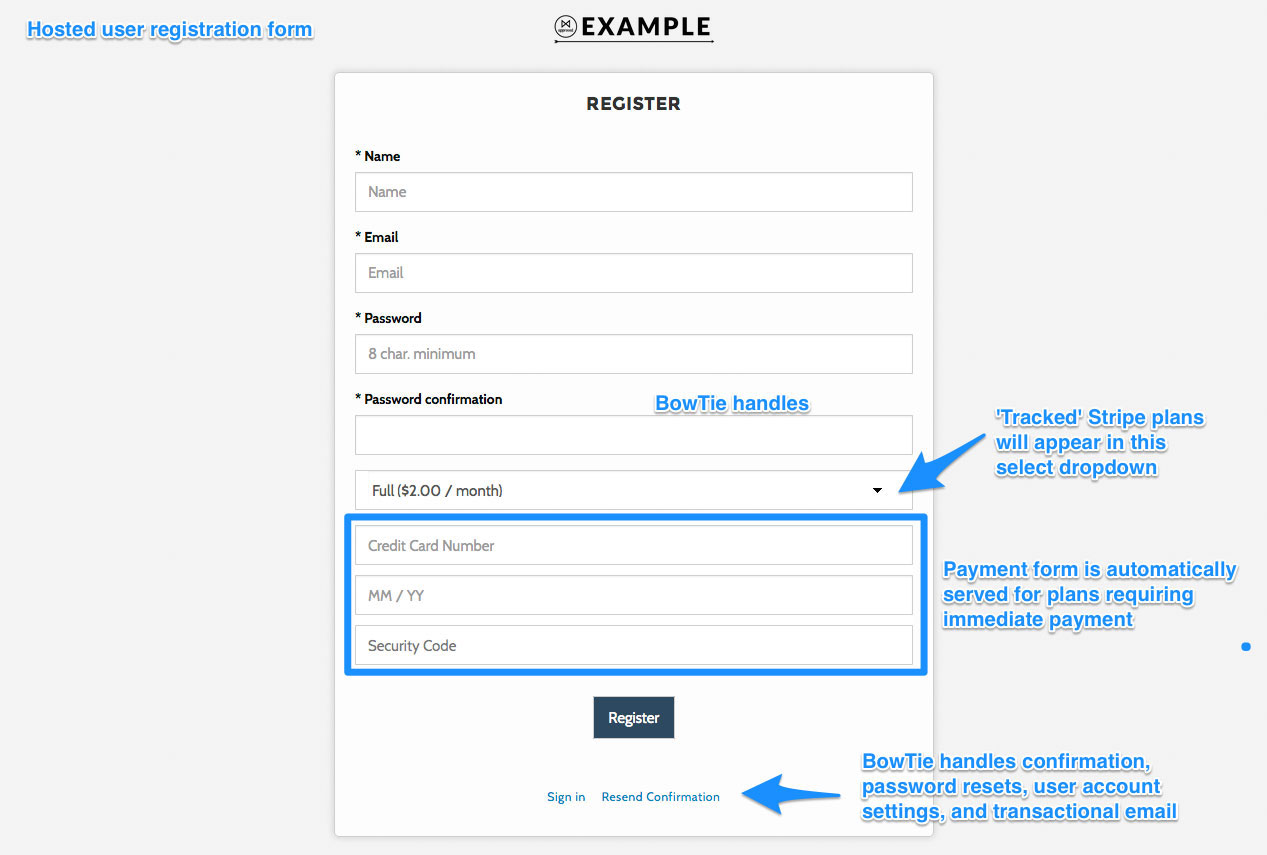
BowTie provides hosted user registration forms, transactional email (confirmation, password resets, etc.), plan selection, and payment forms. Additionally, you can leverage our javascript SDK to build and deploy your own.
The user registration form will capture the information required by the Stripe plan, automatically adding payment forms as a selection option for any tracked plan.
The policies that create this behavior looks like this:
‘Videos’ policy file

In this .bowtie.yml file, you can see that access to the /videos/ directory is restricted to users with the following plans: ‘Free’,’Premium’, and ‘Full’. A site visitor who has not registered, is required to register for one of these plans in order to access the content in /videos/. Permissions are identical for each environment.
When users register or sign in, they will be redirected to the /videos/ directory by default. This behavior is set in the settings.json file found in the root of your project. Simply specify a relative path for the redirect.
After Sign Up redirect
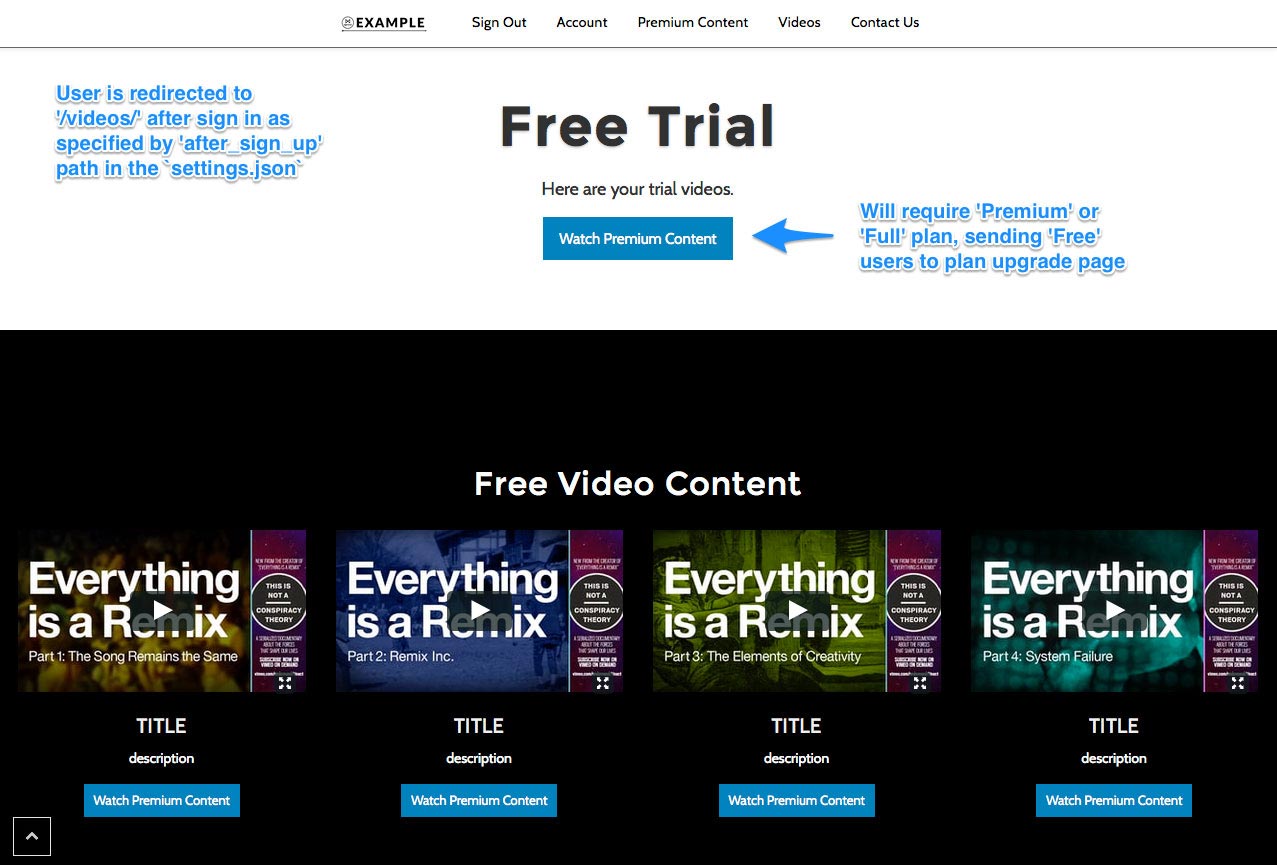
The /premium/ directory is restricted to users who have a ‘Premium’ or ‘Full’ plan in stripe. Those permissions are set by including a .bowtie.yml file in the /premium/ directory as shown below:
‘Premium’ policy file

If a logged out user attempts to access the content, they will be redirected to sign in. If a registered ‘Free’ user attempts to access the content in the /premium/ directory, they will be redirected to a hosted upgrade page.
Upgrade Redirects
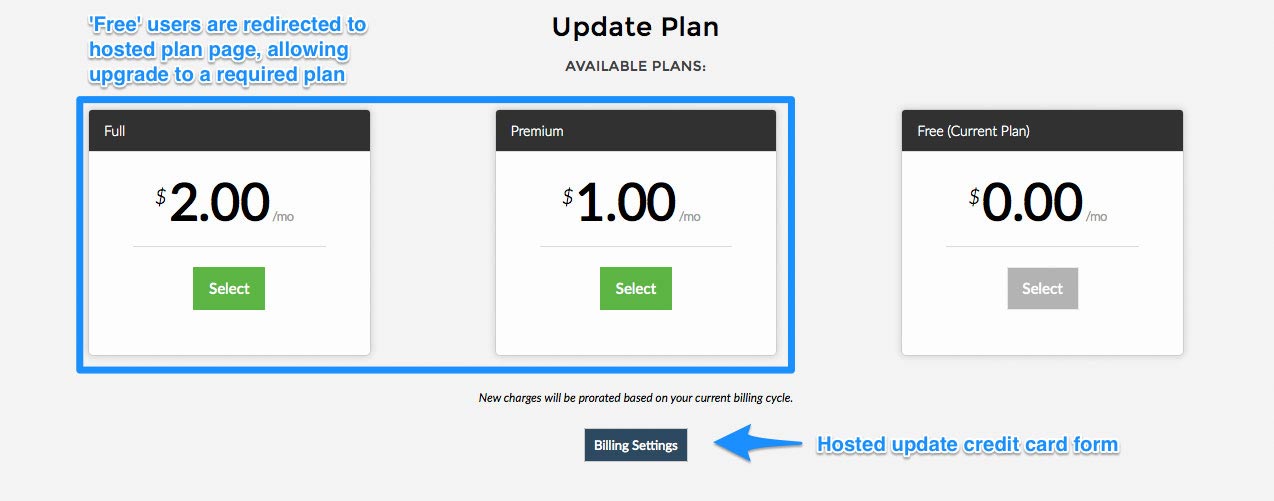
Similar to our hosted registration pages, BowTie hosts and serves forms that enable users to select a new plan, update/add credit card records, and manage their accounts.
The redirect in this example is automatic based on the policy file. To use the plans page manually, create a link to PROJECTNAME/users/plan. To use the billing settings page in your project, create a link to PROJECTNAME/users/credit_card
Congratulations! You’re now a BowTie paywall master. You can use the above method on any frontend content (pages, posts, javascript, etc.). If you need additional help with policies or payments, view our docs.
Payment Restrictions
Looking for the next step? Learn how to accept simple donations, or set policies based on payments by reading this blog post.
If you’d like to see our paywall template on GitHub, check it out here. For even more options, read the our Getting Started series.
If you are new to BowTie, check out our other Getting Started guides.
Getting Started with BowTie:
- Build a Landing Page in 5 minutes
- Using the BowTie Collection Editor
- Initial Configuration
- Setting Up Custom Domains
- Customizing and Styling BowTie frontend content
- Build a website with a pay wall
- Blogging with BowTie
- Launch a simple donation site
- Using BowTie’s User Profile system
- Build a Daily Deal Site with Jekyll Collections
- Using Jekyll Data to extend your site
- Adding BowTie users to MailChimp with Zapier
To keep up to date, follow us on twitter at @bowtie_io
Questions? Please comment! Thanks for your support and feedback.