With Bowtie’s donation template and Stripe Checkout integration, spinning up a static website and accepting donations for any cause is simple.
Launching a donation site with Bowtie involves three key steps: 1. Connecting your Bowtie project to a Stripe account, 2. Creating a “product” through the Bowtie dashboard that people can purchase (their donation, in this example), and 3. Placing a purchase button on your site.
This post will walk you through the process of setting up and building donation buttons using the BowTie collection editor. Other sections of the donation site template can be updated using the collection editor. For an introduction to editing section content and styles read this blog post.
Installing the Donation Site Template
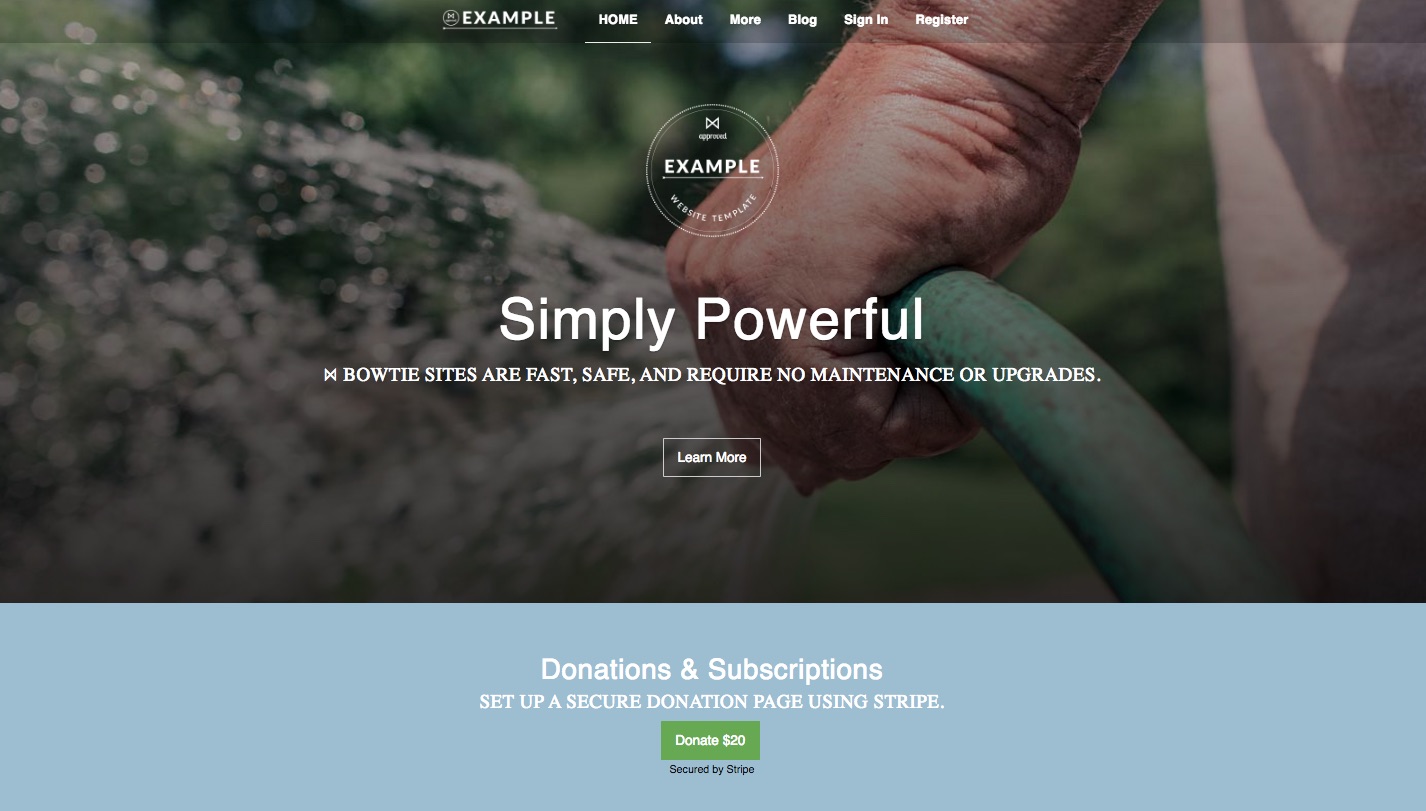
When you create a Bowtie project from your dashboard, choose the Donation Site Template. This will give you all the necessary components to follow along with this guide. The default template will look like this example, but you can design as you wish. For information styling, read our post on style and customization.

Setting up Stripe
BowTie Projects use Stripe for payments, plans, and products. To receive donations, you will need to connect a Stripe account to your BowTie project. If you haven’t already registered a Stripe account, you can do so on their website here.
Connecting Stripe to Bowtie
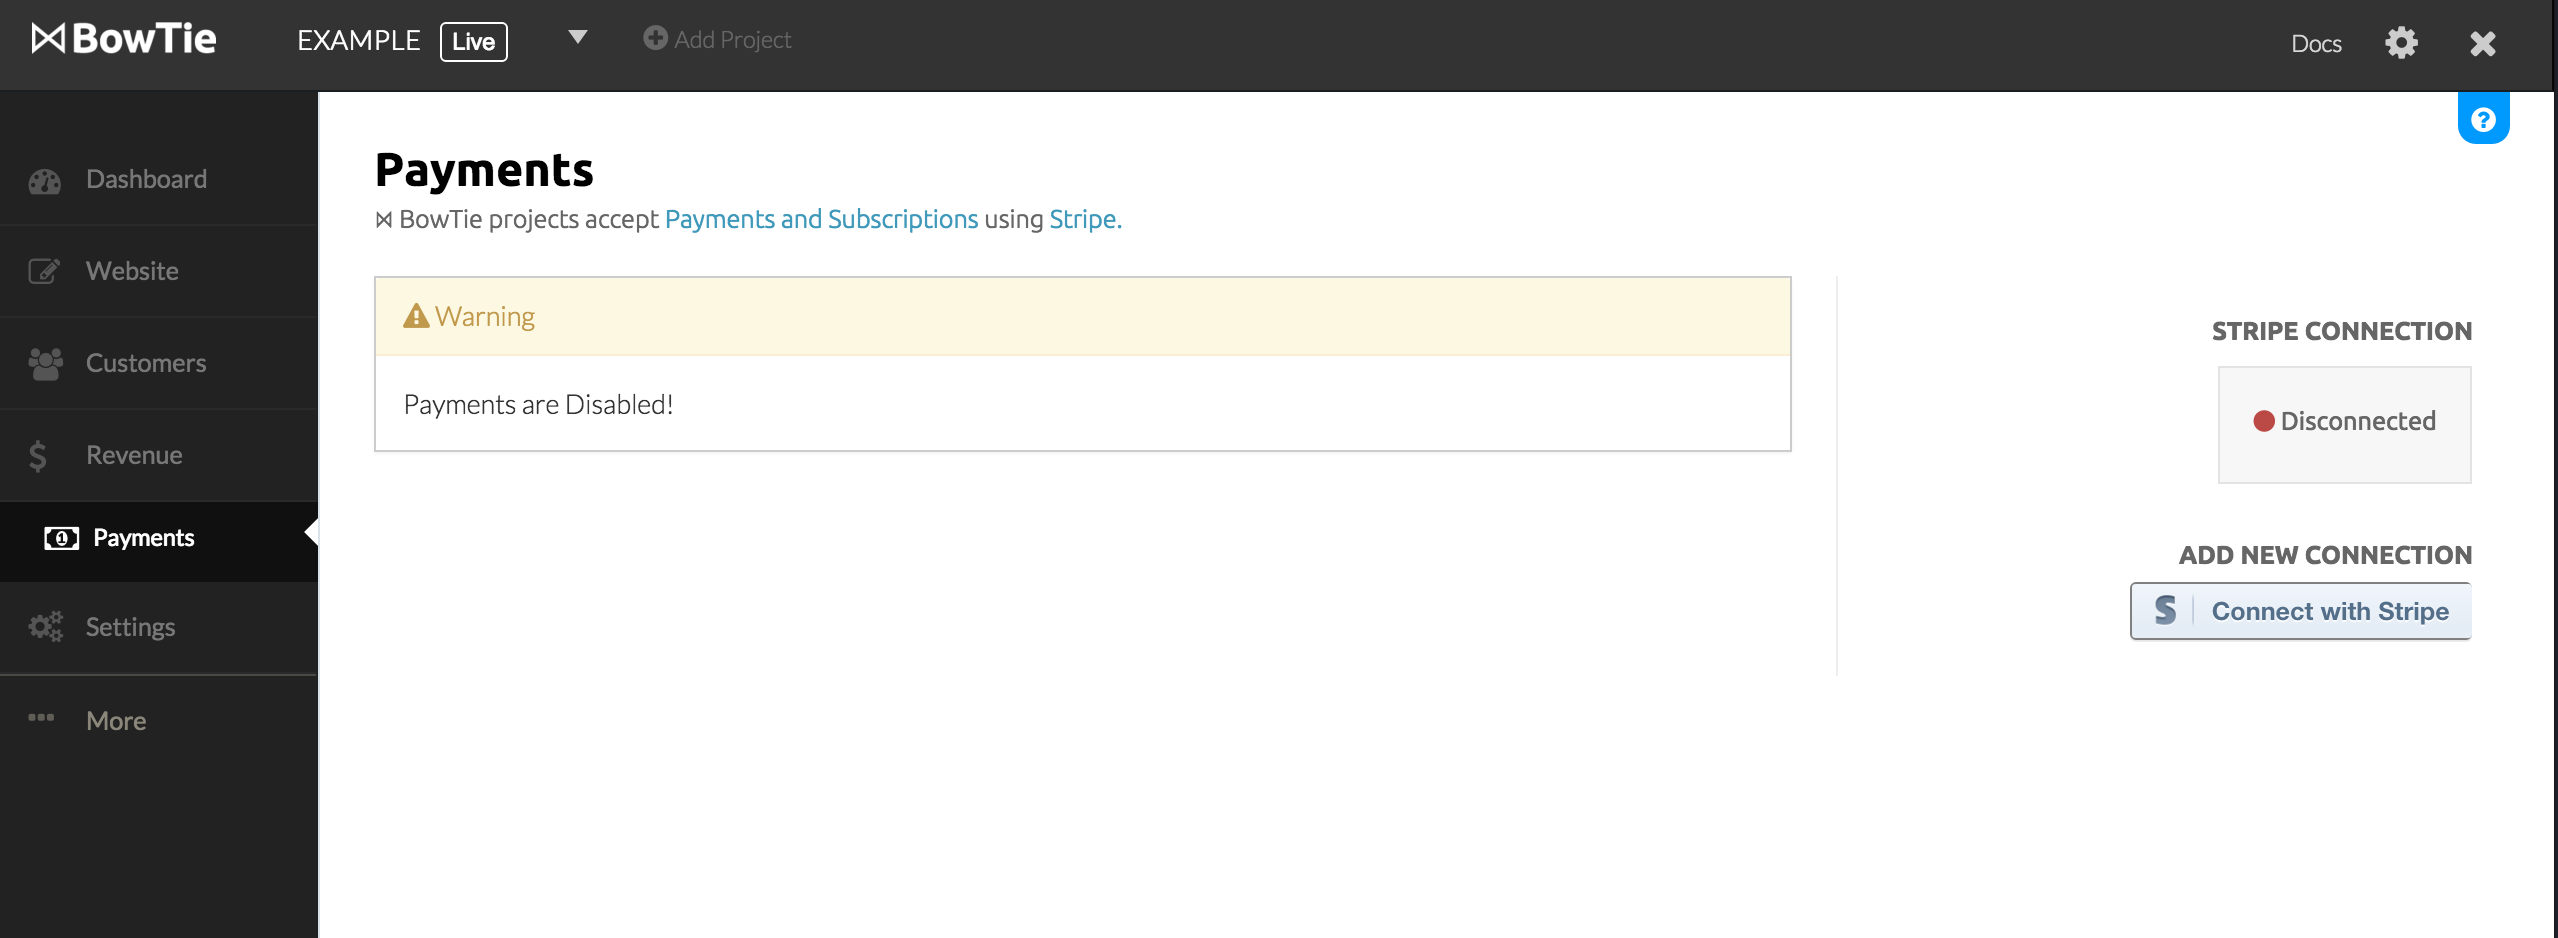
BowTie makes integration to Stripe very easy. Navigate your way to your BowTie Dashboard and go to ‘Revenue’ > ‘Payments’. If you haven’t already established a connection to Stripe, the indicator will say ‘Disconnected’. Click on ‘Connect with Stripe’ and follow the prompts. When you’ve completed the setup, your BowTie project will be linked with your Stripe account, allowing you to charge against Stripe tokens for payments, plans, and products associated with this BowTie Project.
Creating a BowTie Product Record
After connecting to Stripe, you will need to create a ‘Product’ record in BowTie in order to receive a payment. A ‘Product’ allows users to submit a payment, or donation, to you without requiring you to set up a backend integration. Each product (or donation amount) requires a unique product record.
Your BowTie project has two environments: Test and Live. When you create a ‘Product’, it will span both environments. Payments and plans are environment specific, but product records will be present in both environments.
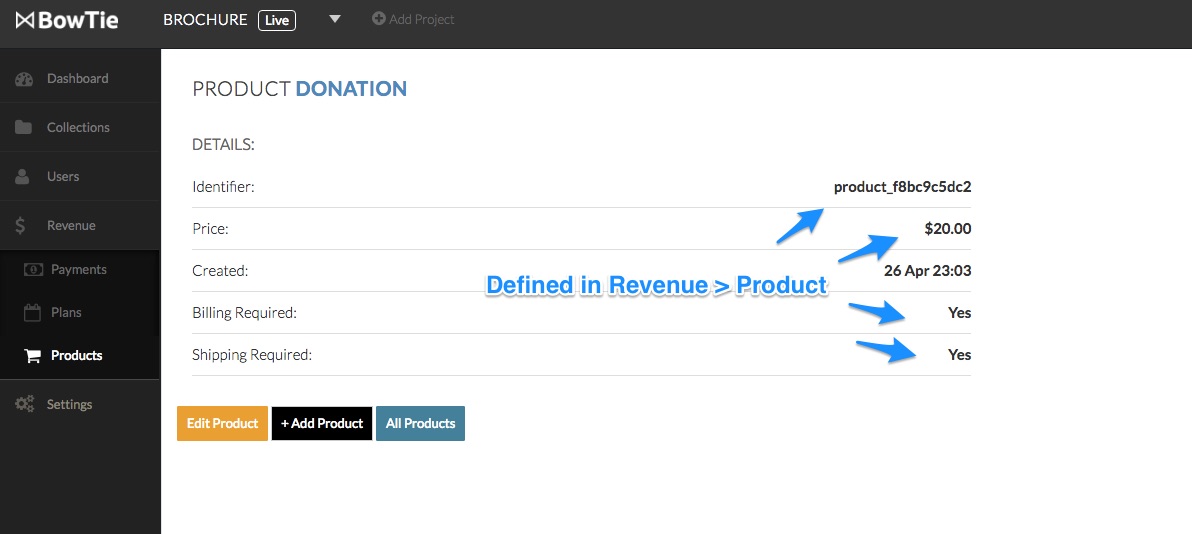
Navigate to ‘Revenue’ > ‘Products’ on your BowTie dashboard and hit ‘+Add Product’. Set the attributes required and save it.
Note: In this example, we are going to create a $20.00 donation button. ‘Price’ is set in cents, so the price we need to set for a $20.00 donation amount is ‘2000.’ Stripe requires a payment of at least $0.50!
Note your new product’s ‘Identifier’. This Identifier will be used when we create the product check out button in our collection, outlined in the next step.
Create Product Checkout Button with the Collection Editor
Now that we have a Product record created, we can create a Product using the BowTie collection editor. This will create the actual checkout button on your site, and add any extra information set by the theme.
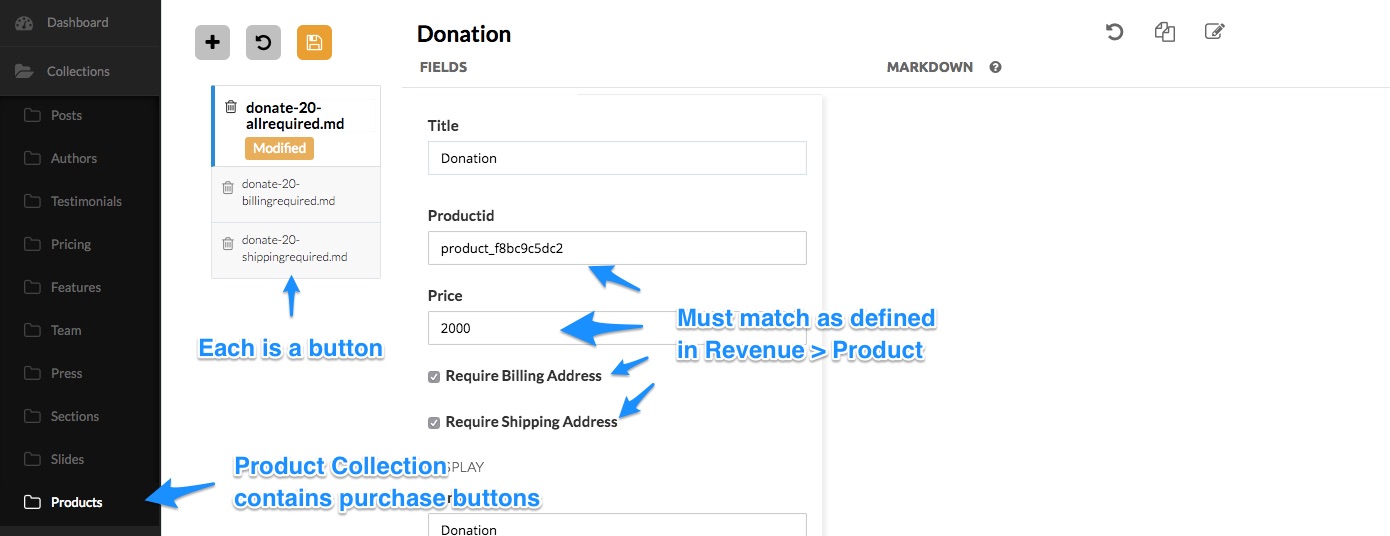
Navigate to Collections > Products and Add a new Product by clicking the ‘+’ button.
Create a title for your product using the Title field.
The ProductID should match the ID generated when you created the Product in the BowTie Dashboard.
Enter the Price in cents. This must match the price created in your BowTie product record.
Check Require Billing Address and/or Require Shipping Address if required (and set in the product record on the Revenue > Product page). Doing so will prompt Stripe to collect this information and pass it back to you after the purchase.
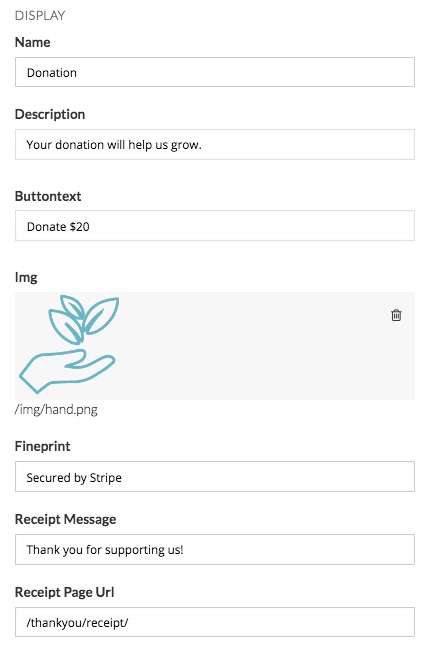
Options in the Display section of let you define how the button will look and behave after purchase.
Buttontext lets you customize the text of your button.
Name will be listed on the checkout popup with the Description below. Upload a custom IMG to appear as the thumbnail in your Stripe checkout.
Fineprint will display below the button, if defined.
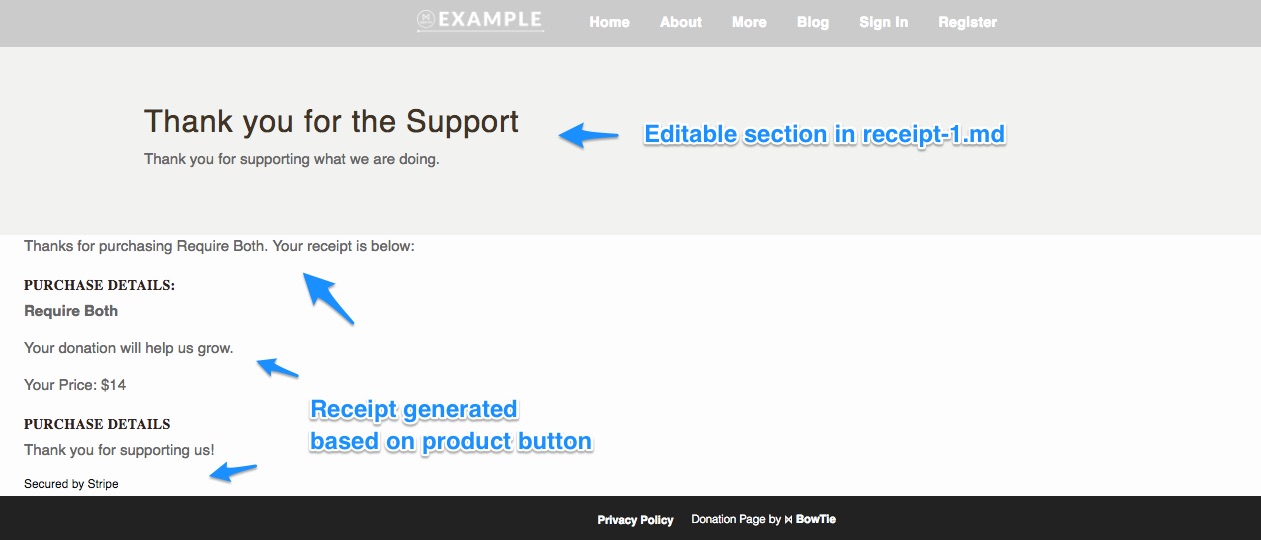
Receipt Message is displayed once a purchase has been completed and the customer is sent to the Receipt Page URL you define. In this template we’ve also created a section that you can use to edit the content of the default receipt page (receipt-1.md, in Collection > Sections).
Including the Checkout Button on a Section or Page
Now that your Product checkout button is complete, you need to add it to a section or page. In this example template, we include it in a section on the ‘homepage’.
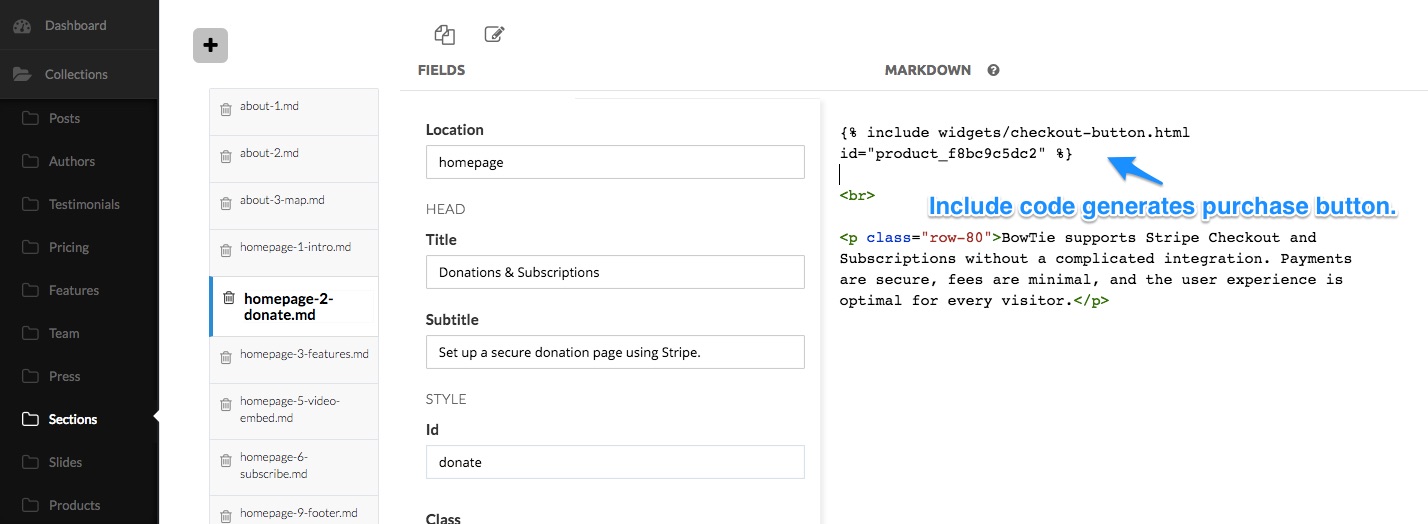
Use the following code in your section content, replacing PRODUCT_ID with the product_ID corresponding to your product:
{% include widgets/checkout-button.html id="PRODUCT_ID" %}
Editing the Receipt Page
When a purchase is completed, the browser will redirect the visitor to the Receipt Page URL. Content on the default receipt page ( /thankyou/receipt/) can be modified using the receipt-1.md section, or by editing the page directly.
That’s it! You’ve successfully set up your BowTie donation site and are ready to accept donations from anyone.
If you want to use multiple buttons or products, repeat the steps to create a product record and checkout button in the BowTie Dashboard.
Important Note - If your donation button isn’t working (you click on it and the modal doesn’t pop up), you are NOT connected to Stripe!
User Pipeline Restrictions
Combining payments with BowTie’s policy restrictions will make your site even more powerful. For example, you can implement restrictions to certain parts of your donation site based on payment status, allowing you to send a user to a thank you page, or to a page with content only accessible after a payment (such as a unique voucher, code, or downloadable content).
Payment Based Restrictions
BowTie’s payment policies allow you to offer protected or premium content to groups of visitors who have donated on your site. In this example, we will make a ‘Thank You’ page in a protected directory of the BowTie project. A /.bowtie.yml file in that directory will restrict access to this page to people who have paid you.

Your /.bowtie.yml file will look like this:
/confirmation/.bowtie.yml
permits:
  profile:
    purchases:
      product_000000000: true
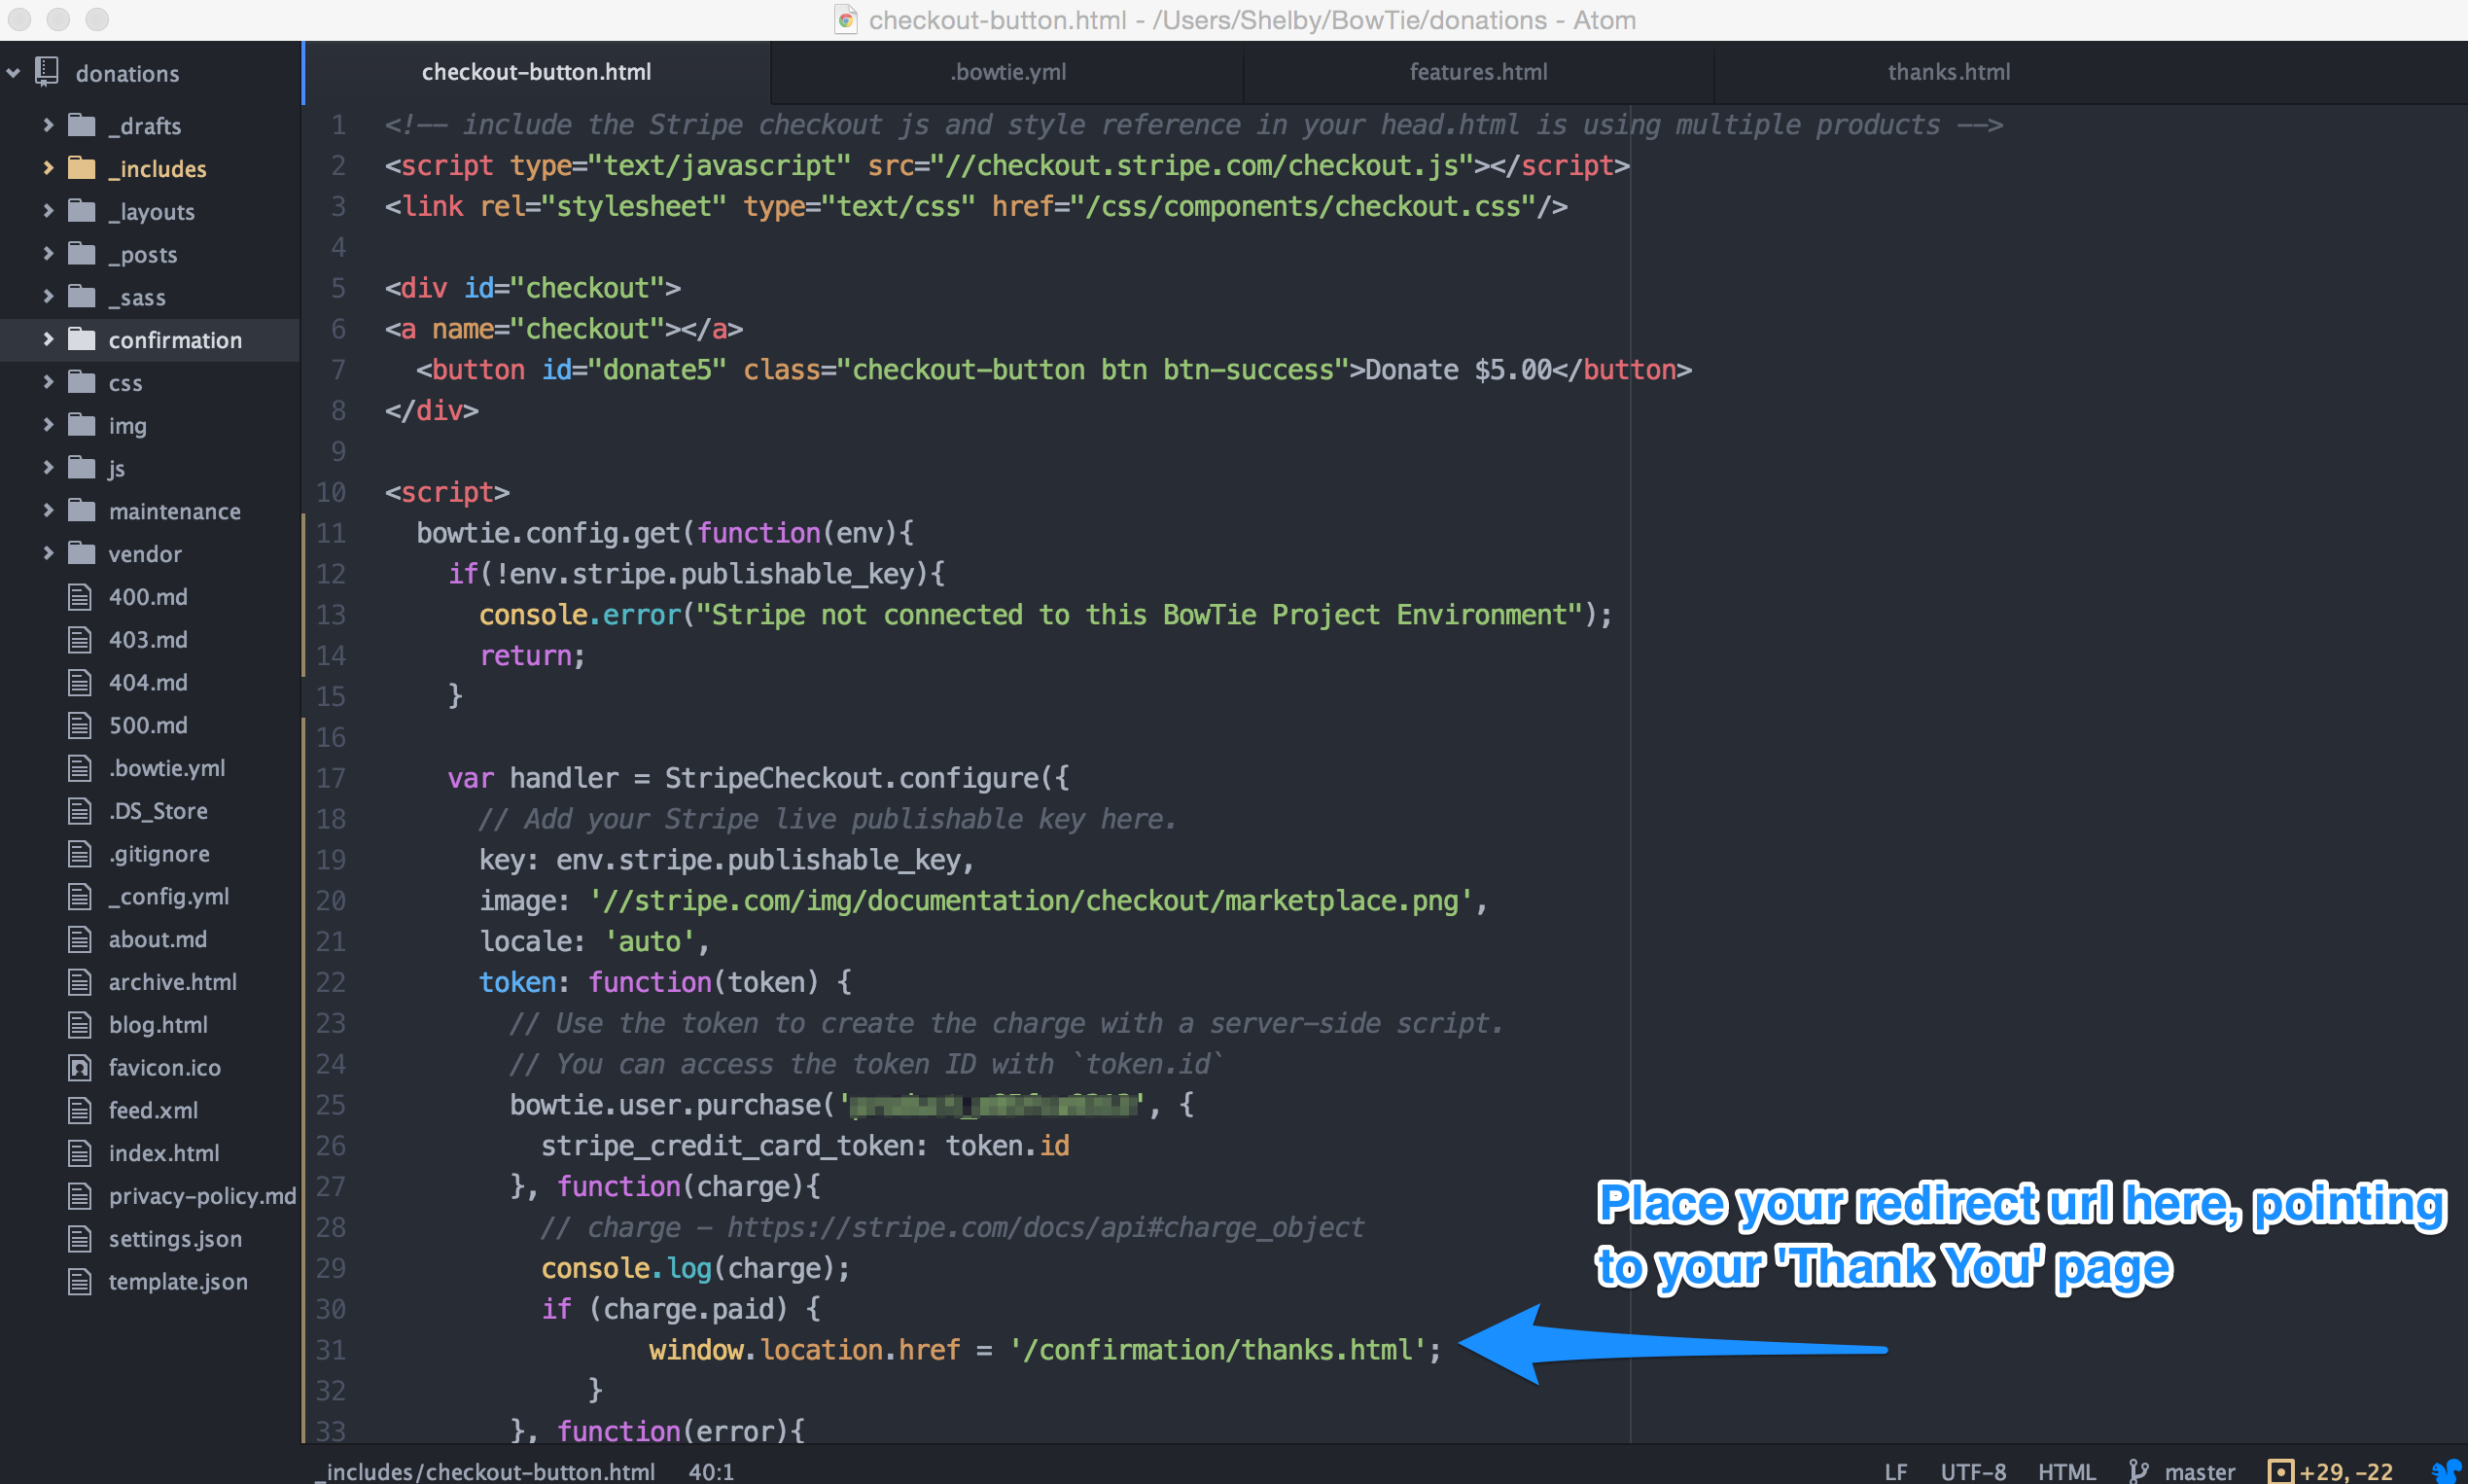
In the above scenario, only people who have purchased your product (Product ID ‘product_000000000’), i.e. donated, will be redirected to /confirmation/thanks.html and can have access to whatever premium or protected content you’d like on that page. The screenshot below shows indicates where to place your redirect url to the protected page.
Session Based Restrictions
Another type of restriction you can place on your BowTie site is session restrictions. You can permit access to visitors who have not registered, visitors who have registered but don’t have a plan, or fully registered users. Some examples of groups that you may want to grant access to are outlined below with their appropriate /.bowtie.yml file.
To permit only requests by visitors who have not yet registered successfully:
permits:
  status: visitor
To permit only requests by visitors who have registered (they may not have a plan):
permits:
  status: registered
To permit access to a fully registered user who has also made a purchase:
permits:
  status: registered
  profile:
    purchases:
      product_000000000: true
If you want to explore the full technical scope of our policy functionality, refer to the policy reference docs.
Stripe API Keys
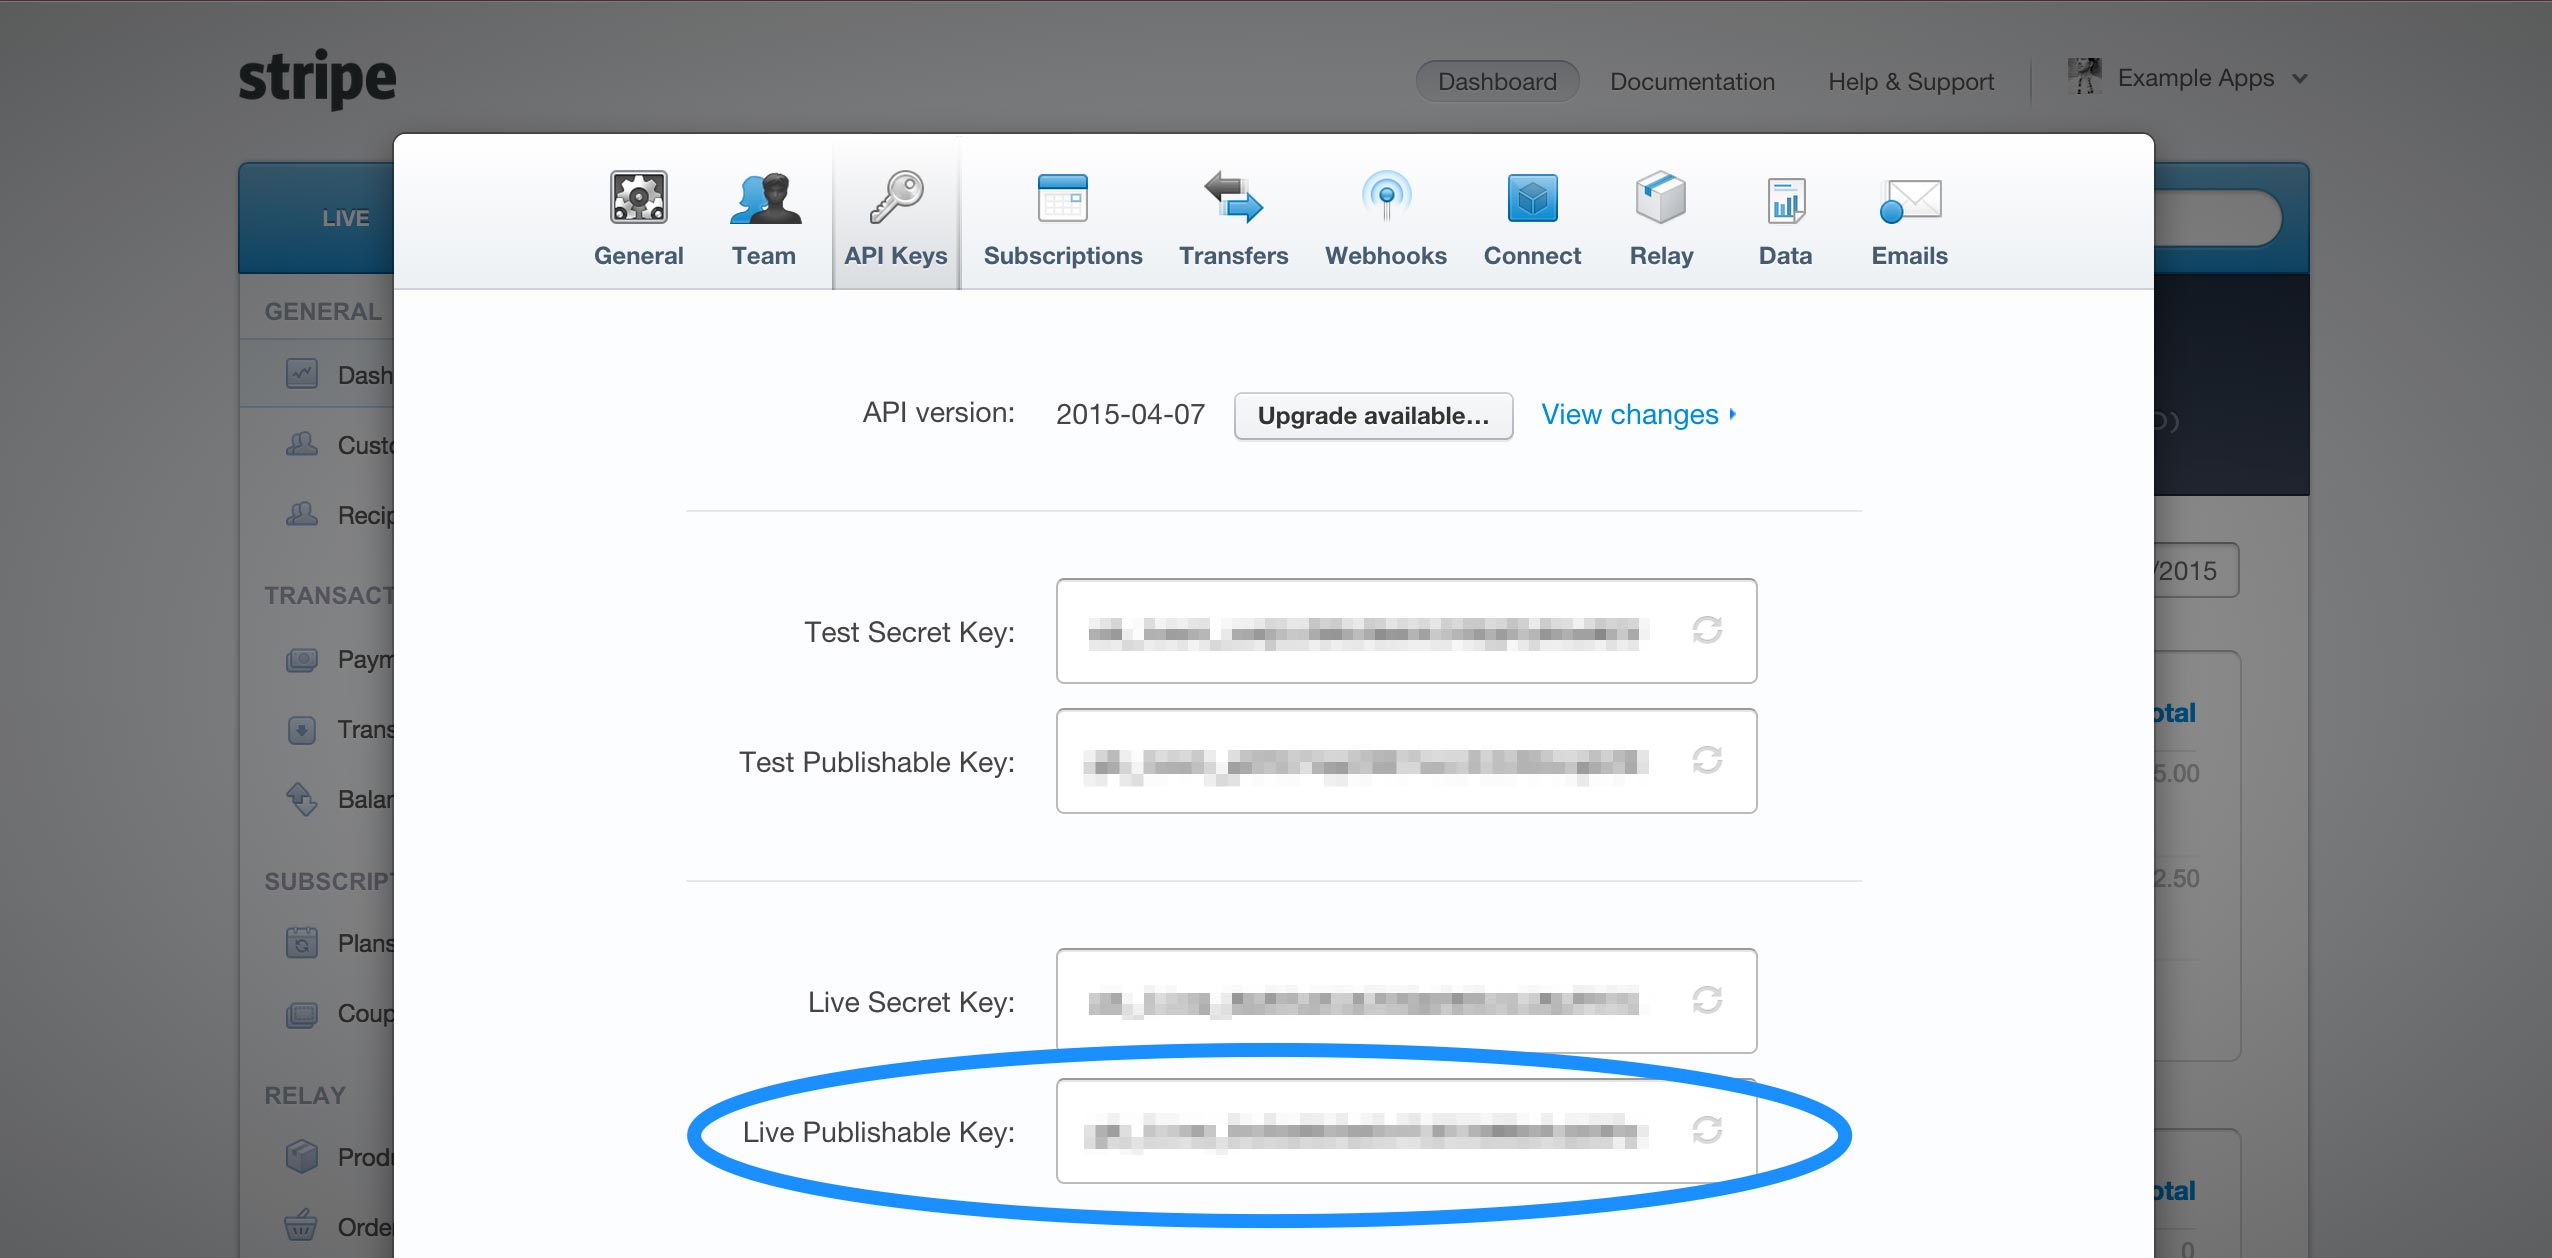
You don’t need to do anything with your Stripe keys. Your Test or Live Stripe key will be automatically saved into the env.stripe.publishable_key field, depending on what environment you’re working in.
If for any reason you need access to your Stripe keys, you can find them by navigating to ‘Your Account’ in the upper right hand corner of the Stripe dashboard, then to ‘Account Settings’ > ‘API Keys’.
More Options
Now that you understand BowTie’s Stripe Checkout and policy functions, you might want to explore setting policies around a subscription plan. Read this post to learn about using subscriptions and building paywalls.
You can also use our Zapier Integration to notify yourself of incoming payments or send new purchasers to a mailing list with an autoresponder using services like Mailchimp. You can learn how in this post.
If you’d like to see our donation template on GitHub, check it out here. For even more options, read the our Getting Started series.
If you are new to BowTie, check out our other Getting Started guides.
Getting Started with BowTie:
- Build a Landing Page in 5 minutes
- Using the BowTie Collection Editor
- Initial Configuration
- Setting Up Custom Domains
- Customizing and Styling BowTie frontend content
- Build a website with a pay wall
- Blogging with BowTie
- Launch a simple donation site
- Using BowTie’s User Profile system
- Build a Daily Deal Site with Jekyll Collections
- Using Jekyll Data to extend your site
- Adding BowTie users to MailChimp with Zapier
To keep up to date, follow us on twitter at @bowtie_io
Questions? Please comment! Thanks for your support and feedback.