
When using BowTie’s profile data and Zapier integration, collecting and connecting user input is as simple as a few lines of javascript. In this tutorial I will show you how to covert our standard contact form component to use Zapier.
Set up your html form to connect to profile data.
I’m starting with the contact form found in BowTie’s aboutus.html component, but this method is applicable to any HTML form. If you’re repurposing a form as we are in this example, make sure to remove the form method and submit actions. You do not want the browser to submit the form. Submission will be handled through javascript.
Step 1: Our component is initially configured to submit to Formspree. Remove the action as follows:
before:
<form action="//formspree.io/info@bowtie.io" method="POST" class="text-left">
after:
<form class="text-left">
Step 2: Convert the submit input into an html button.
before:
<input id="Submit" class="button btn btn-info" name="Submit" type="submit" value="Create Email" />
after:
<button id="update_profile_submit" class="button btn btn-info"/>Submit</button>
Step 3: Make sure each of your input fields have an ID or selector you can easily reference in your javascript. For this example we will use the ID’s profile_name, profile_email, and profile_message
Step 4: Lastly, if you plan to user this information to build a marketing list, include an opt-in such as this example.
<label><input id="profile_listserve" type="checkbox" checked > Yes, I would like to be added to your mailing list.</label>
Using Javascript to update the browser profile.
We will be using the bowtie.user.profile function to define the following data in the users profile. This is what will be available for use when we set up our connection in Zapier.
Add your Javascript
We want to collect the proper input values, and pass them into the object we’ll use to update the profile. Define the variables and tie them to the IDs you created for each input in the previous step. You can add additional data to the object (such as the name of the form) to help manage multiple forms and connections in Zapier. I’ve also added an alert pop up to follow the submission.
$(function(){
  $("#update_profile_submit").on("click", function(){
    var profileName = $('#profile_name').val();
    var profileEmail = $('#profile_email').val();
    var profileMessage = $('#profile_message').val();
    var profileListserve = $('#profile_listserve:checked').val();

    var profileData = {
      name: profileName,
      email: profileEmail,
      message: profileMessage,
      form: "contact form about page", // use this to filter in Zapier
      listserve: profileListserve ? true : false,
    };

    // Submit Contact Form on AboutUS
    bowtie.user.profile(profileData, function(){
      alert("Thank you for contacting us.  We will be in touch shortly.");
    });
    return false;
  });
});
Testing the Form
You can test the form in your local build by running $ bowtie serve
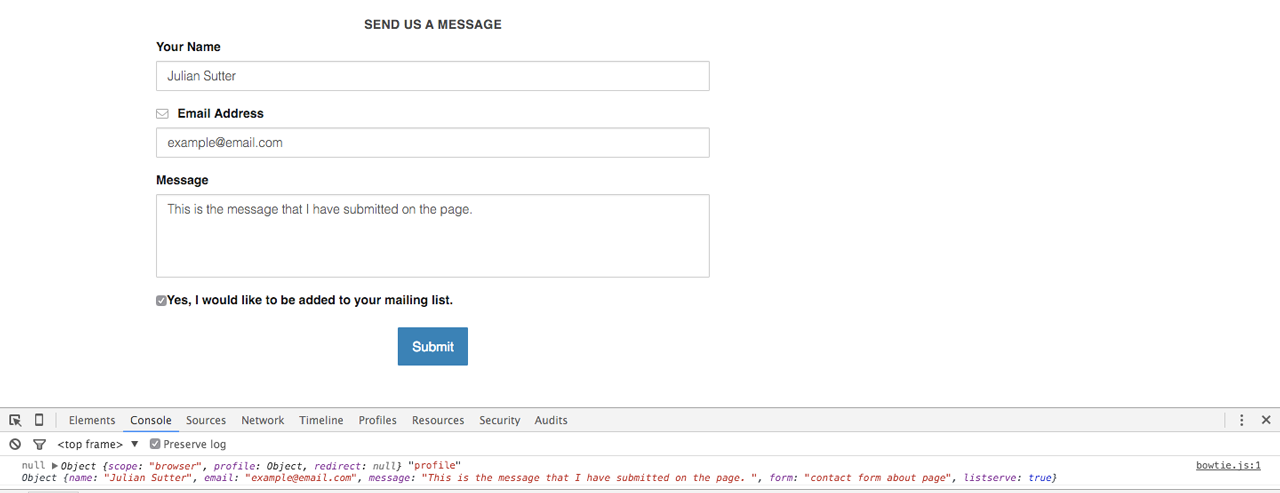
Visit your Project Dashboard on BowTie.io to find the user profile associated with your test session. If you are developing locally, make sure you have the test environment selected for your project.
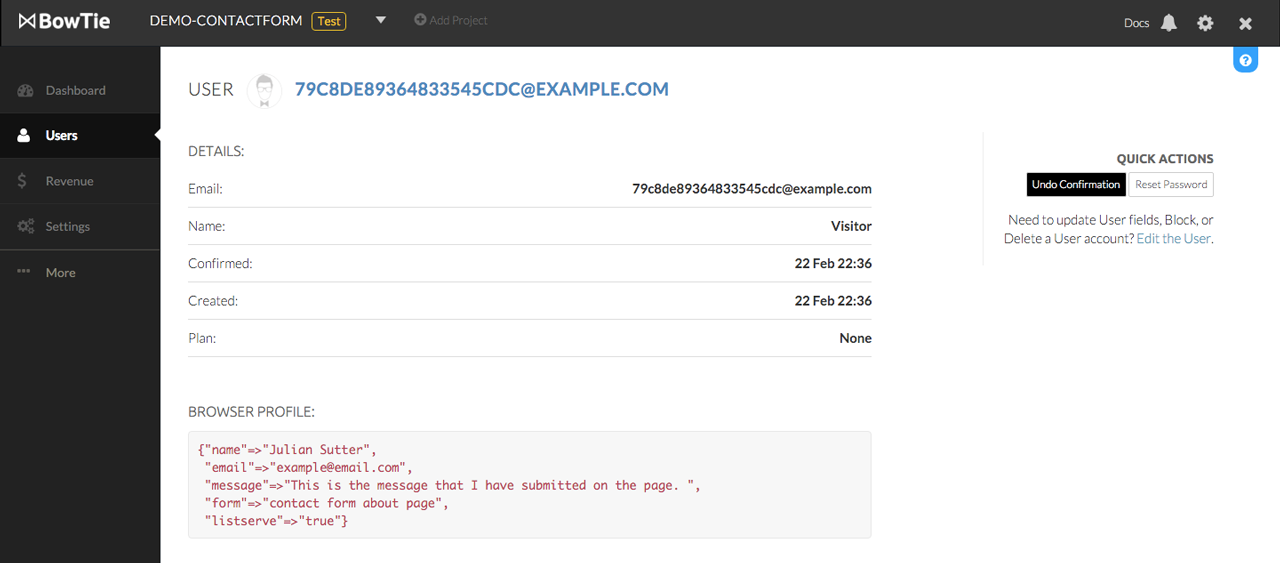
Note: If you update and resubmit the form, the visitor profile will be updated.
Configure Zapier
Zapier is a service designed to connect various applications through ‘Zaps’. Zaps at the most basic level contain a Trigger and an Action that results from that trigger. BowTie is able to trigger Zaps when a users profile is updated allowing us to push this data into other applications. Setup an account on Zapier.
Build a Zap
Set up BowTie as the trigger
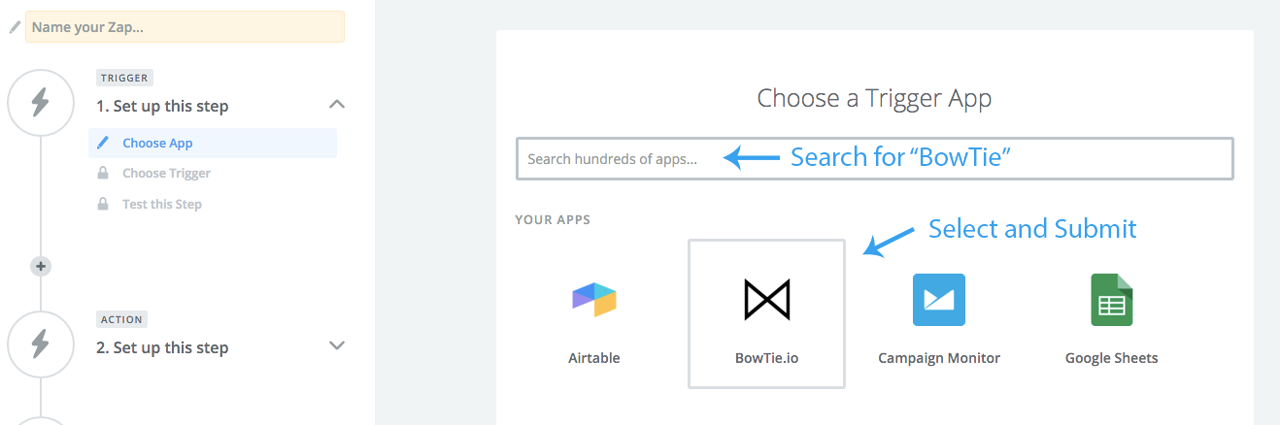
Step 1: In Zapier, create a new Zap and select BowTie as the trigger app.
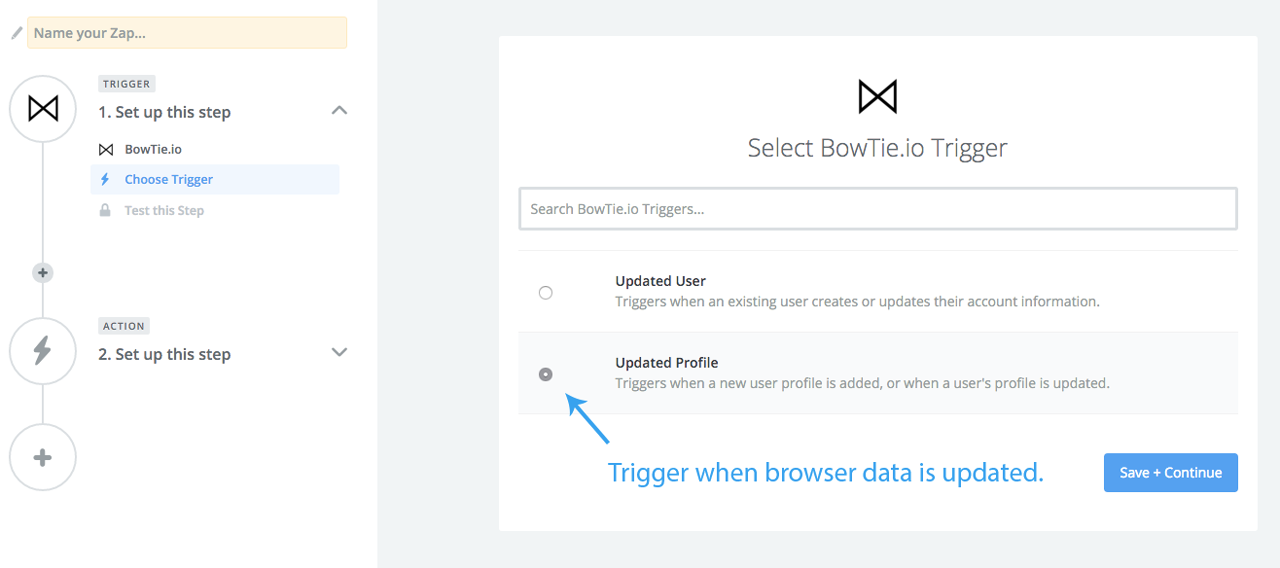
Step 2: Select “Update Profile” as the Trigger. This will push updated browser data to Zapier anytime a browser profile is updated.
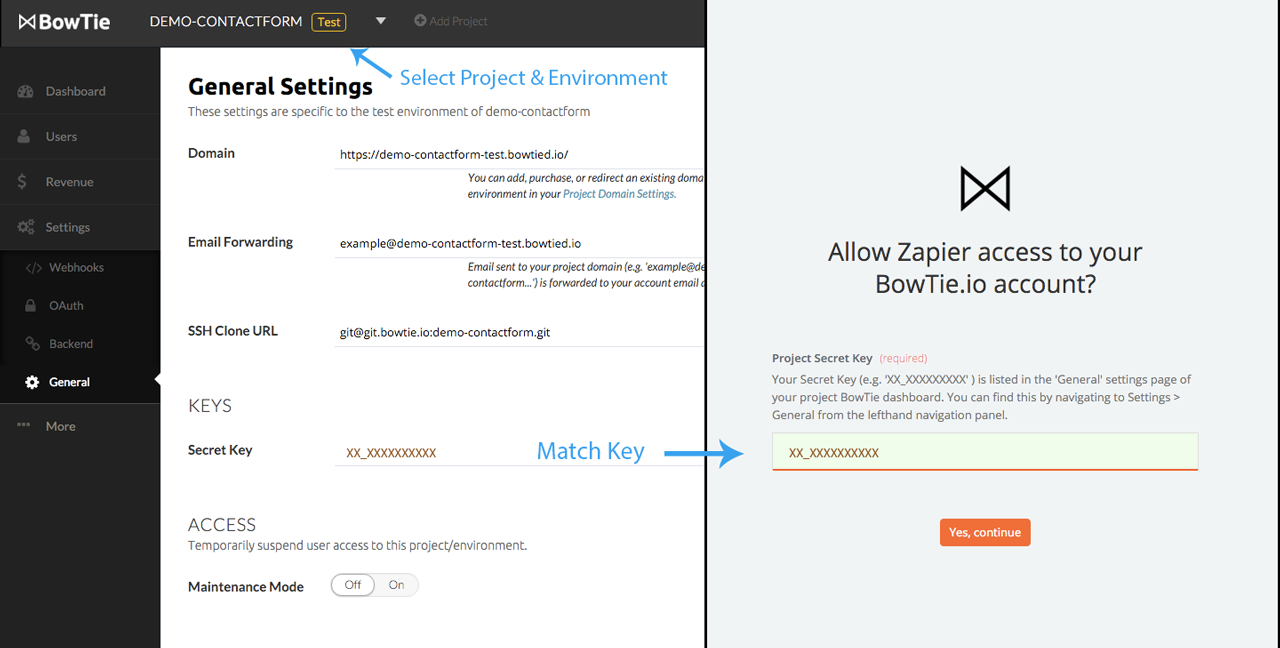
Step 3: Zapier will ask you which BowTie Account to use for this Zap. You can select a previously used account or setup a new one. It is important to note that each BowTie environment needs to be set up separately. For example: if you are testing locally, connect your test environment. You can always go back and connect the live environment later.
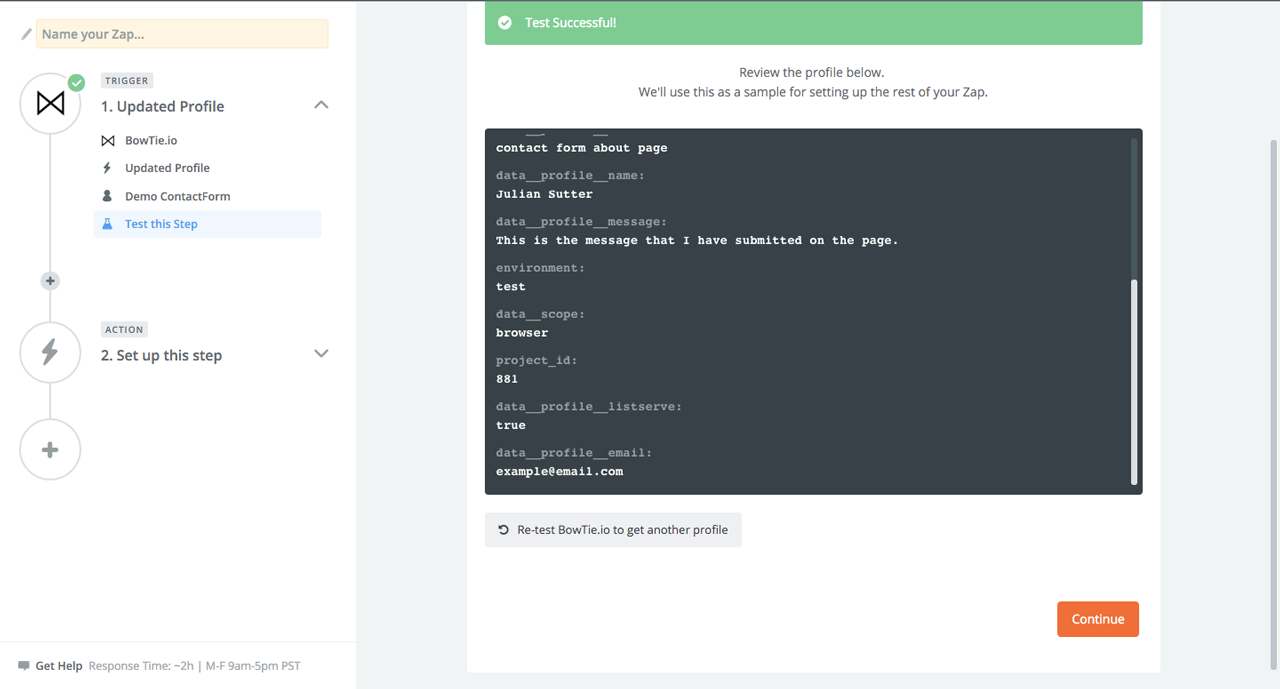
Step 4: Test the connection and sample the most recent data from BowTie. Data output from the BowTie trigger is what we can connect to other applications actions.
Sending an Email using Zapier
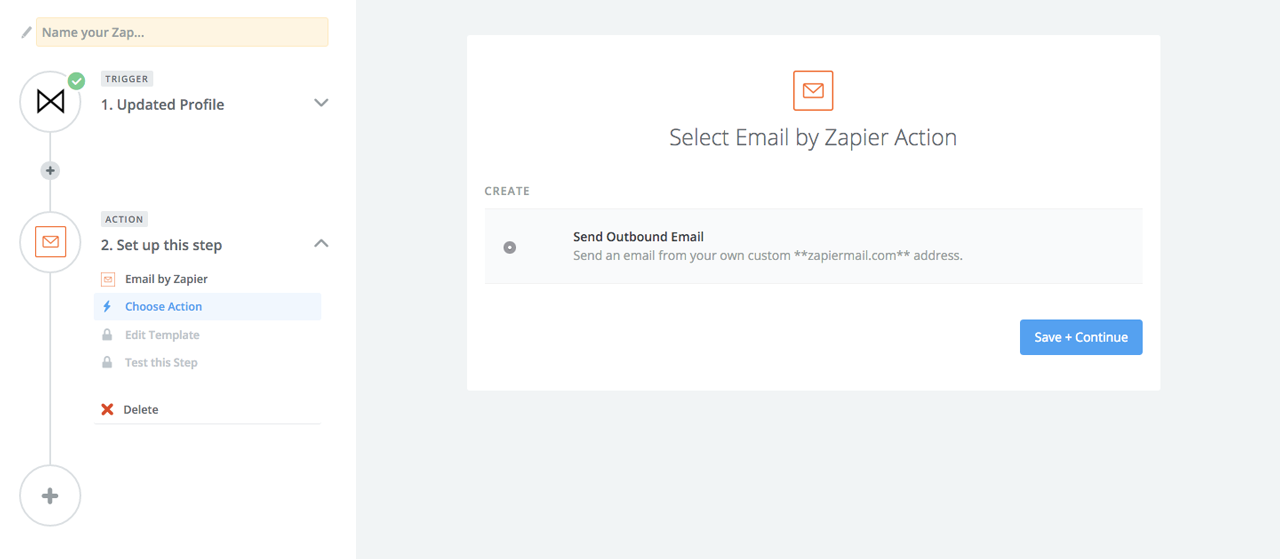
For the second part of this Zap we need to select an Action. We are going to use Email by Zapier to send us an email with the BowTie data.
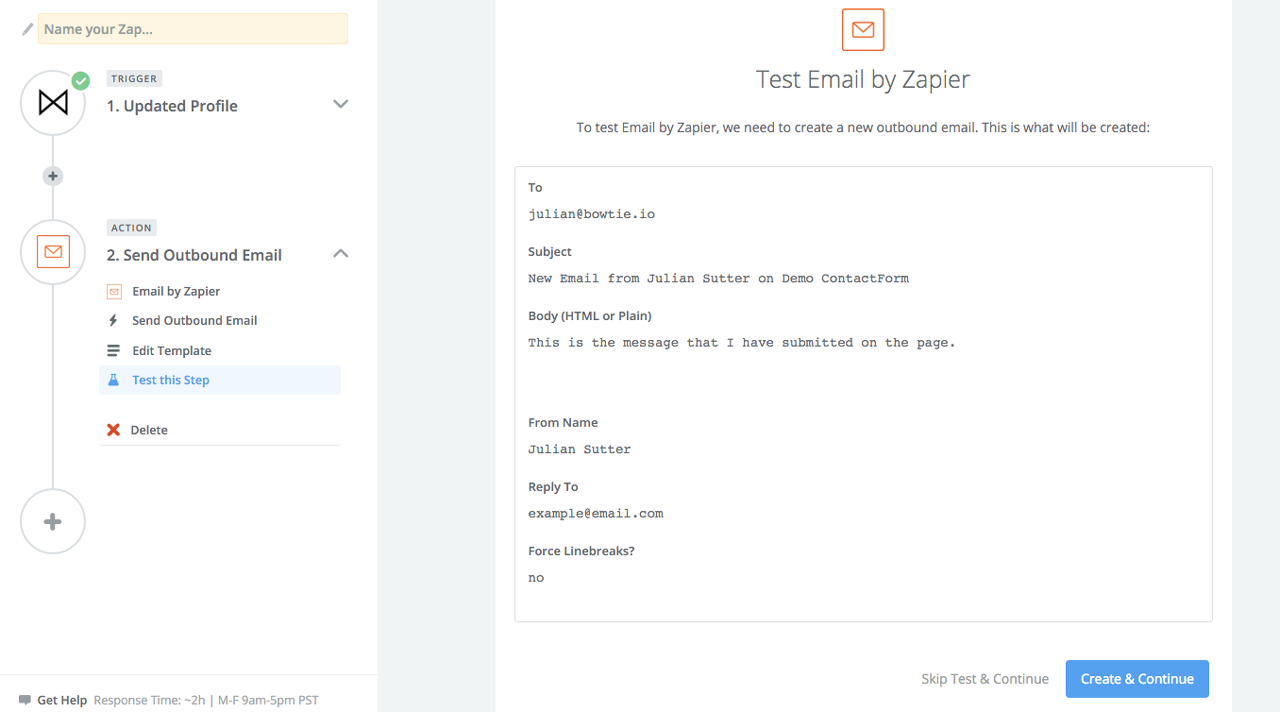
Step 1: Select ‘Email by Zapier’ as your action. Email by Zapier will provide an email template. This template will be used to build and send an email each time your BowTie trigger is fired.
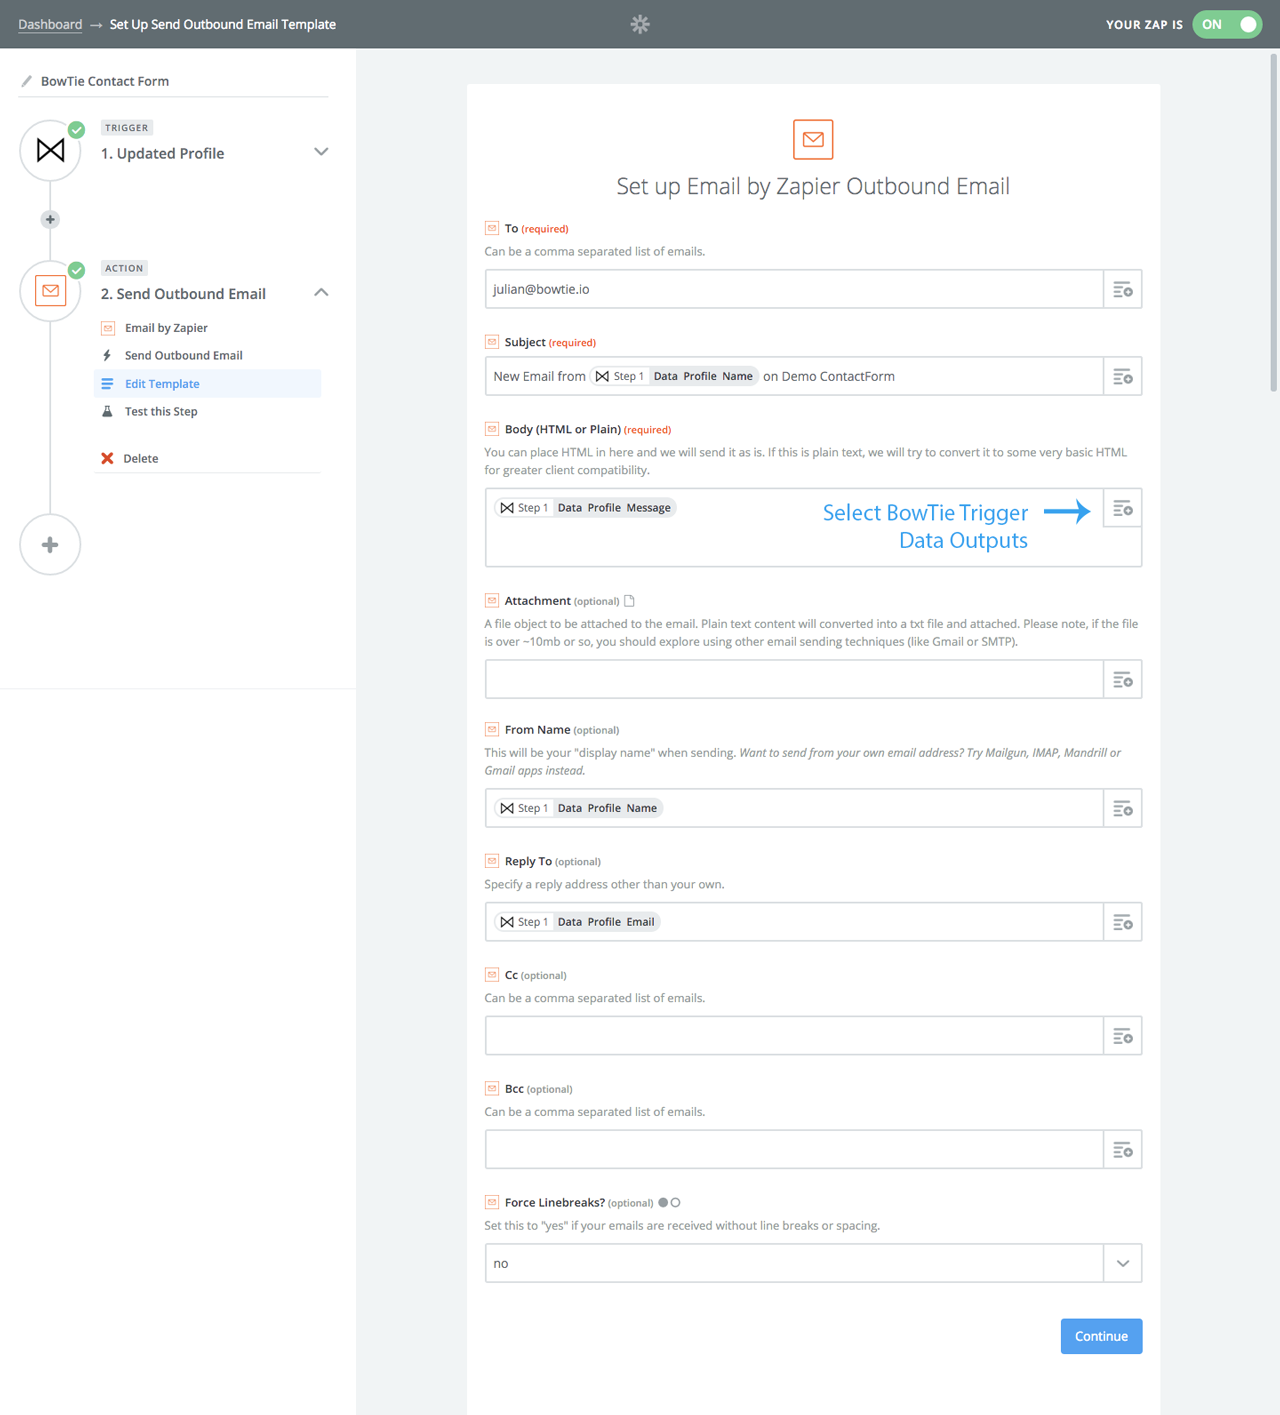
Step 2: Match the data output from the BowTie Trigger to any of the fields in the email template. In my example, I am connecting the profile name to the from field, profile email to the reply field, and profile message to the email message field.
Step 3: Save the template. Zapier will show you the email action output and then test send an email.
Email received!
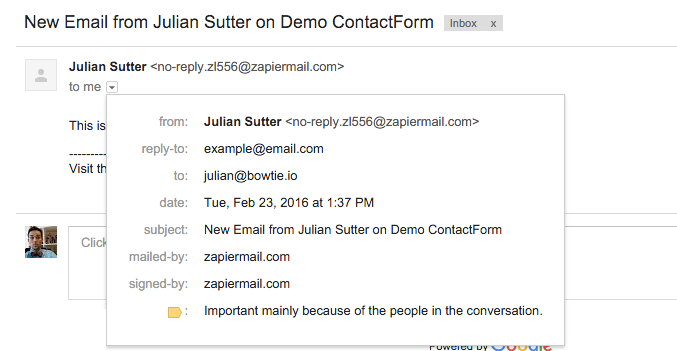
At this point you can test your form and look for the Zap output. Each time you submit new data through the browser profile, Zapier will trigger and send you an email.
Capture submitted email addresses into an email list using Multizap
A more powerful way to leverage Zapier with BowTie is to build Multizaps. Multizaps allow you to trigger multiple actions with the same trigger.
Lets extend what we just built to capture names and emails into a marketing list. For this example we will us Google Sheets to build our list, but you can replace the action with any number of supported apps. Here is a tutorial on connecting with mailchimp.
Set up a Filter to Verify User Opt-in
When setting up the form, we included a checkbox asking if users would like to be added to our marketing list. This passed through a true or false in the profile that we can use to filter further actions in this Zap. This way the action of adding a user to our list will only happen if they checked the opt-in box providing a true value.
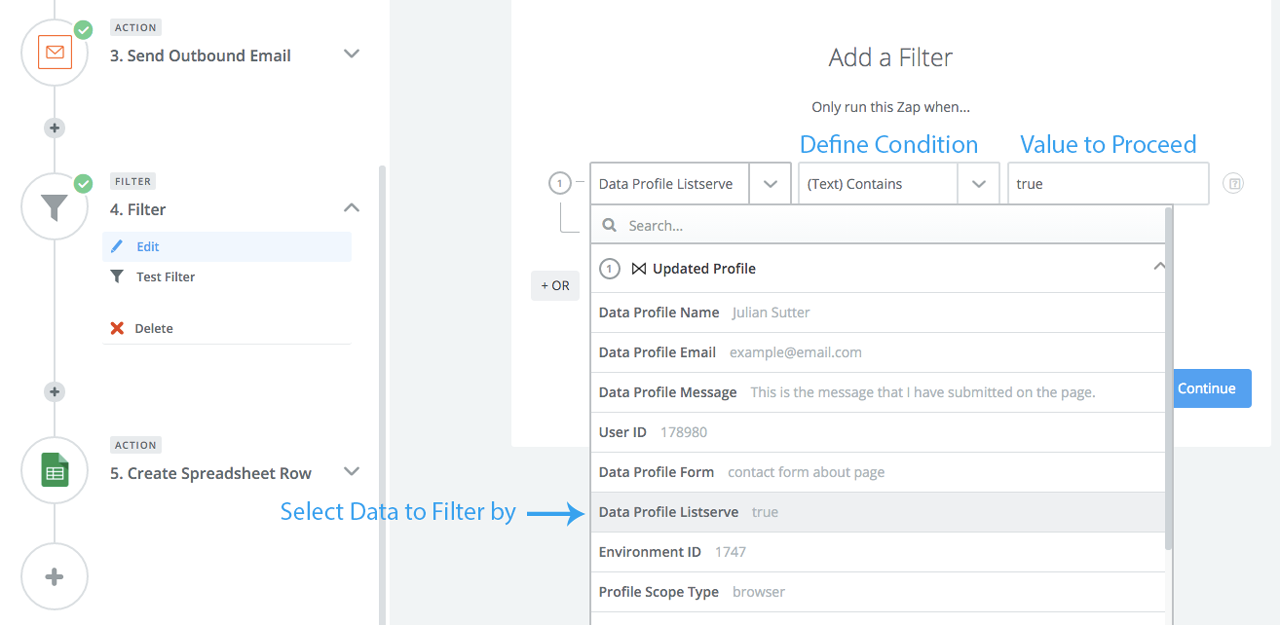
Filters contain three parts. The data field to filter by -> The Condition -> The Value to check against. In our example the filter checks if data_profile_listserve contains (text) “true”. If these conditions are met, the multizap will continue to our next action, adding a spreadsheet row.
Create a new spreadsheet entry
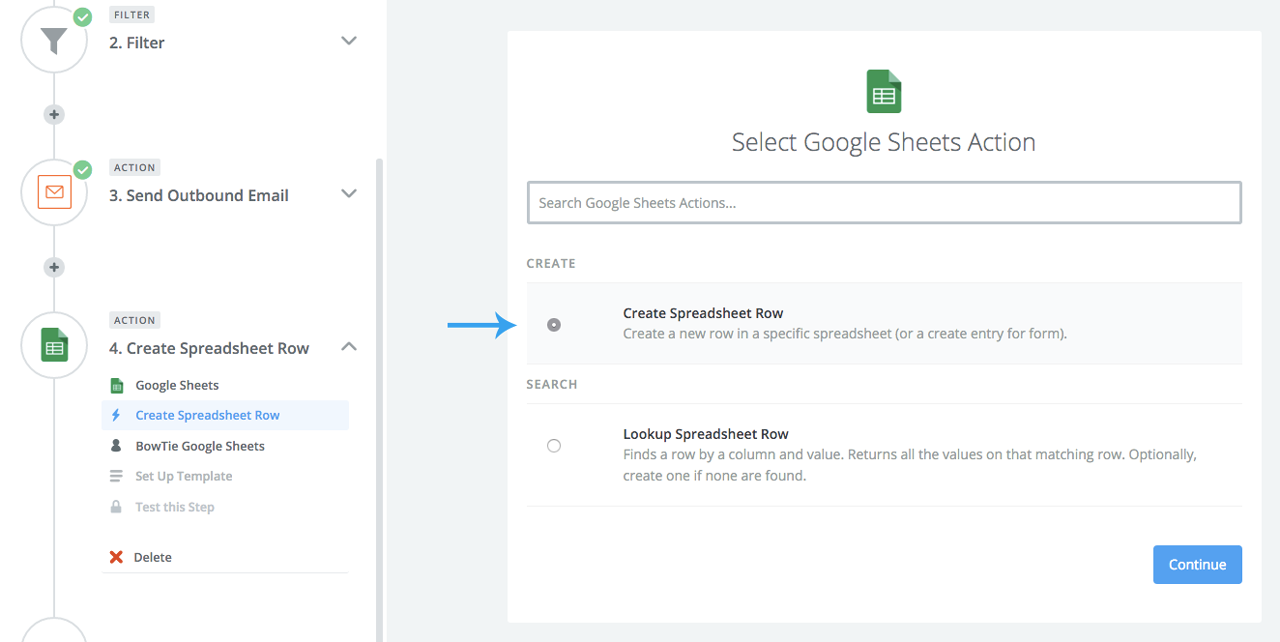
Add a new action to our zap, select Google sheets and Add a spreadsheet row. You will be prompted to connect your Google account, and then presented with a sheets template.
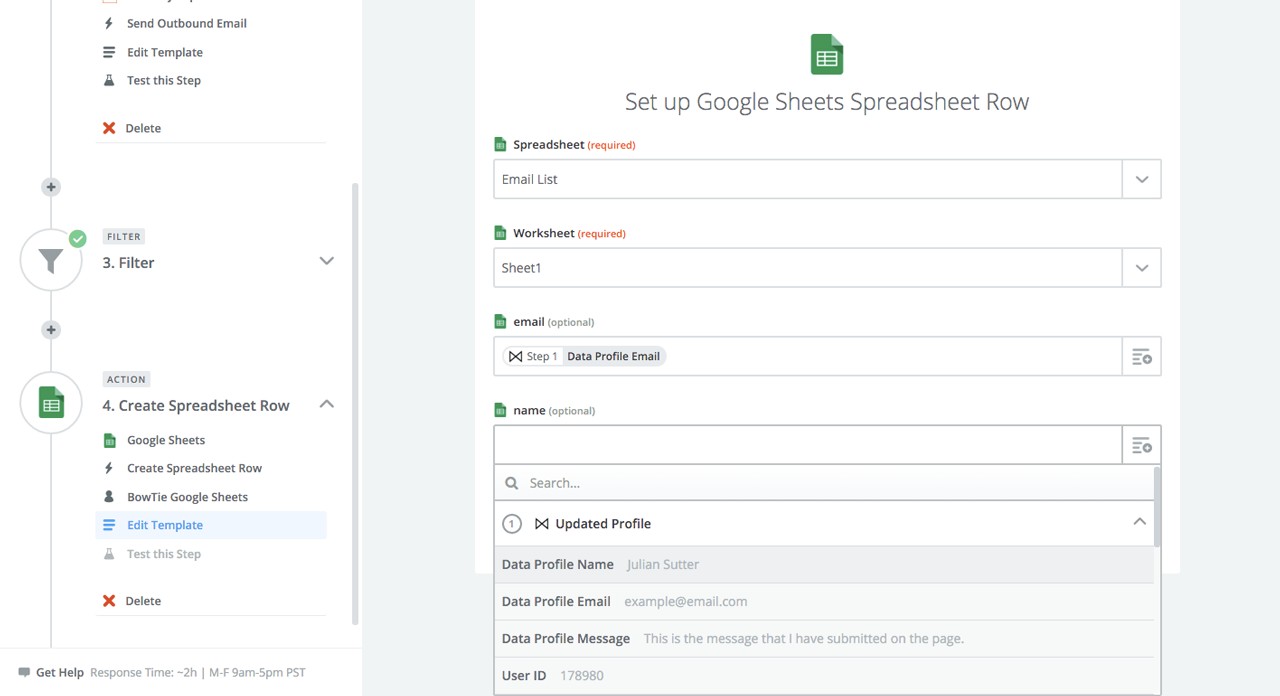
Select the File and sheet you would like to create new rows in. Zapier will then pull in the various columns and allow you to map the Step 1 data output from BowTie to each column. Save and test the action. You can the new row in Google sheets.

Taking Integration Further
As you can see in this example, using BowTie profile data to collect, update and push data into other applications is easy when using our Zapier integration. Checkout common BowTie Zaps and feel free to get creative. If you have an interesting application of BowTie and Zapier, let us know in the comments below.
If you are new to BowTie, check out our other Getting Started guides.
Getting Started with BowTie:
- Build a Landing Page in 5 minutes
- Using the BowTie Collection Editor
- Initial Configuration
- Setting Up Custom Domains
- Customizing and Styling BowTie frontend content
- Build a website with a pay wall
- Blogging with BowTie
- Launch a simple donation site
- Using BowTie’s User Profile system
- Build a Daily Deal Site with Jekyll Collections
- Using Jekyll Data to extend your site
- Adding BowTie users to MailChimp with Zapier
To keep up to date, follow us on twitter at @bowtie_io
Questions? Please comment! Thanks for your support and feedback.