If you’re using BowTie’s User Management system, you can leverage Zapier to connect to dozens of third party marketing, business management, and communication services. In this post I’ll show you how to connect your BowTie project to Zapier, and build an example integration to Mailchimp.
Building a Zapier Zap
BowTie enables you to easily collect email addresses for Users and Prospects. We handle transactional email with your users (password resets, etc.), but don’t offer direct email marketing features. Zapier allows you to quickly send your BowTie users to a popular mailing list software, such as Mailchimp or Campaign Monitor, without writing any code.
To follow along with this demo, you’ll need an existing BowTie project, a Zapier account, and Mailchimp account.
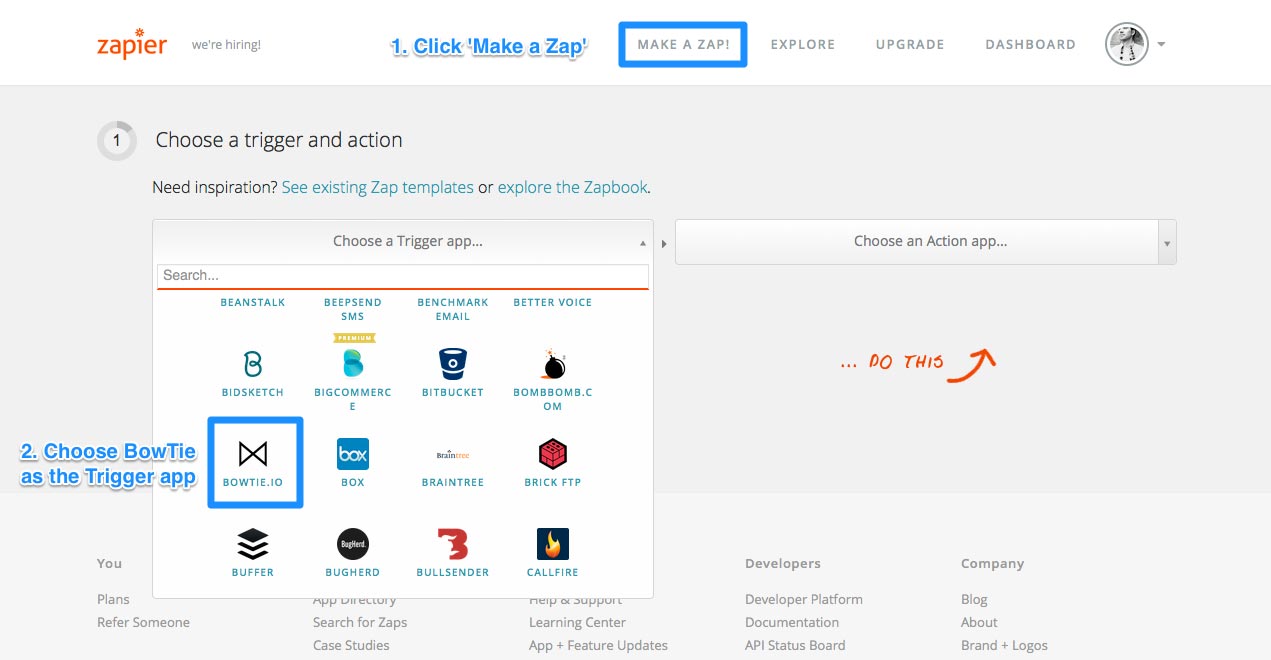
Start by creating an account and logging into Zapier. To begin building your ‘Zap’, click the link in the top menu. Next, locate BowTie.io from the Trigger option dropdown.
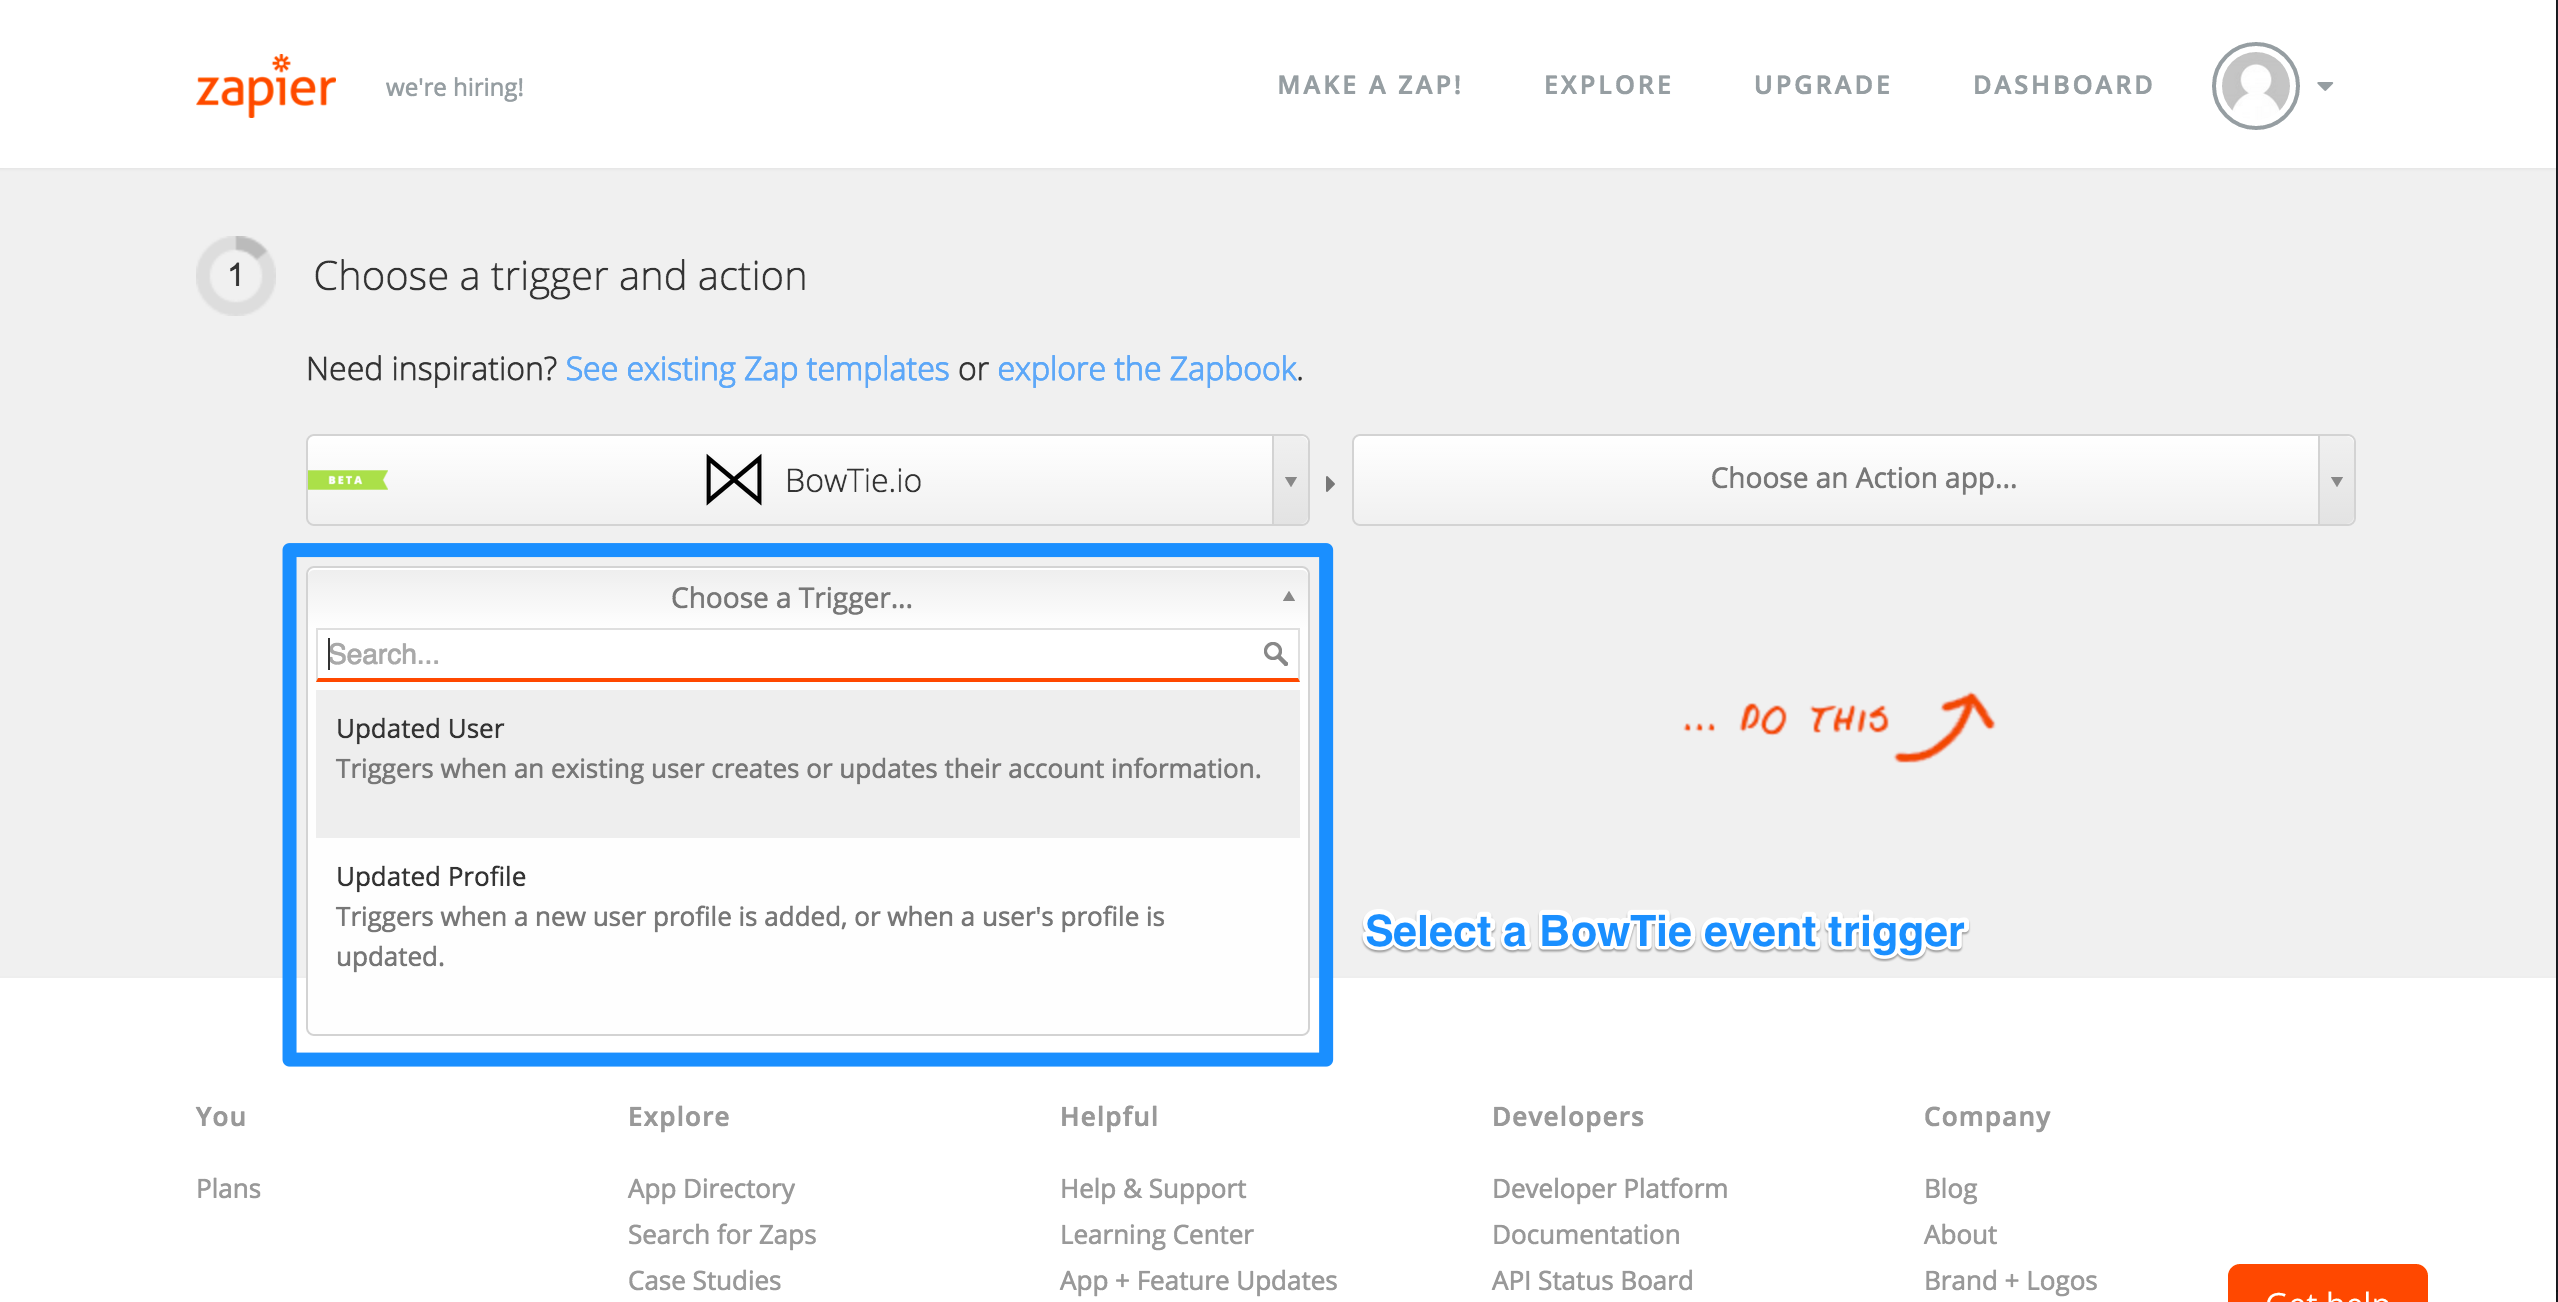
Next, choose the Trigger event you would like to use. BowTie provides triggers based on updates to Users or Profiles. For this example, we will use the ‘Updated User’ trigger, which provides information from the BowTie user API when a new user or prospect is created or updated on our project site.
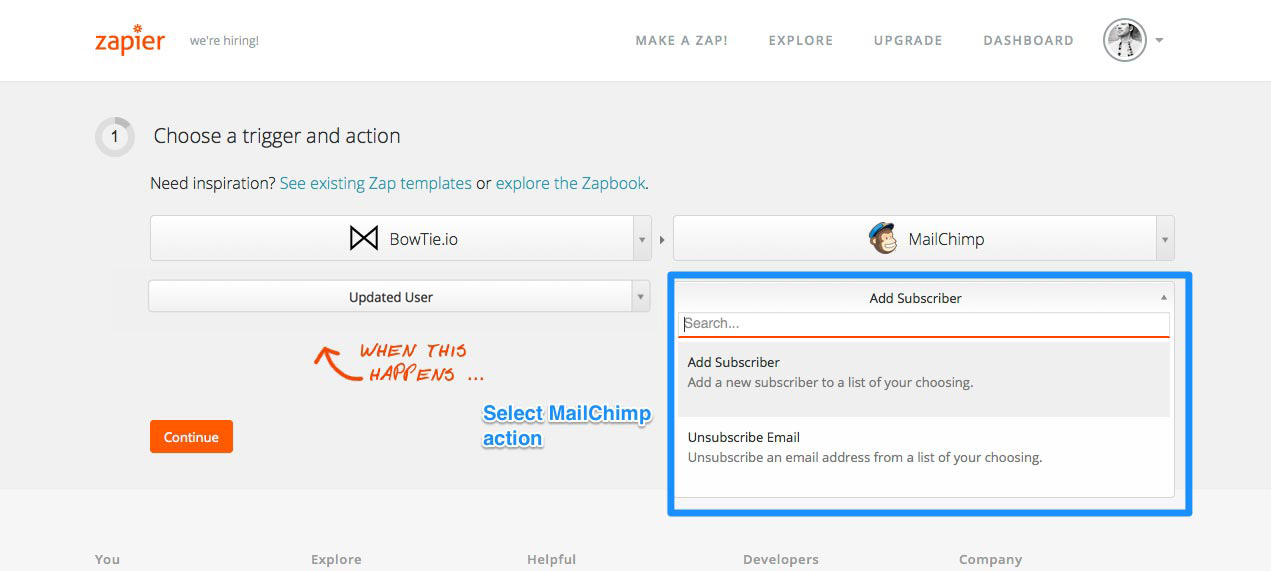
After selecting your trigger, you need to select the desired outcome action. Choose MailChimp from the action dropdown, then select the appropriate action you want to undertake. Since we’ll be adding new users to a MailChimp list, our MailChimp action is ‘Add Subscriber’.
Connecting Your BowTie Project to Zapier
The next step will prompt you to make the connection to BowTie (and for this example, MailChip). If you’ve connected your account previously, select your existing account from the available dropdown in Zapier, or add a new connection.
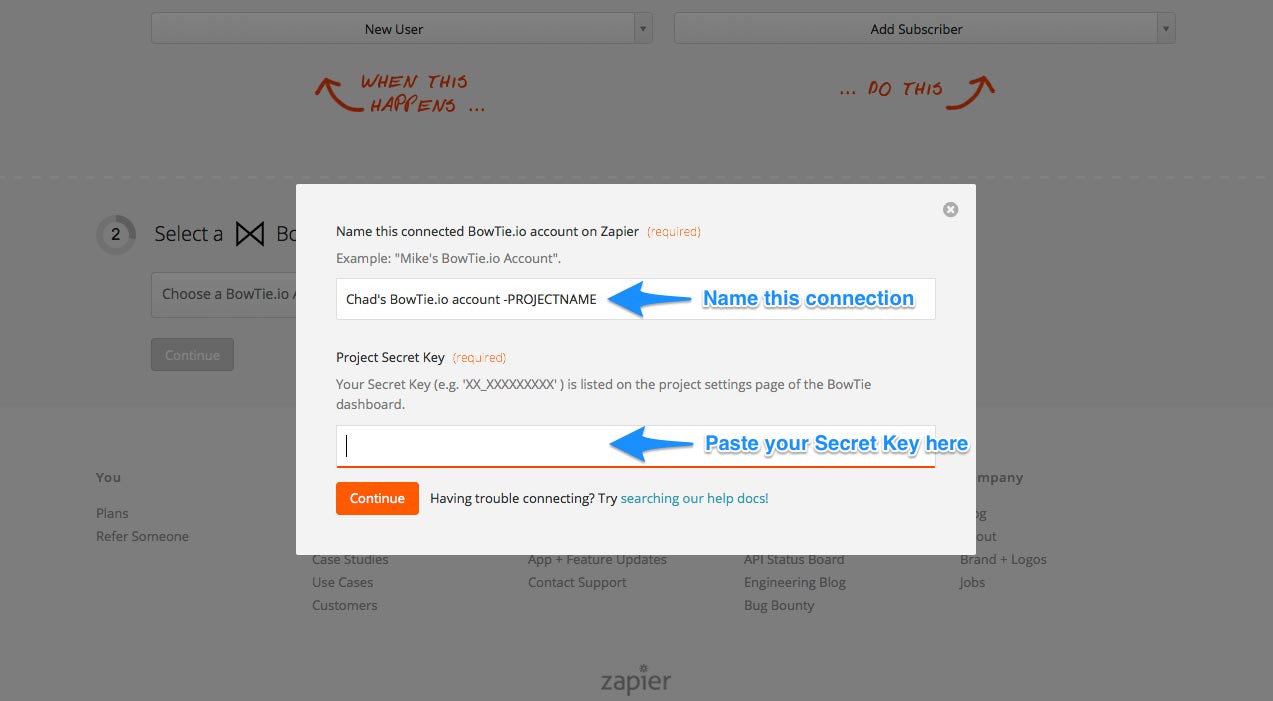
BowTie connects to Zapier using your project Secret Key. You can connect several BowTie projects/environments to the same Zapier account, and build and use different Zaps with each.
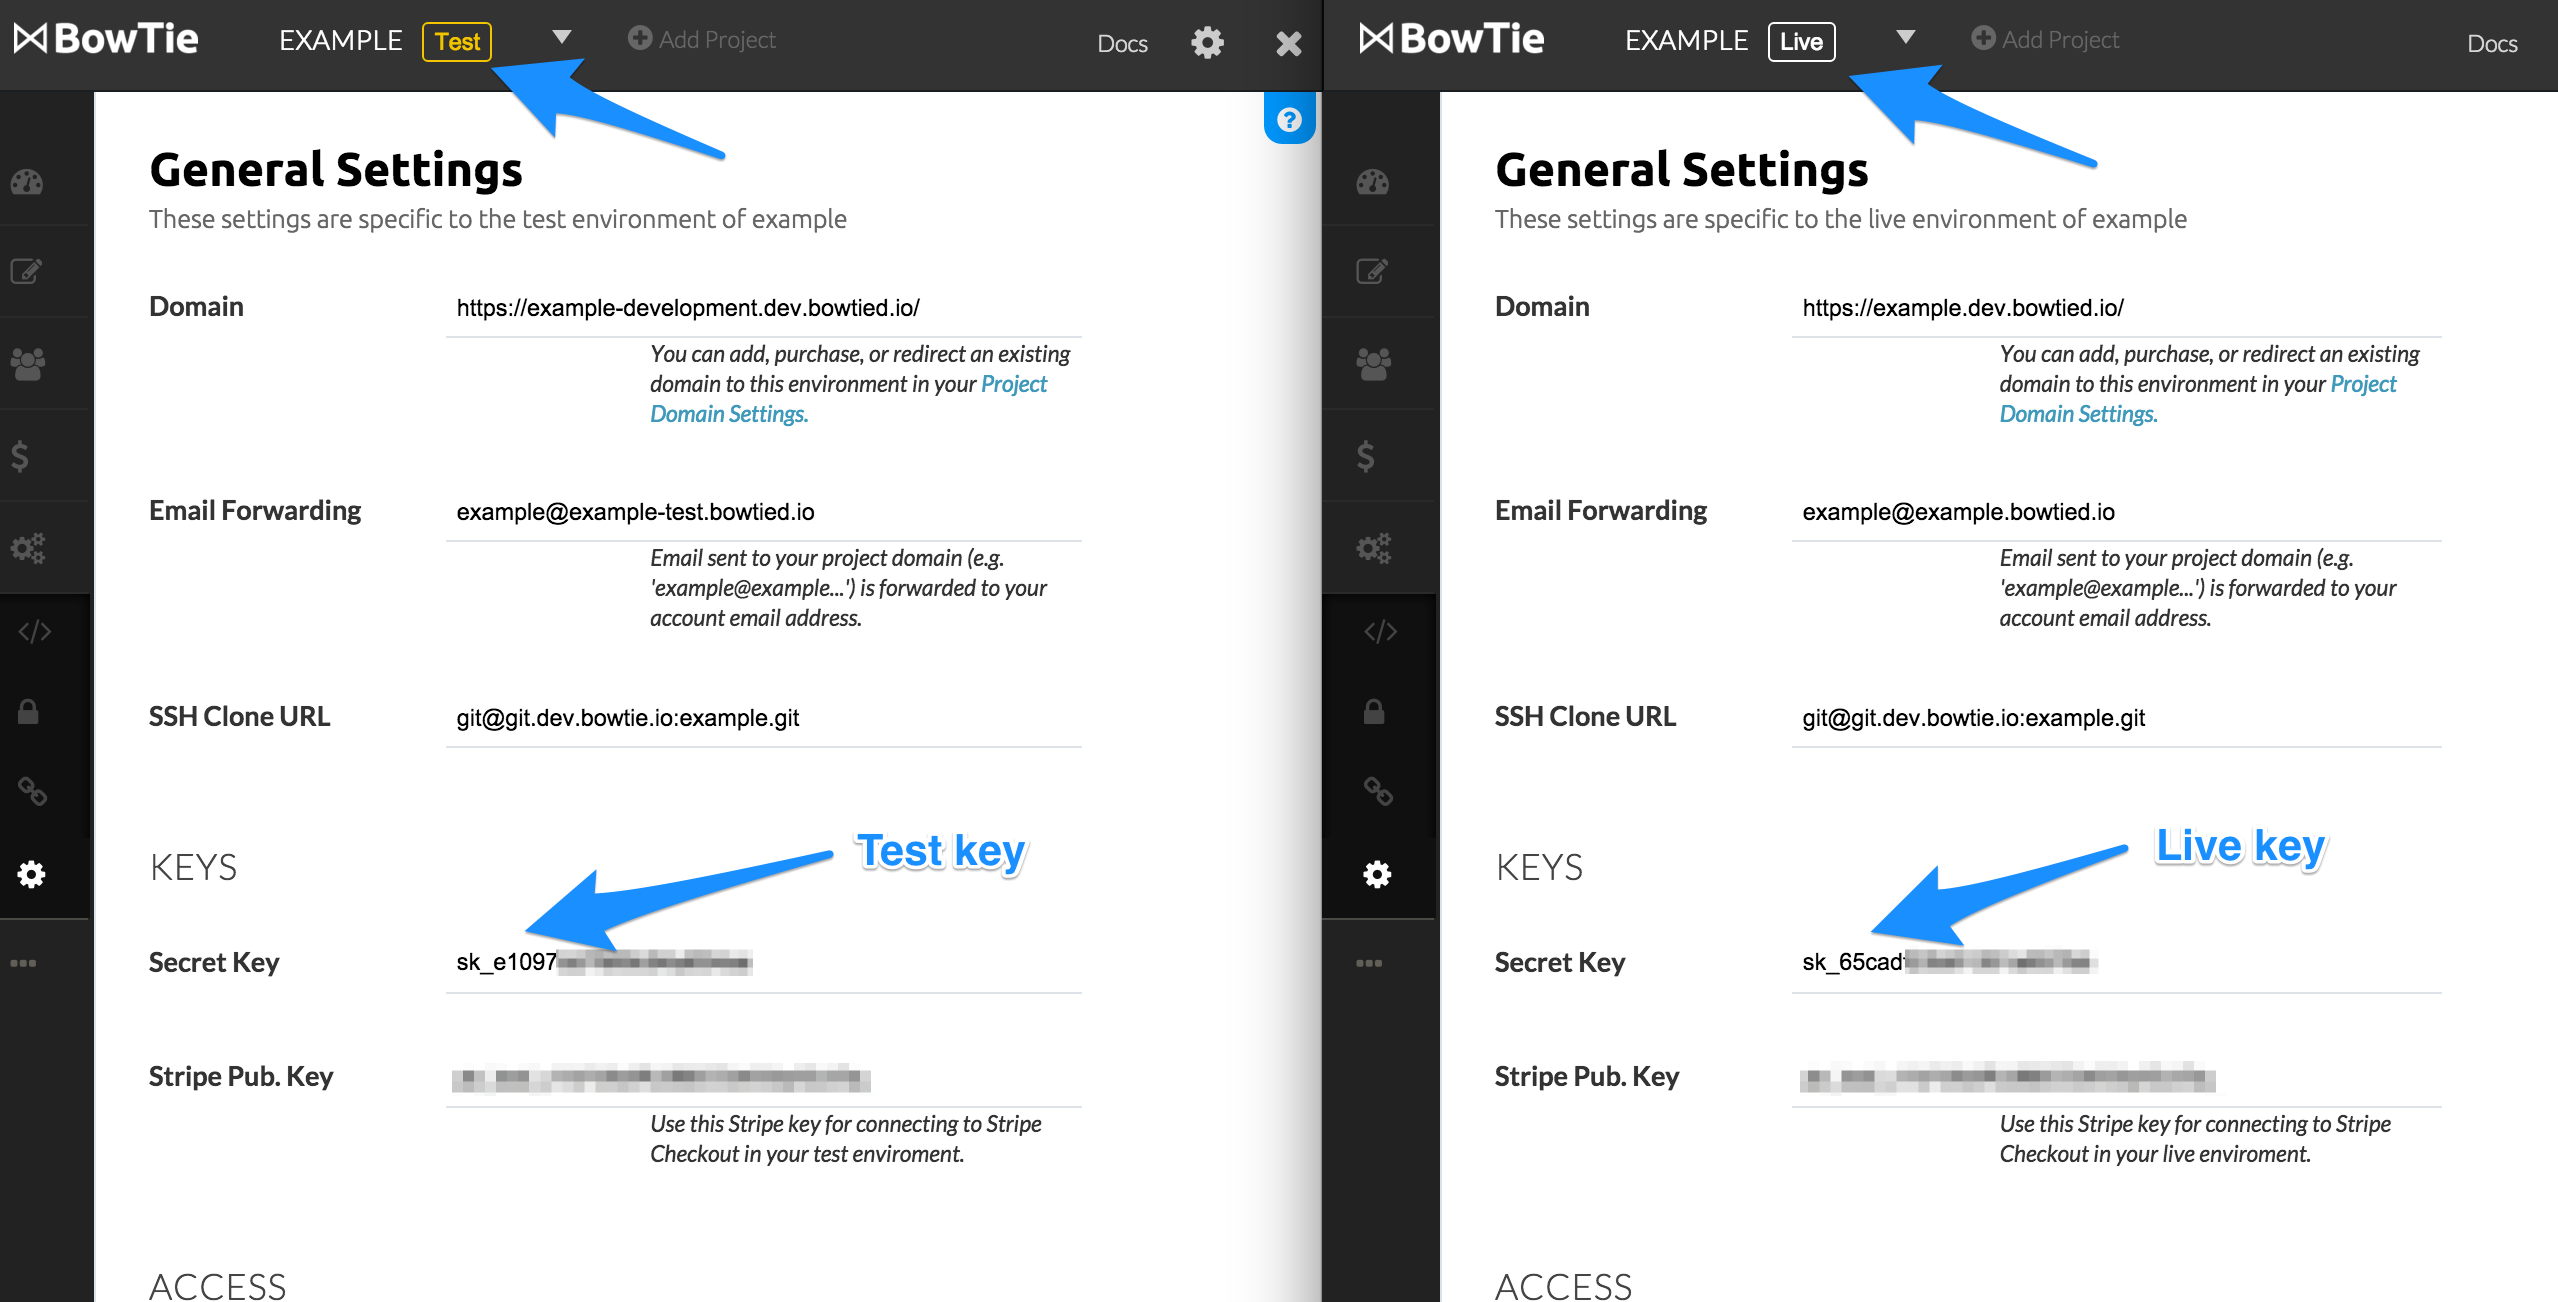
Locate your Secret Key under ‘Settings’ > ‘General’ in your Bowtie Dashboard.
Your BowTie project has two environments - Test and Live. Be sure to note and select the desired environment before copying your key into Zapier.
Project secret keys are environment specific. User data will not pass between environments.
We recommend naming your connection with a reference to the project, and optionally, the selected environment.
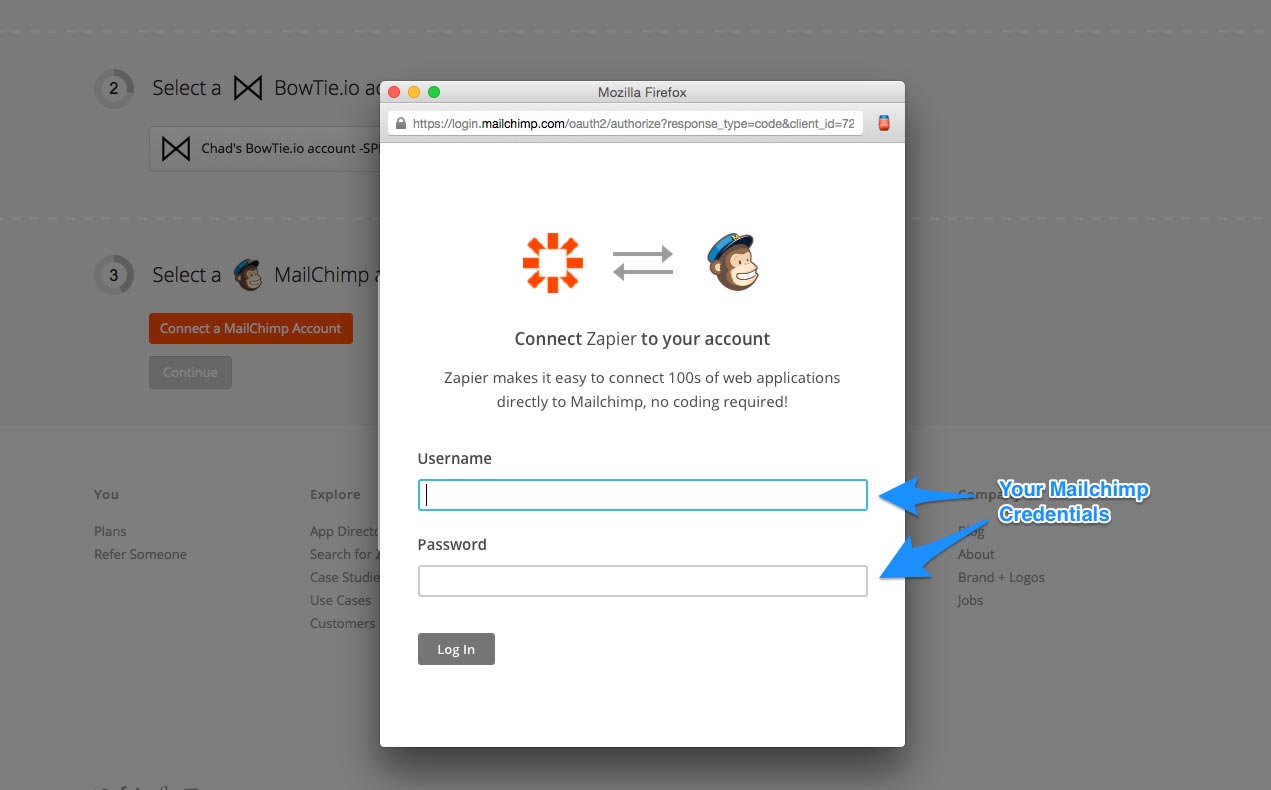
MailChip will connect via OAuth. Enter your MailChimp account credentials when the pop-up appears. If the connection is successful you will receive a notice on the page.
Using Filters
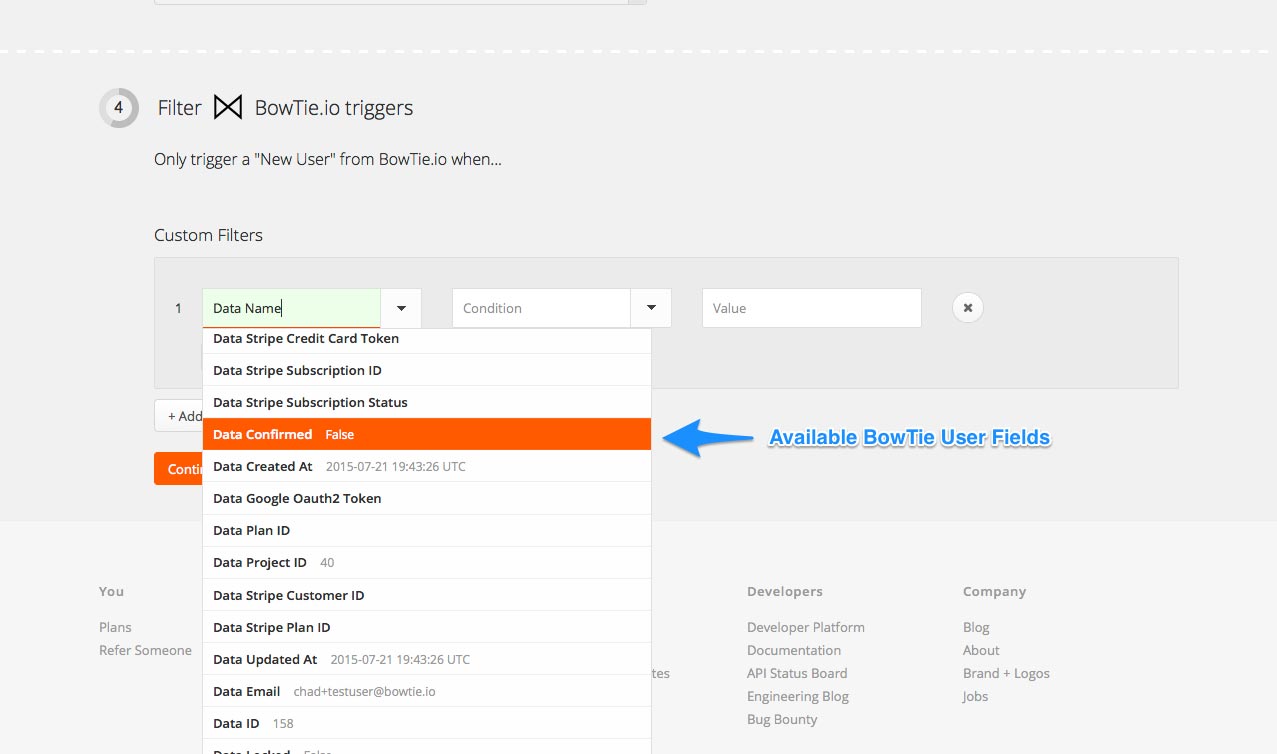
The next step will prompt you to select and/or filter the available data coming from the BowTie API. This step is optional. For this example, no filter was used. We’ll be sending every new user (of any status/type) to our MailChimp list.
Filters allow you to send more specific information to the action API. For example, you can filter your BowTie users based on their activity, type, and access to other services like our Stripe subscription integration.
A common filter for our example use case would be to differentiate between BowTie Users based on the status field. A user with the status of ‘visitor’ has come to your site but hasn’t registered, whereas a user with status type ‘registered’ has created a full user record.
Matching Fields
Select an existing Mailchimp list from the ‘List’ dropdown. If you don’t have a list, you can open MailChimp in another tab and create a list right now, then return to Zapier and select it from the dropdown.
We’ll be matching the BowTie user email address by clicking the ‘Insert BowTie Fields’ button and choosing Data Email.
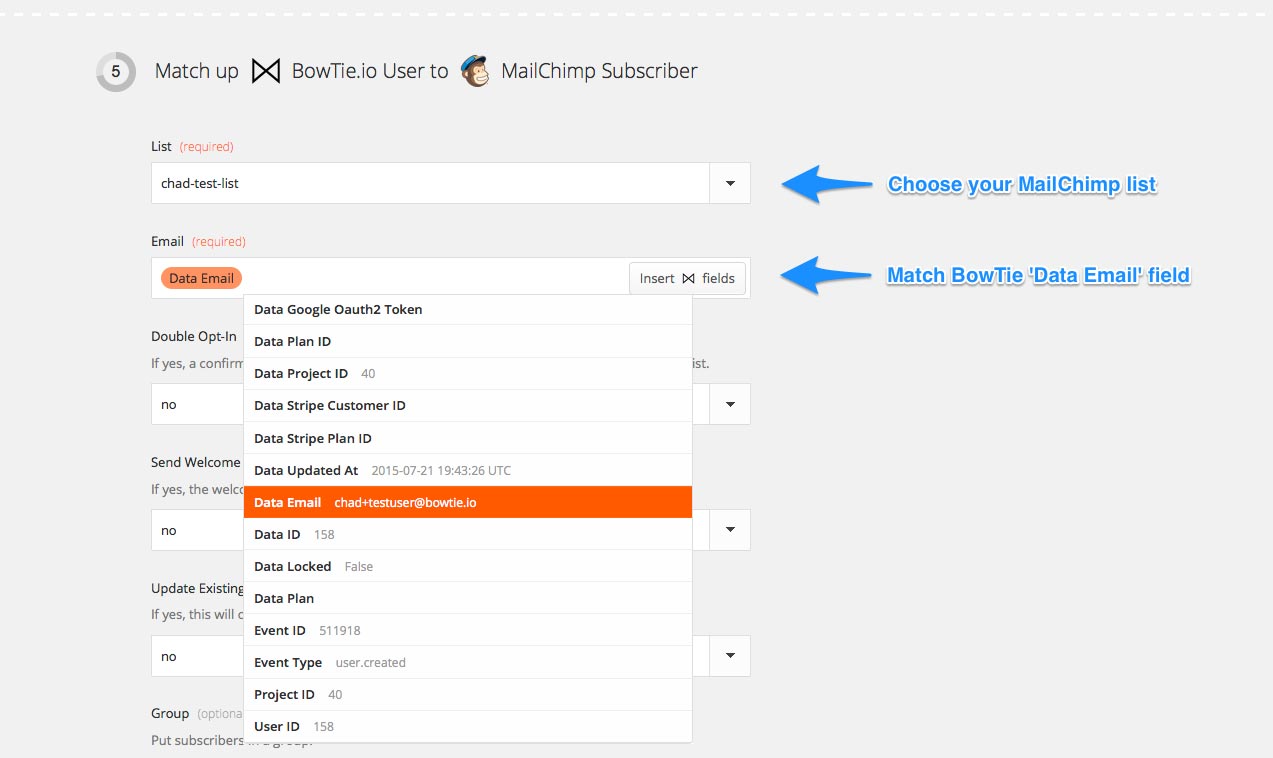
Finally, fill any other fields you would like to match, and add any other MailChimp options you wish to leverage (such as double opt-in or a Welcome Email) and click continue.
Testing your BowTie Zapier Integration
At this point, you can test your new Zap! Click the ‘Test’ button, then send the test with your sample data.
If you haven’t created any users on your project, you should see a pop-up that says ‘We couldn’t get any samples from BowTie.io’
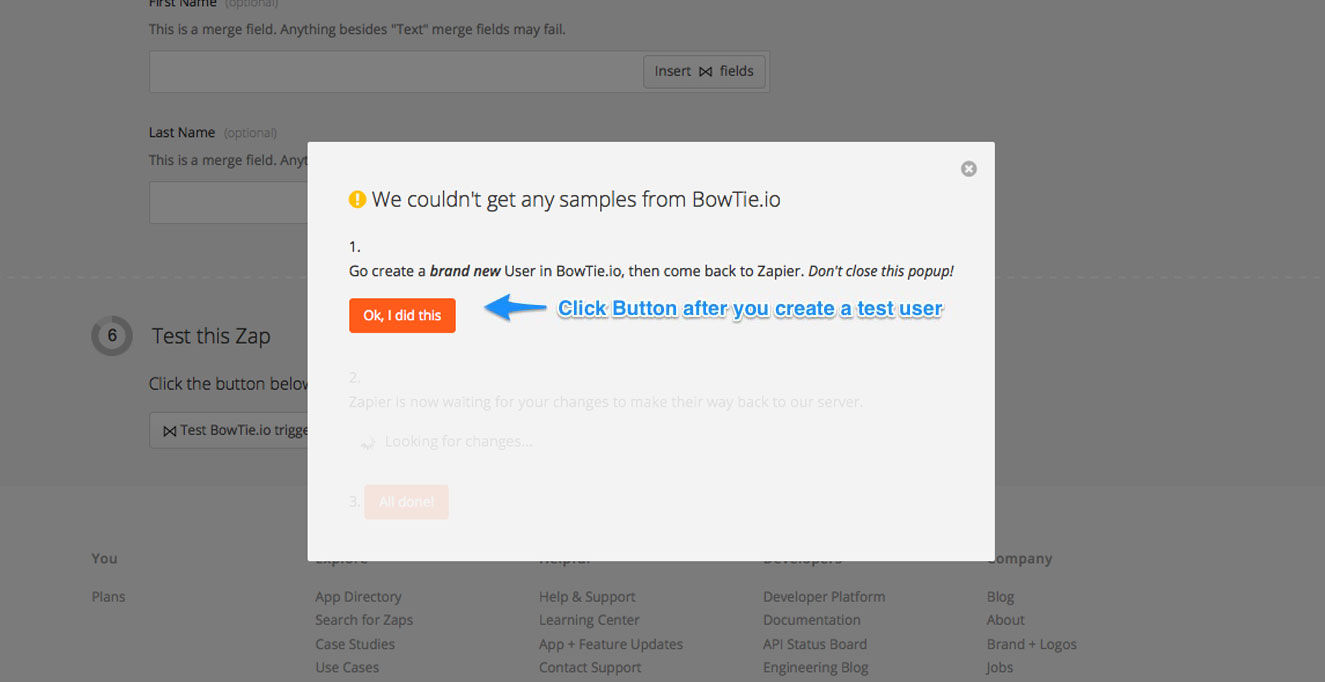
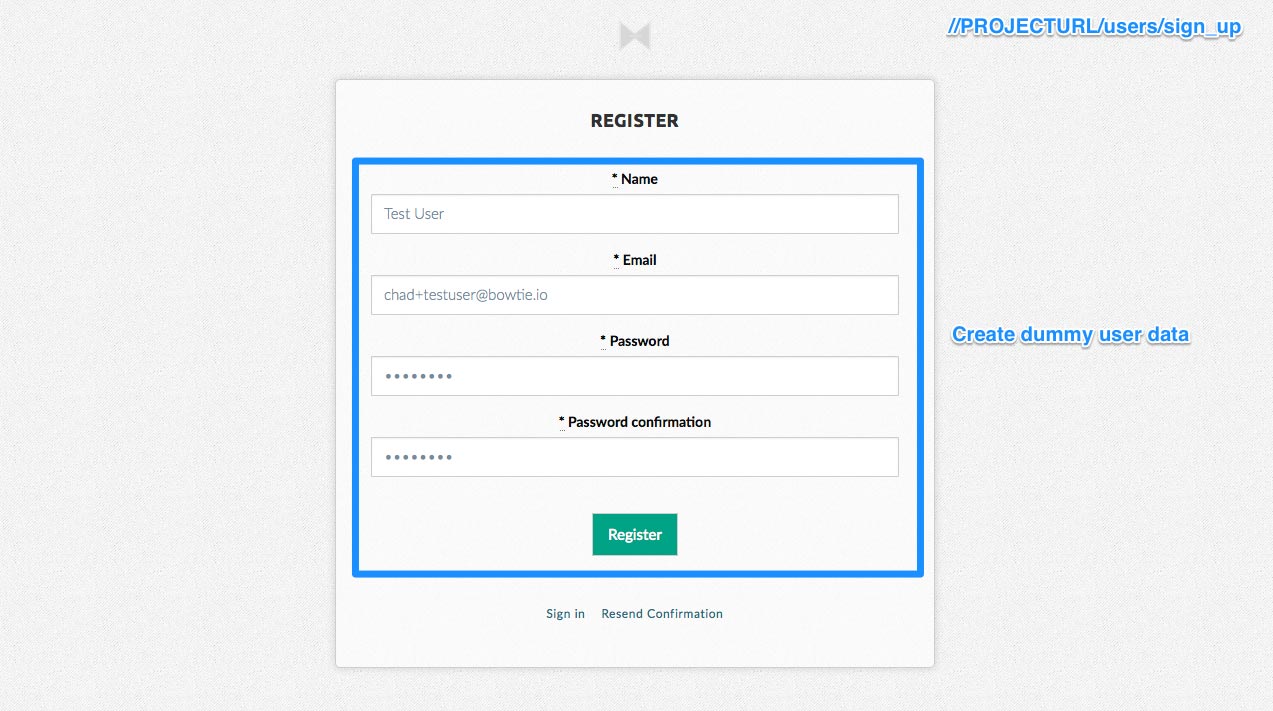
Open a new tab, go to your customer facing BowTie project (visit /PROJECTURL/users/sign_up ), and create a new test user.
Now, return to your Zapier tab and click the ‘Okay, I did this’ button. If it was successful you will receive notice that the data was received and can close the pop up.
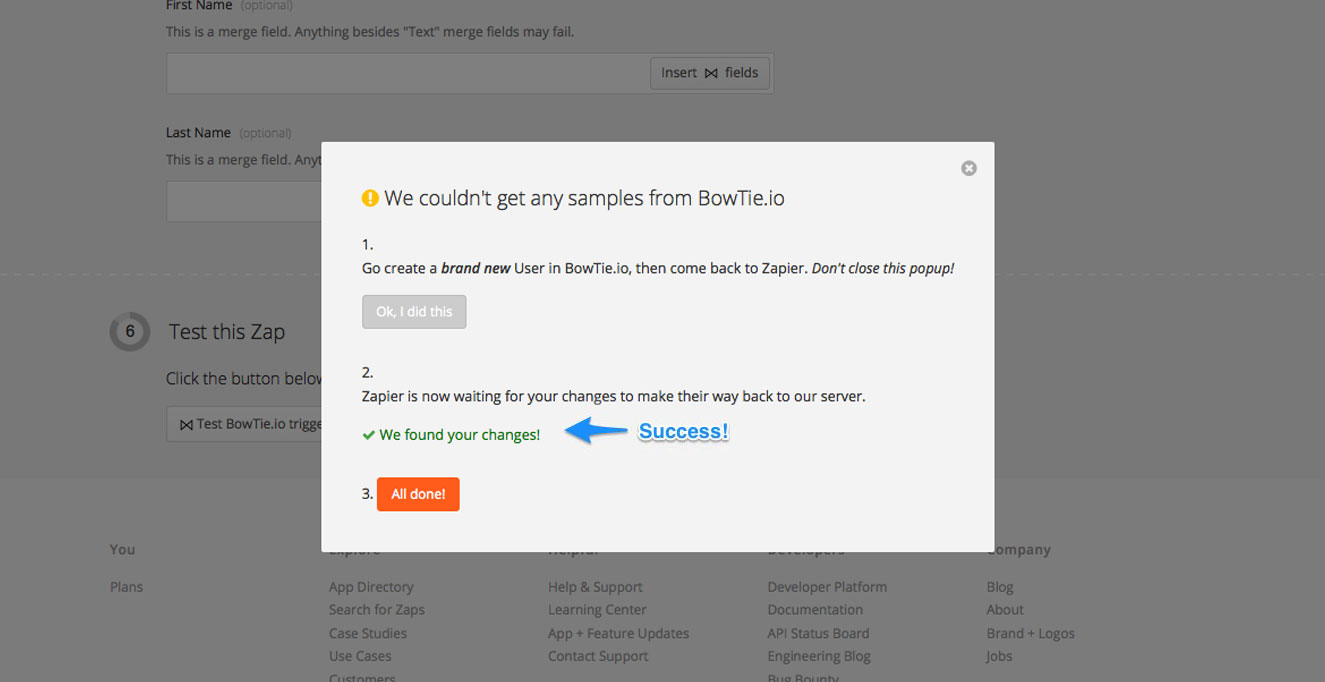
If the test is successful, you will receive notice on screen, and your BowTie test user’s email address should now appear in your MailChimp list as seen below. Note, it may take a few minutes to populate, but Zapier will toss an error at you if the integration fails.
Your user in Mailchimp
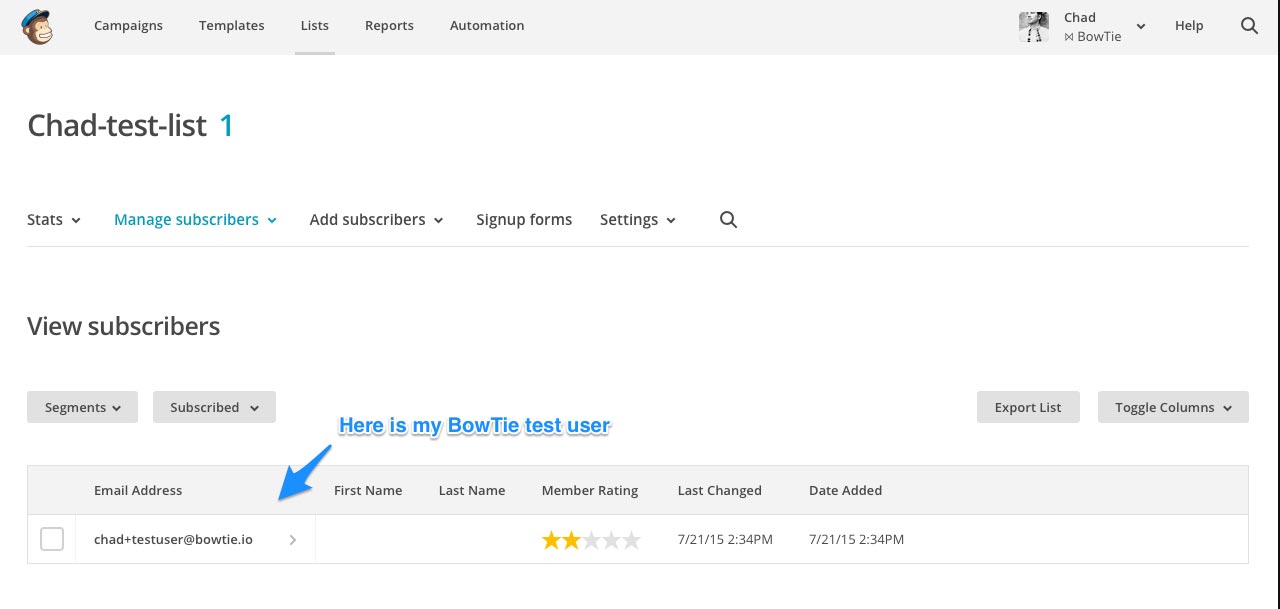
Congratulations! Your BowTie project is now sending new prospects and users to Mailchimp via Zapier.
If you’d like to see our pre-built templates on GitHub, check them out here. For even more options, read our Getting Started series:
If you are new to BowTie, check out our other Getting Started guides.
Getting Started with BowTie:
- Build a Landing Page in 5 minutes
- Using the BowTie Collection Editor
- Initial Configuration
- Setting Up Custom Domains
- Customizing and Styling BowTie frontend content
- Build a website with a pay wall
- Blogging with BowTie
- Launch a simple donation site
- Using BowTie’s User Profile system
- Build a Daily Deal Site with Jekyll Collections
- Using Jekyll Data to extend your site
- Adding BowTie users to MailChimp with Zapier
To keep up to date, follow us on twitter at @bowtie_io
Questions? Please comment! Thanks for your support and feedback.