User Profiles are one of the my favorite BowTie features. We store every user record in our database so you don’t have to maintain one, and give you access to your users with simple APIs. User Profiles contain a number of predefined values, and can be customized to suit your needs.
What is a User “Profile”?
A User “Profile” on BowTie refers to certain information associated with a user record created by your BowTie site. Users can register for your site via the hosted registration page (found at ‘YOURSITE/users/sign_up’) or through our oAuth2 implementation, thoroughly outlined here. Registered Users, along with visitors(users that don’t register) will be tracked in your BowTie dashboard under the ‘Customers’ tab on the lefthand navigation.
Profile Types
There are several types of User Profiles. Each one tracks something specific about the people that interact with your site. Like most User data, User Profiles are Environment Specific, so depending on which site the user is interacting with(Test or Live), the user record will show under it’s corresponding environment in your BowTie dashboard.
User
A User on your BowTie site is someone who has gone through the registration process and has an active account. These Users will appear in your BowTie dashboard, and will have associated information stored along with their profile, that will be outlined below.
Visitors
Visitor records will appear in your BowTie dashboard when a person visits your site, but doesn’t perform any action that would associate persisting data with their profile. These records will disappear after 24 hours if no User Profile data becomes associated with them. However, if the visiting User performs an action linked to their account, say a purchase of some kind, their visitor record will persist.
Browser
Every BowTie User can be given additional ‘Browser Profile’ attributes, if you assign them. You can assign browser profile attributes to users through the HTTP or Javascript APIs. For example, you can use the Browser Profile to store a user avatar, or a unique text string. Visitors who have browser profile data associated with their user accounts will be wiped after 24 hours, similar to visitors with no information associated with them. If the visitor continues on to make a purchase, for example, the user record will persist.
Purchases
When you connect to our Stripe integration and set up ‘Products’, you are enabling the Purchases Profile, which is populated with records related to User purchases. This is done through the purchase call in the Javascript API, triggered when you accept a Stripe payment. If you’d like a visual explanation of how to set up ‘Products’ and accept payments through Stripe, read this user guide.
Usage
You can access Users and their profile data using the two methods outlined below; our Javascript API, or for more advanced use cases, the HTTP API.
Javascript API
You can access User Profile data with our client side Javascript API, which will write/retrieve the current user’s profile information.
Browser Profile Example
For this example, I’ll be accessing and adding to a User Profile on the ‘Donation Example’ site we built for this user guide.
I’m using the Javascript API to insert Browser Profile attributes into a user’s profile. I’ve made a text box on the homepage where users can submit a response to the question ‘Why do you donate?’ The entry that is submitted through this text box is set as the value to a ‘reason’ key in the user’s Browser Profile.
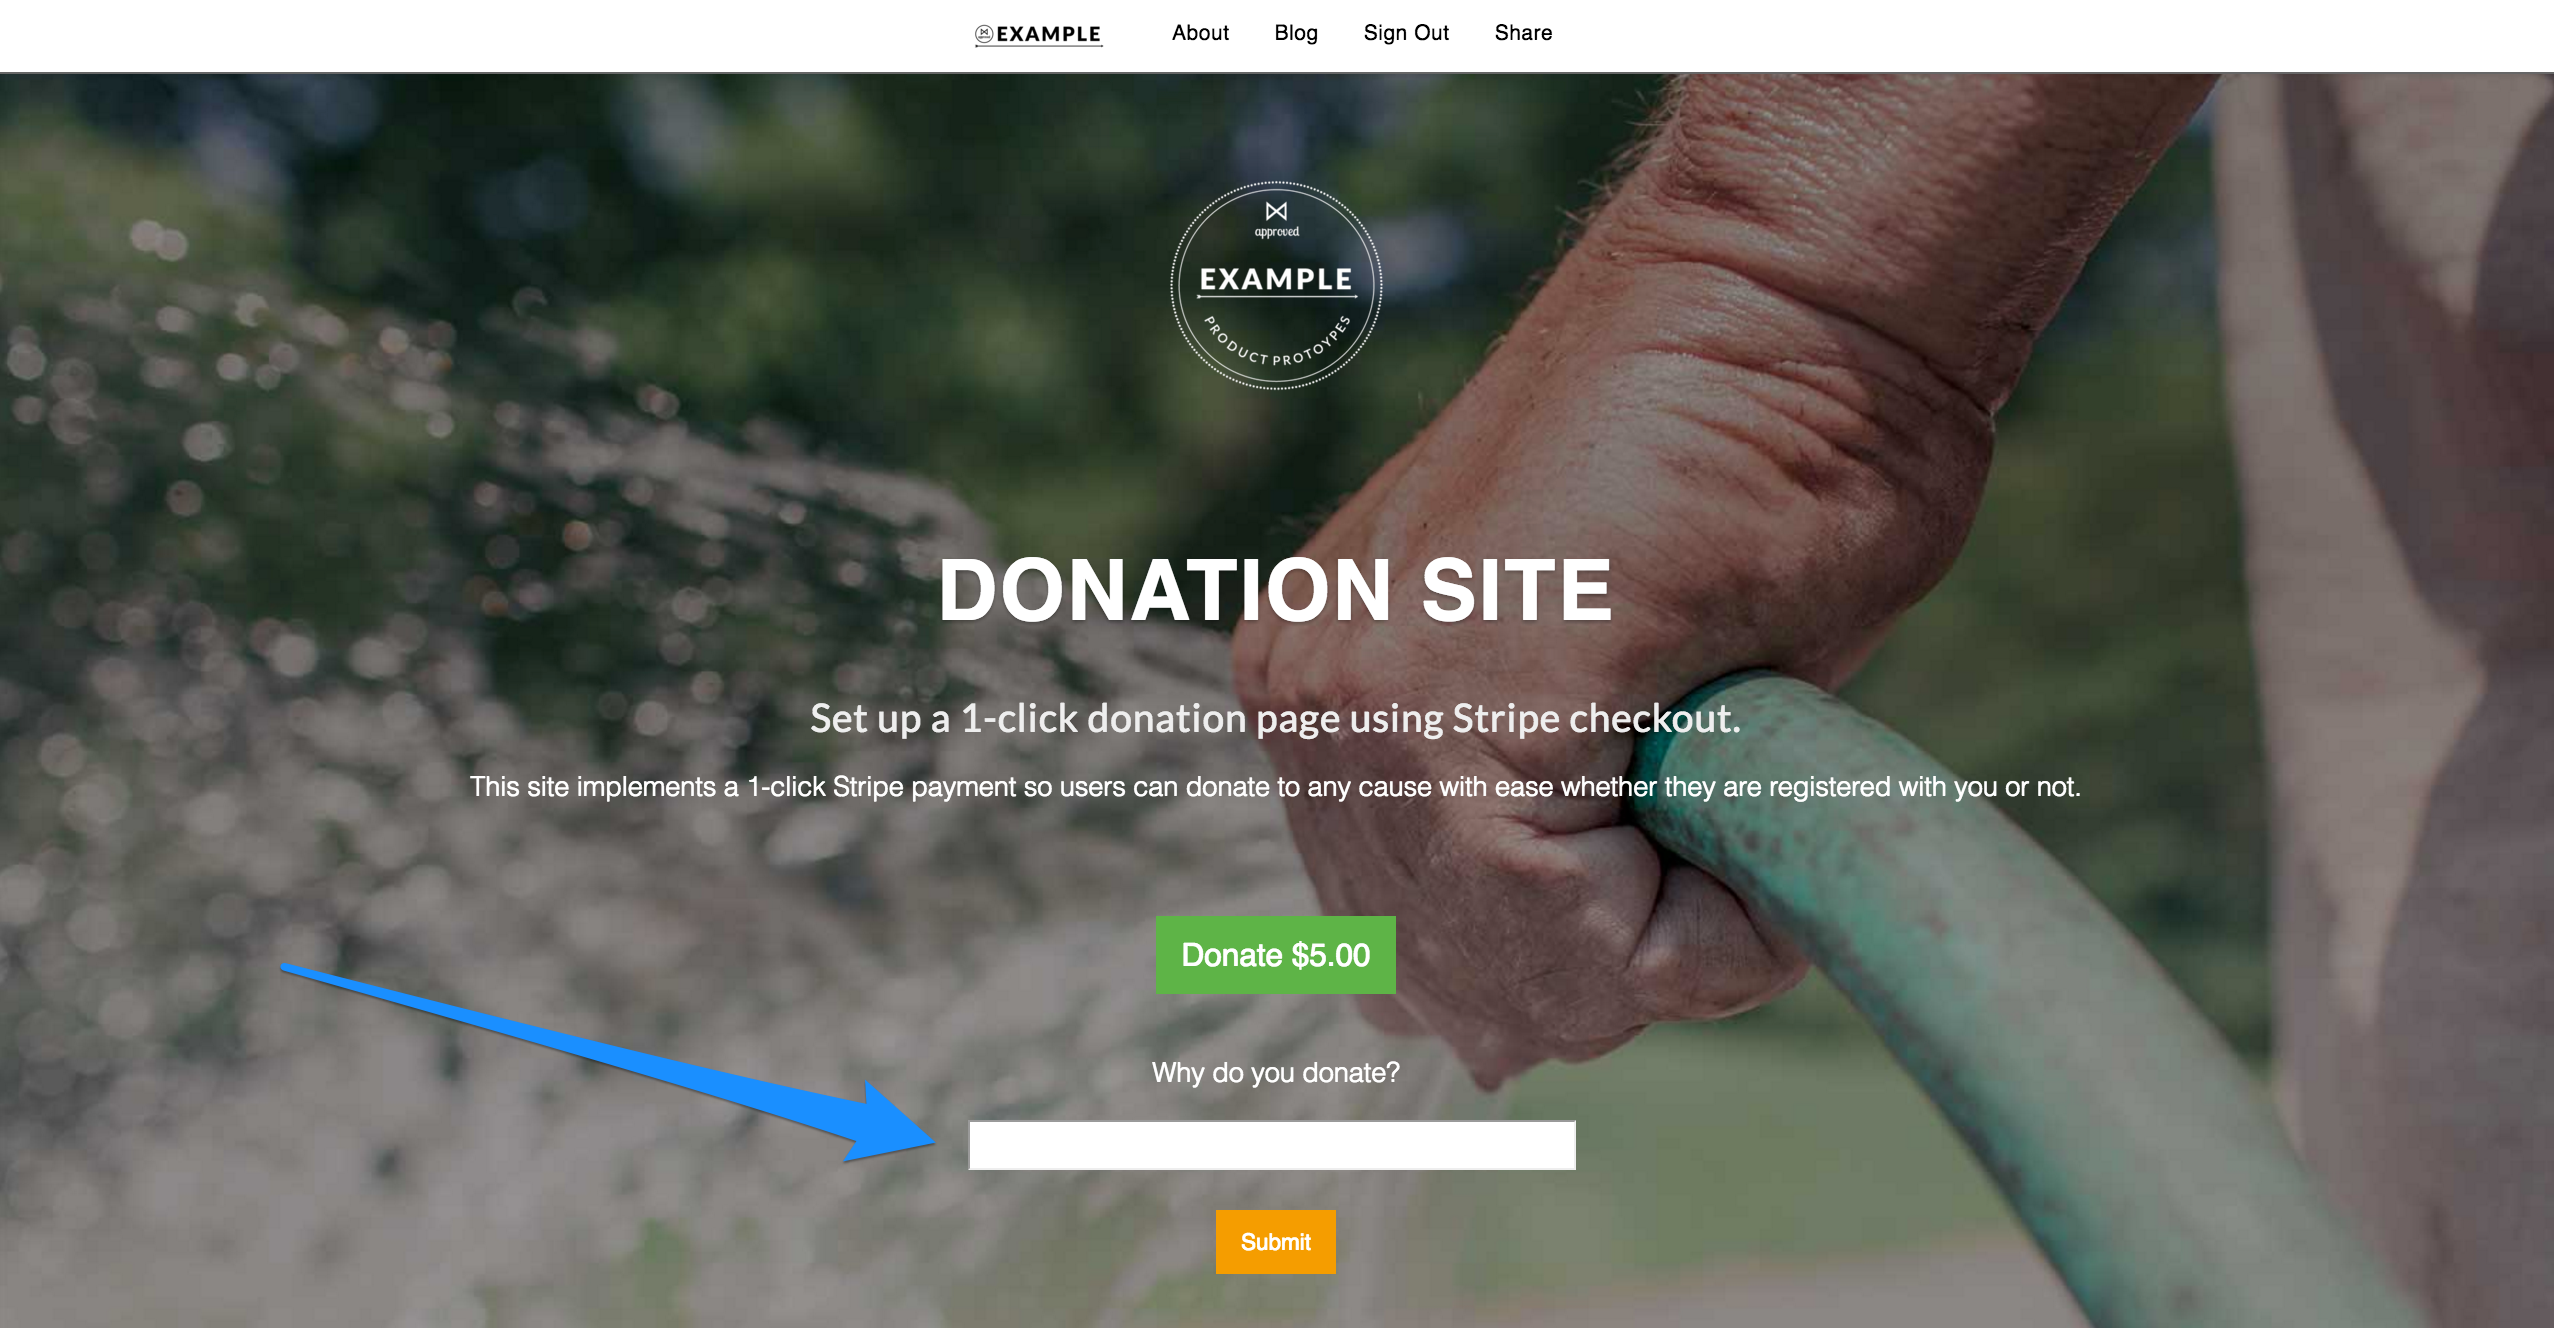
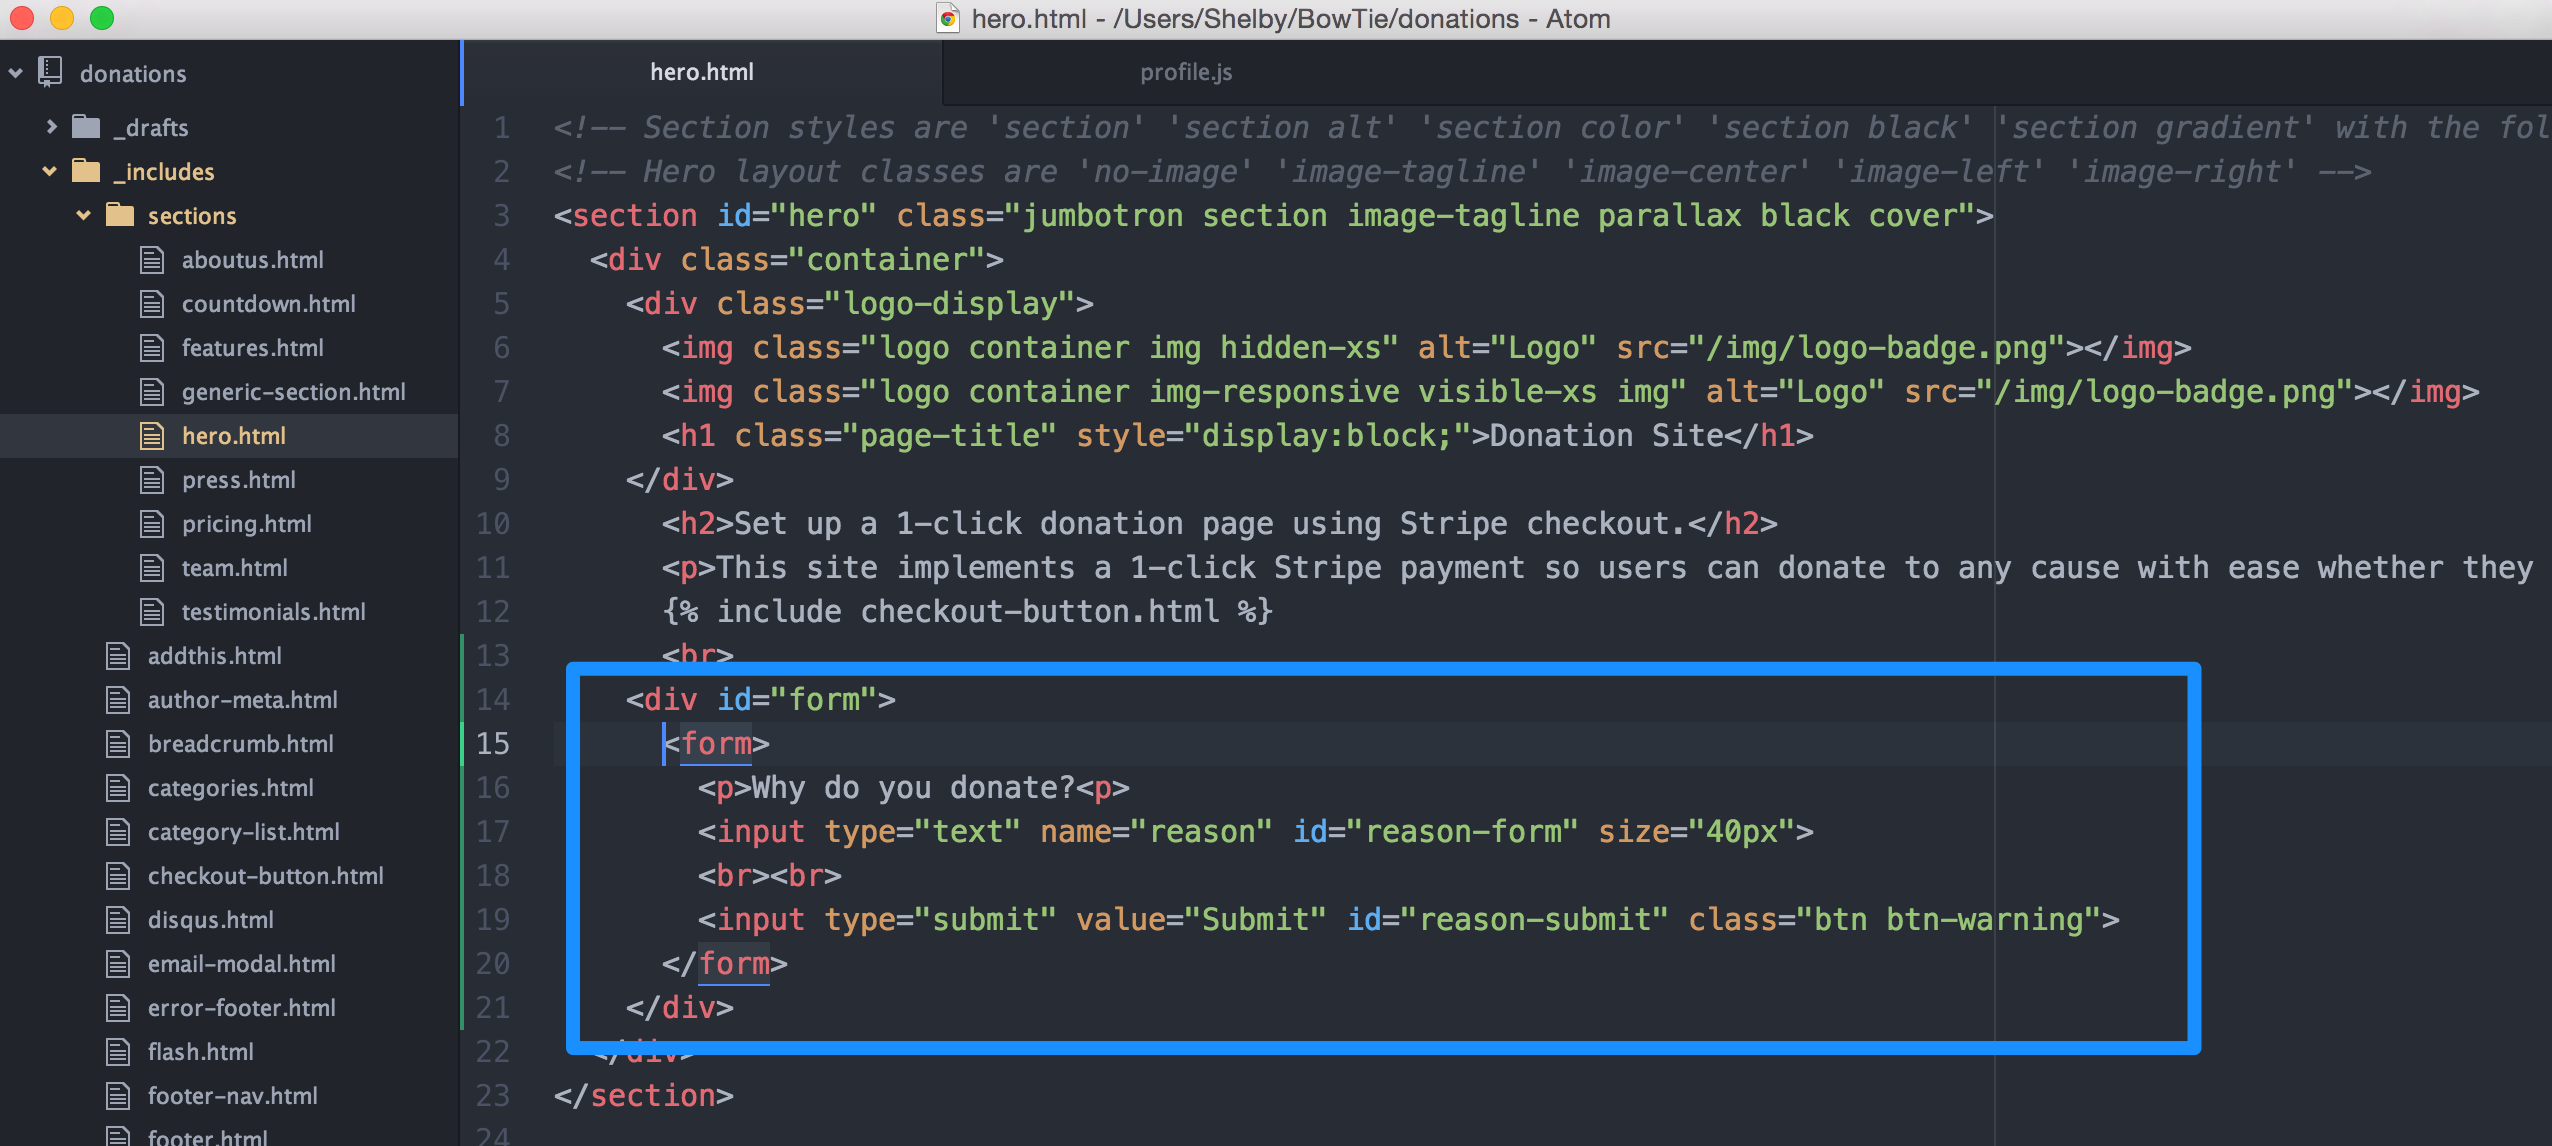
I’ve put a form in my hero section located at /_includes/sections/hero.html to take the input.
Finally, I have put some Javascript inside of my profile.js to assign the input into the user’s BowTie Browser Profile. I’m also using a little jQuery to hide or show the form, depending on if they have already submitted a “reason” or not.
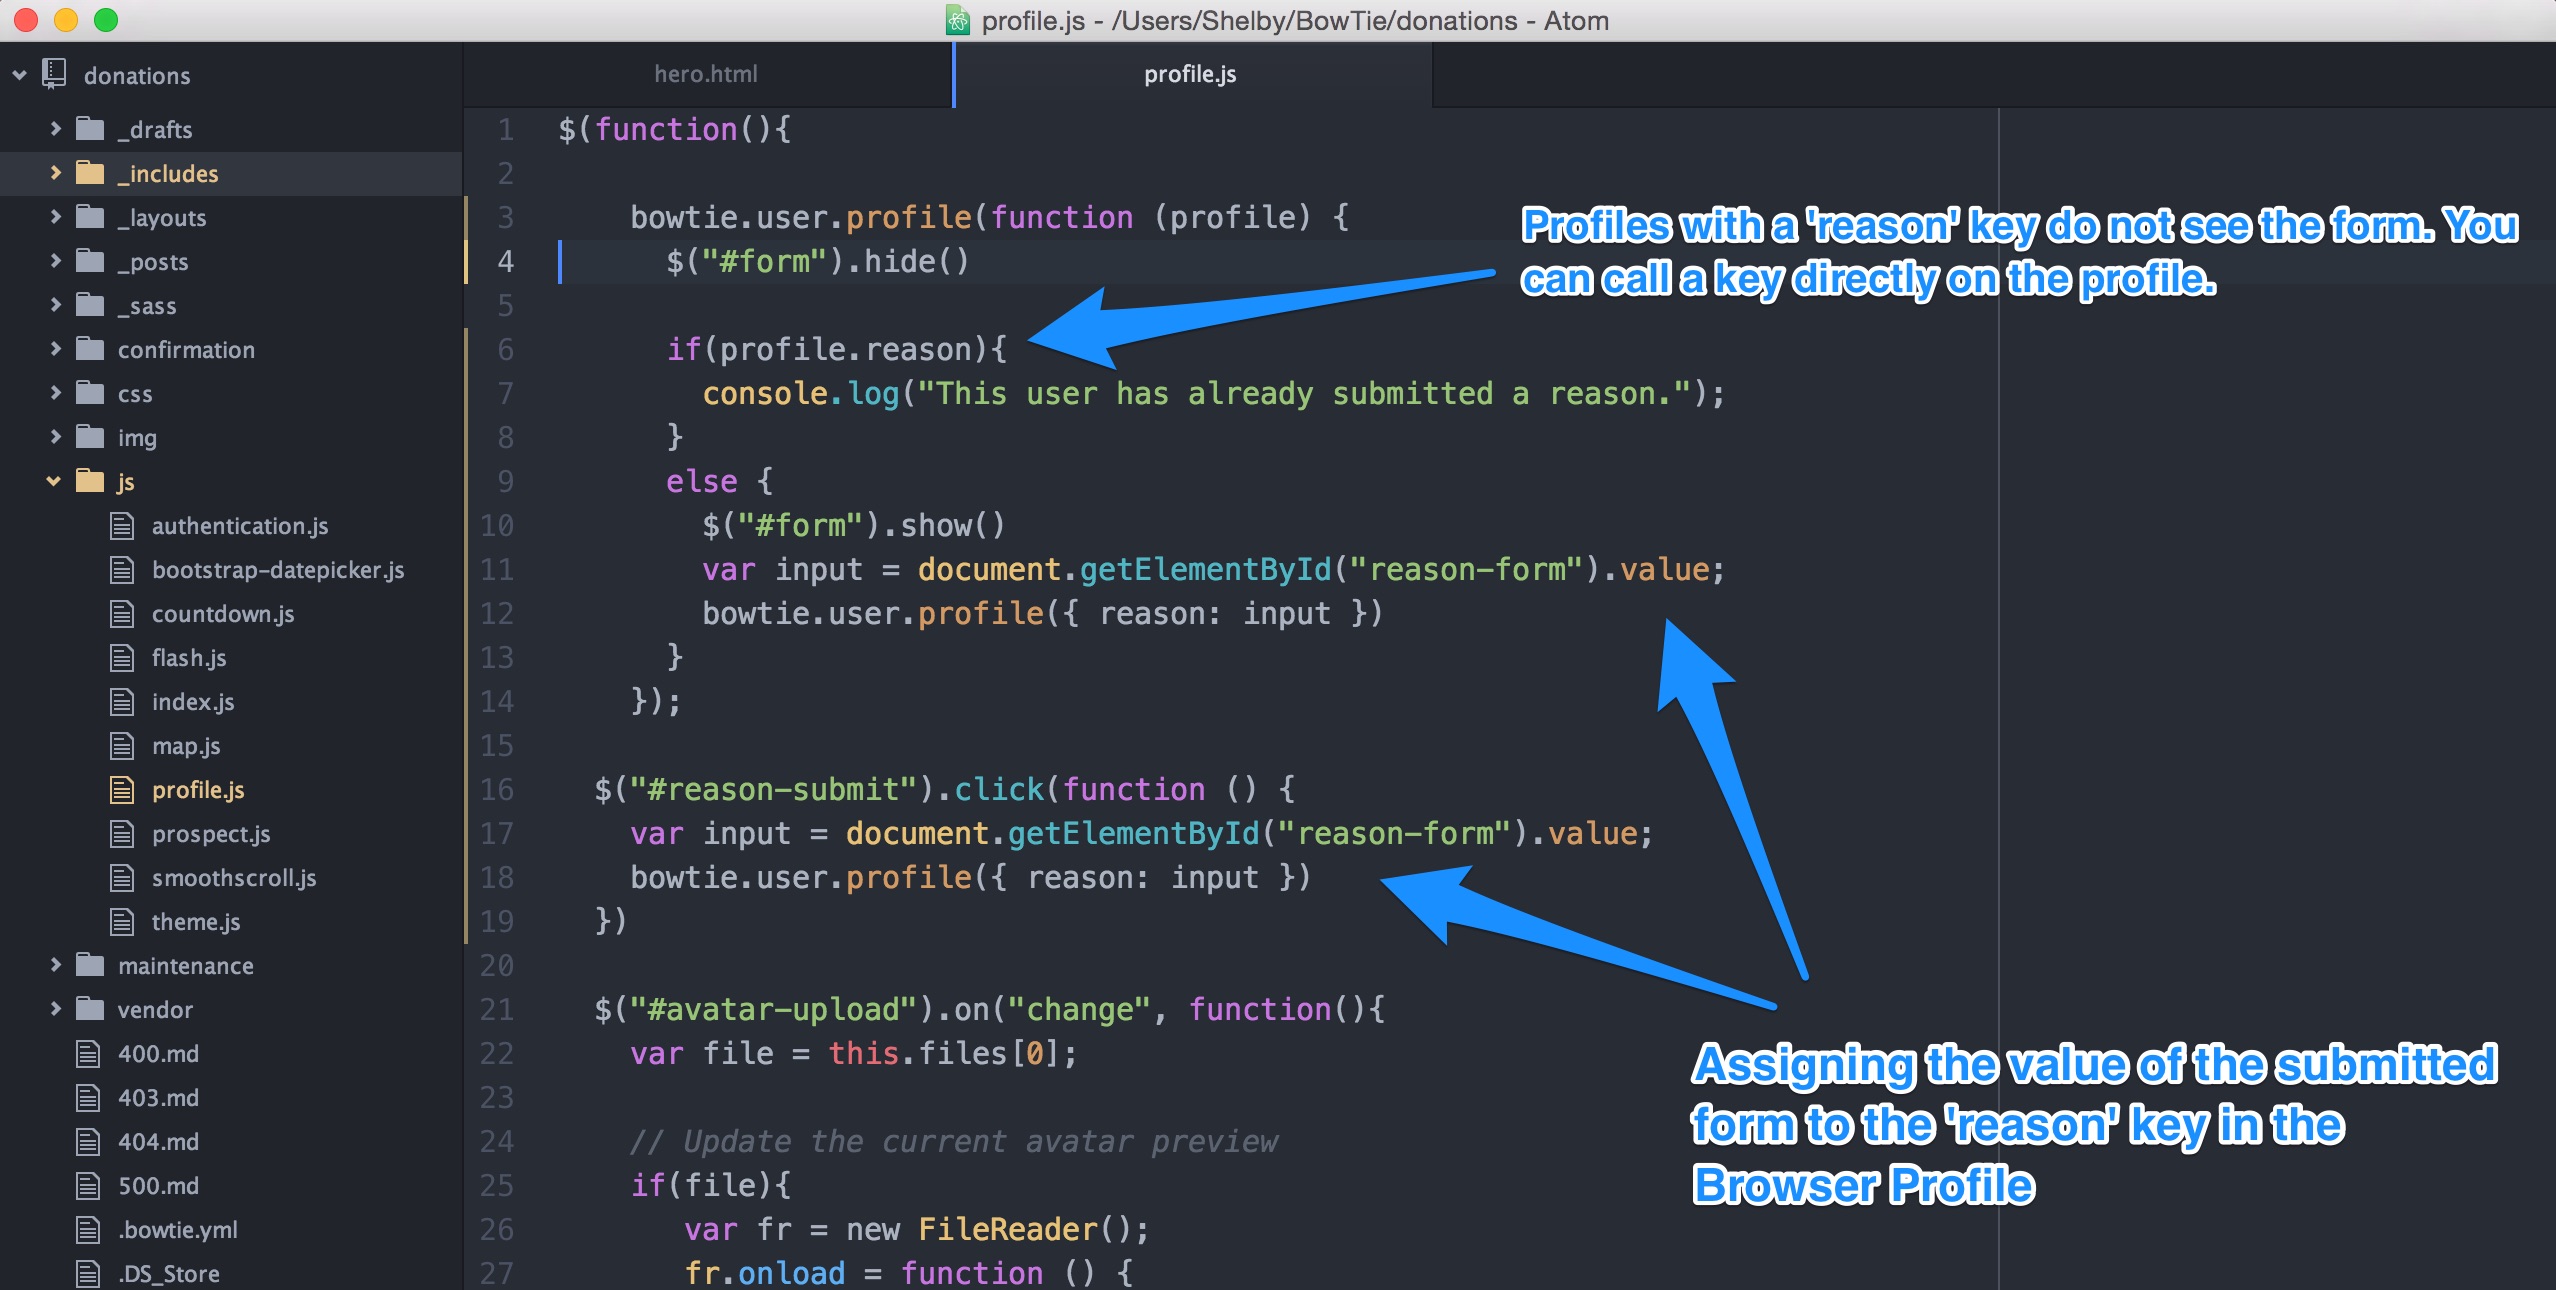
Inside of the bowtie.user.profile function, I am checking to see if the user already has a reason for donating stored, and if not, letting them submit a reason and assigning it to their profile.
In line 6 I check for a ‘reason’ key, and if they have one (if they’ve already submitted a reason for donating) I hide the form.
If they do not have a key, in lines 9-13 I grab the input from my html form and in lines 16-19, I use jQuery to actually submit the reason and assign it to the BowTie User’s Browser Profile.
Here are the code snippets below:
To put browser profile keys with values into the BowTie User’s Browser Profile:
bowtie.user.profile({ reason: "I like giving back to my community." })
To see the User’s Browser Profile in your browser console:
bowtie.user.profile(function (profile) {
  console.log(profile)
});
To access the key on the User’s profile:
profile.reason
As stated above, if you’d like to see the results of writing a browser profile attribute to a User in your browser, open up your console after inserting the console.log from above into your profile.js file. Now I can see the User Profile object and all the profile data that it contains.
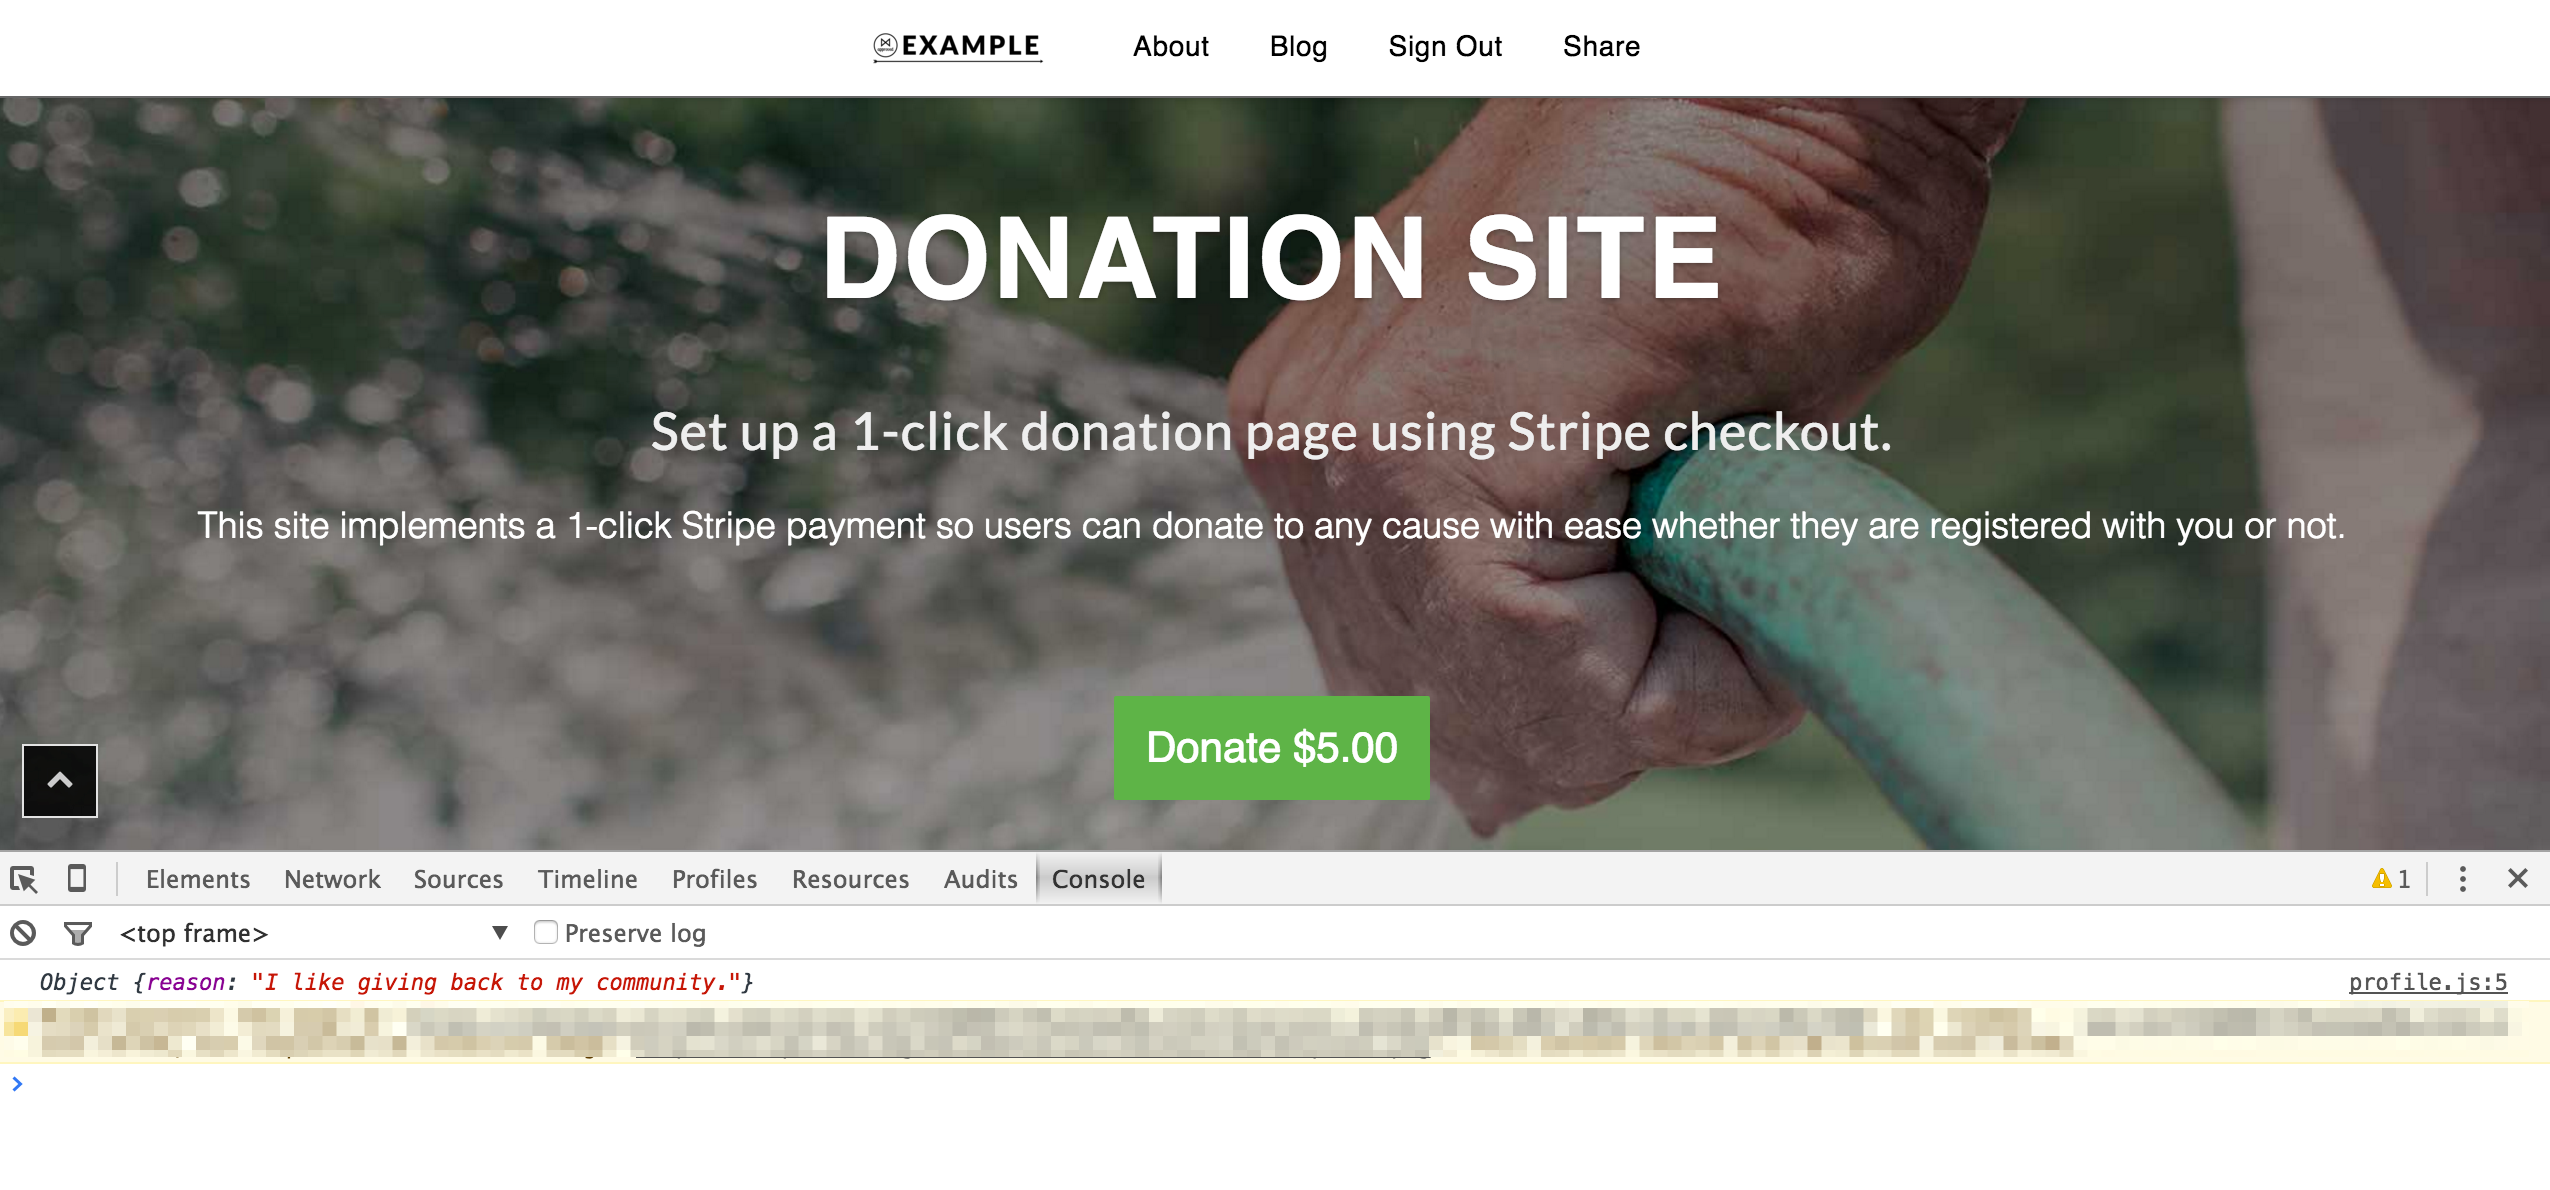
Users and their Browser Profile data is also shown in your BowTie Dashboard under ‘Customers’ > ‘Users’.
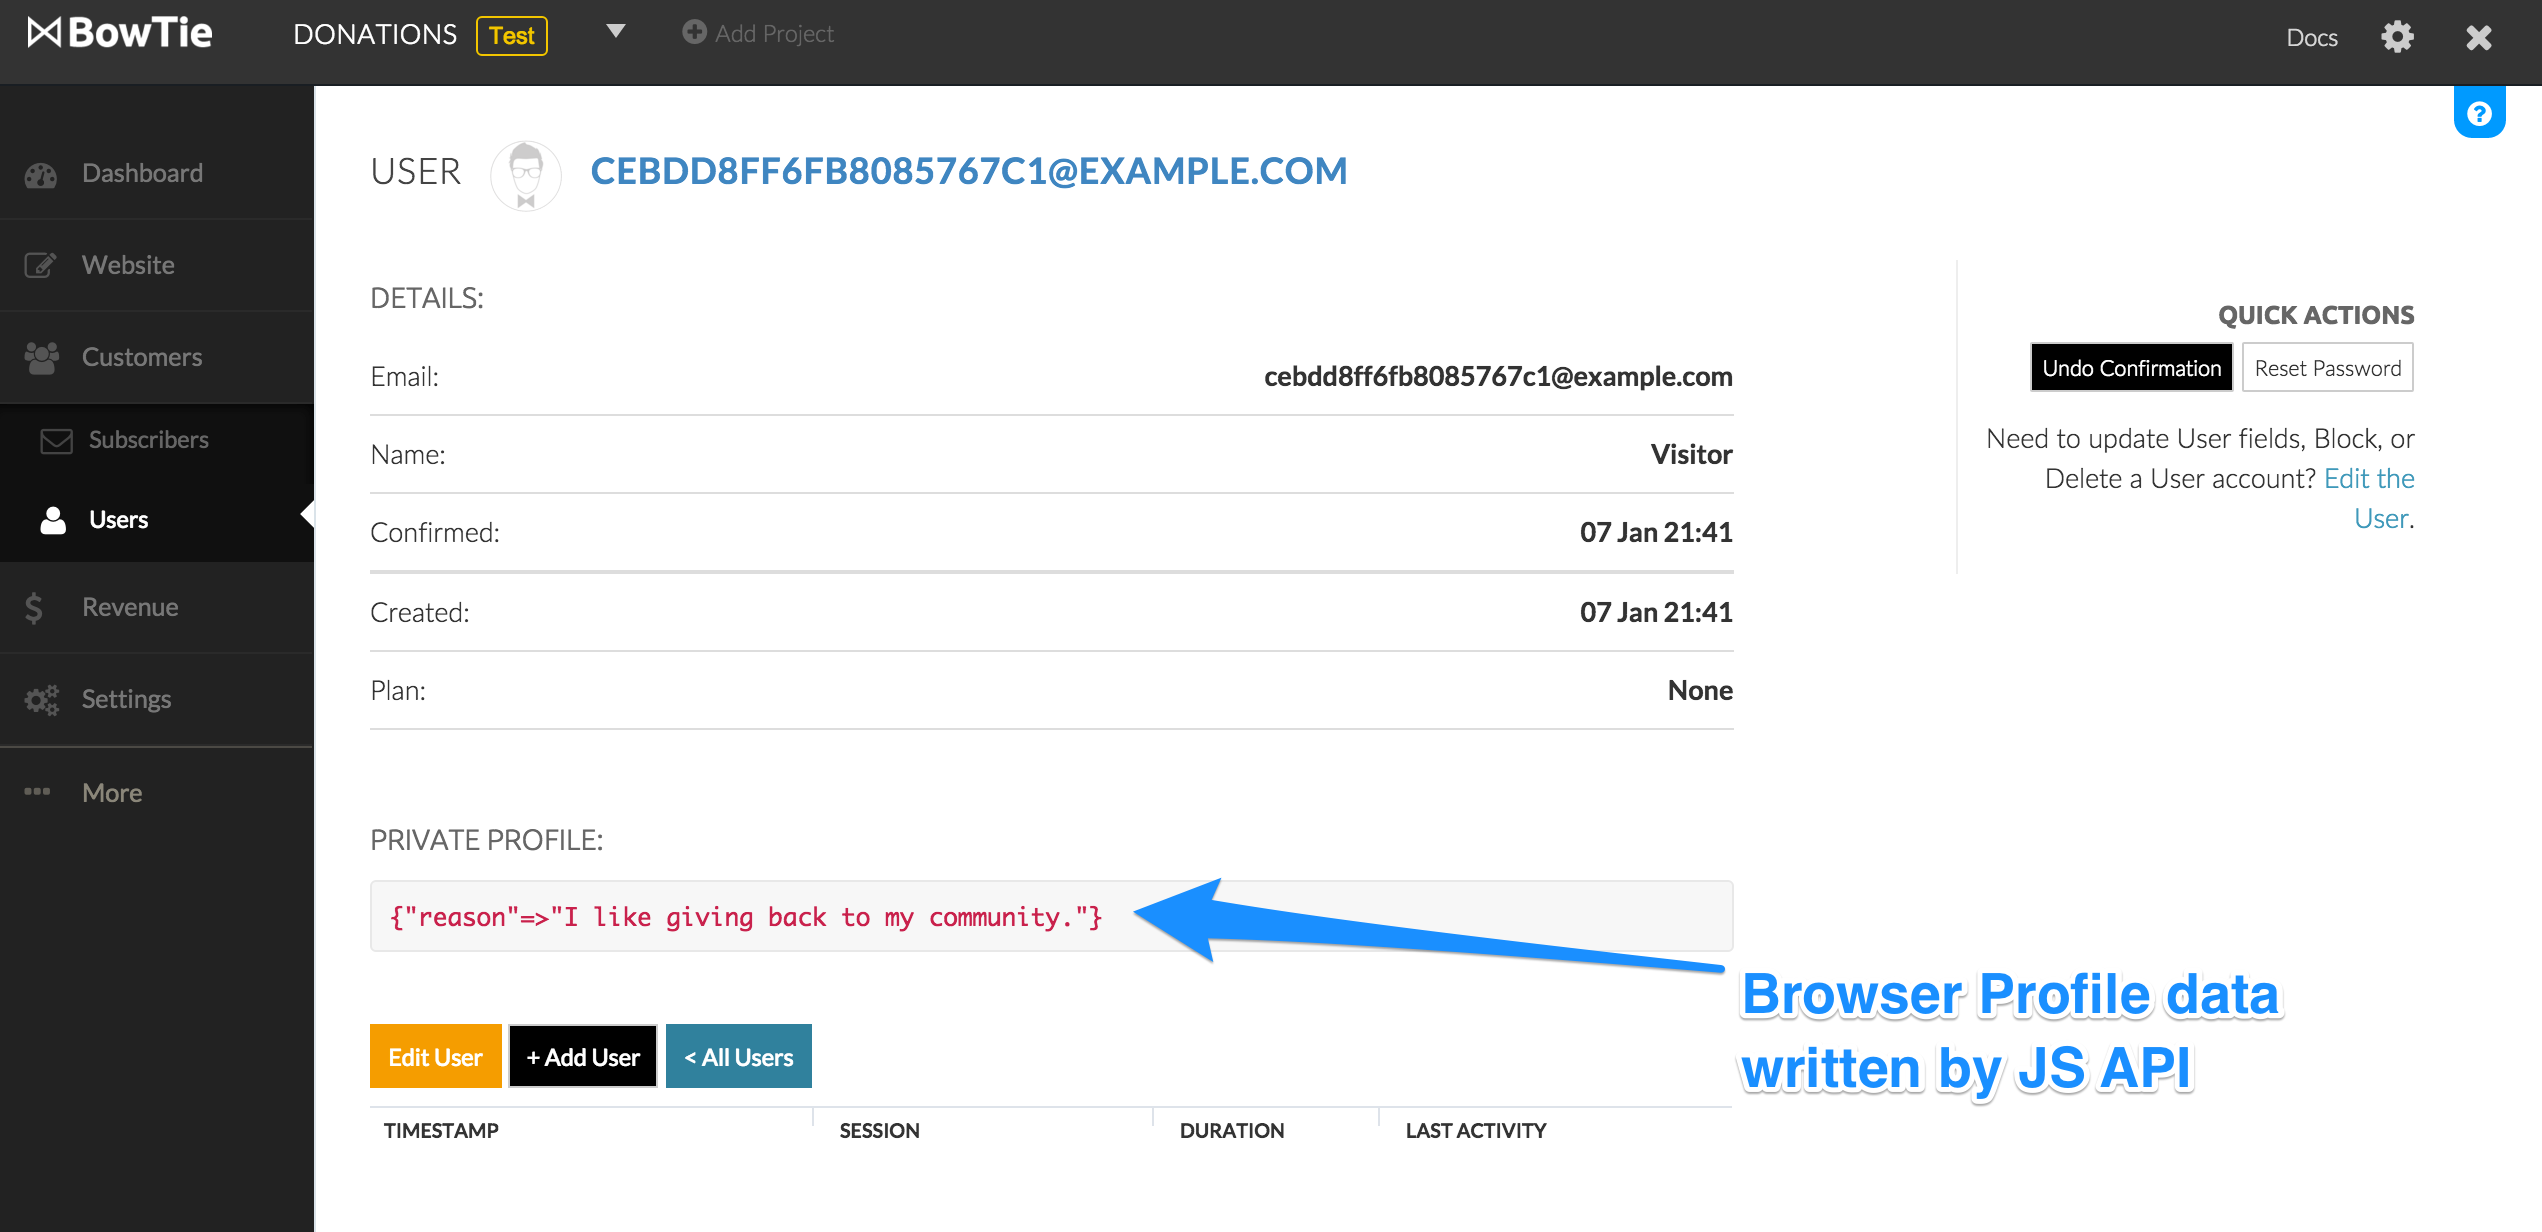
Note - You can write to a Browser Profile with the same key as many times as you’d like. The most recent call to the Javascript API will replace what the value of the key was prior.
Purchase Profile Example
If someone donates to this example site, they will be adding information to their Purchase Profile as well. You can find this information in your BowTie Dashboard for each user in the same place you see your Browser Profile data.
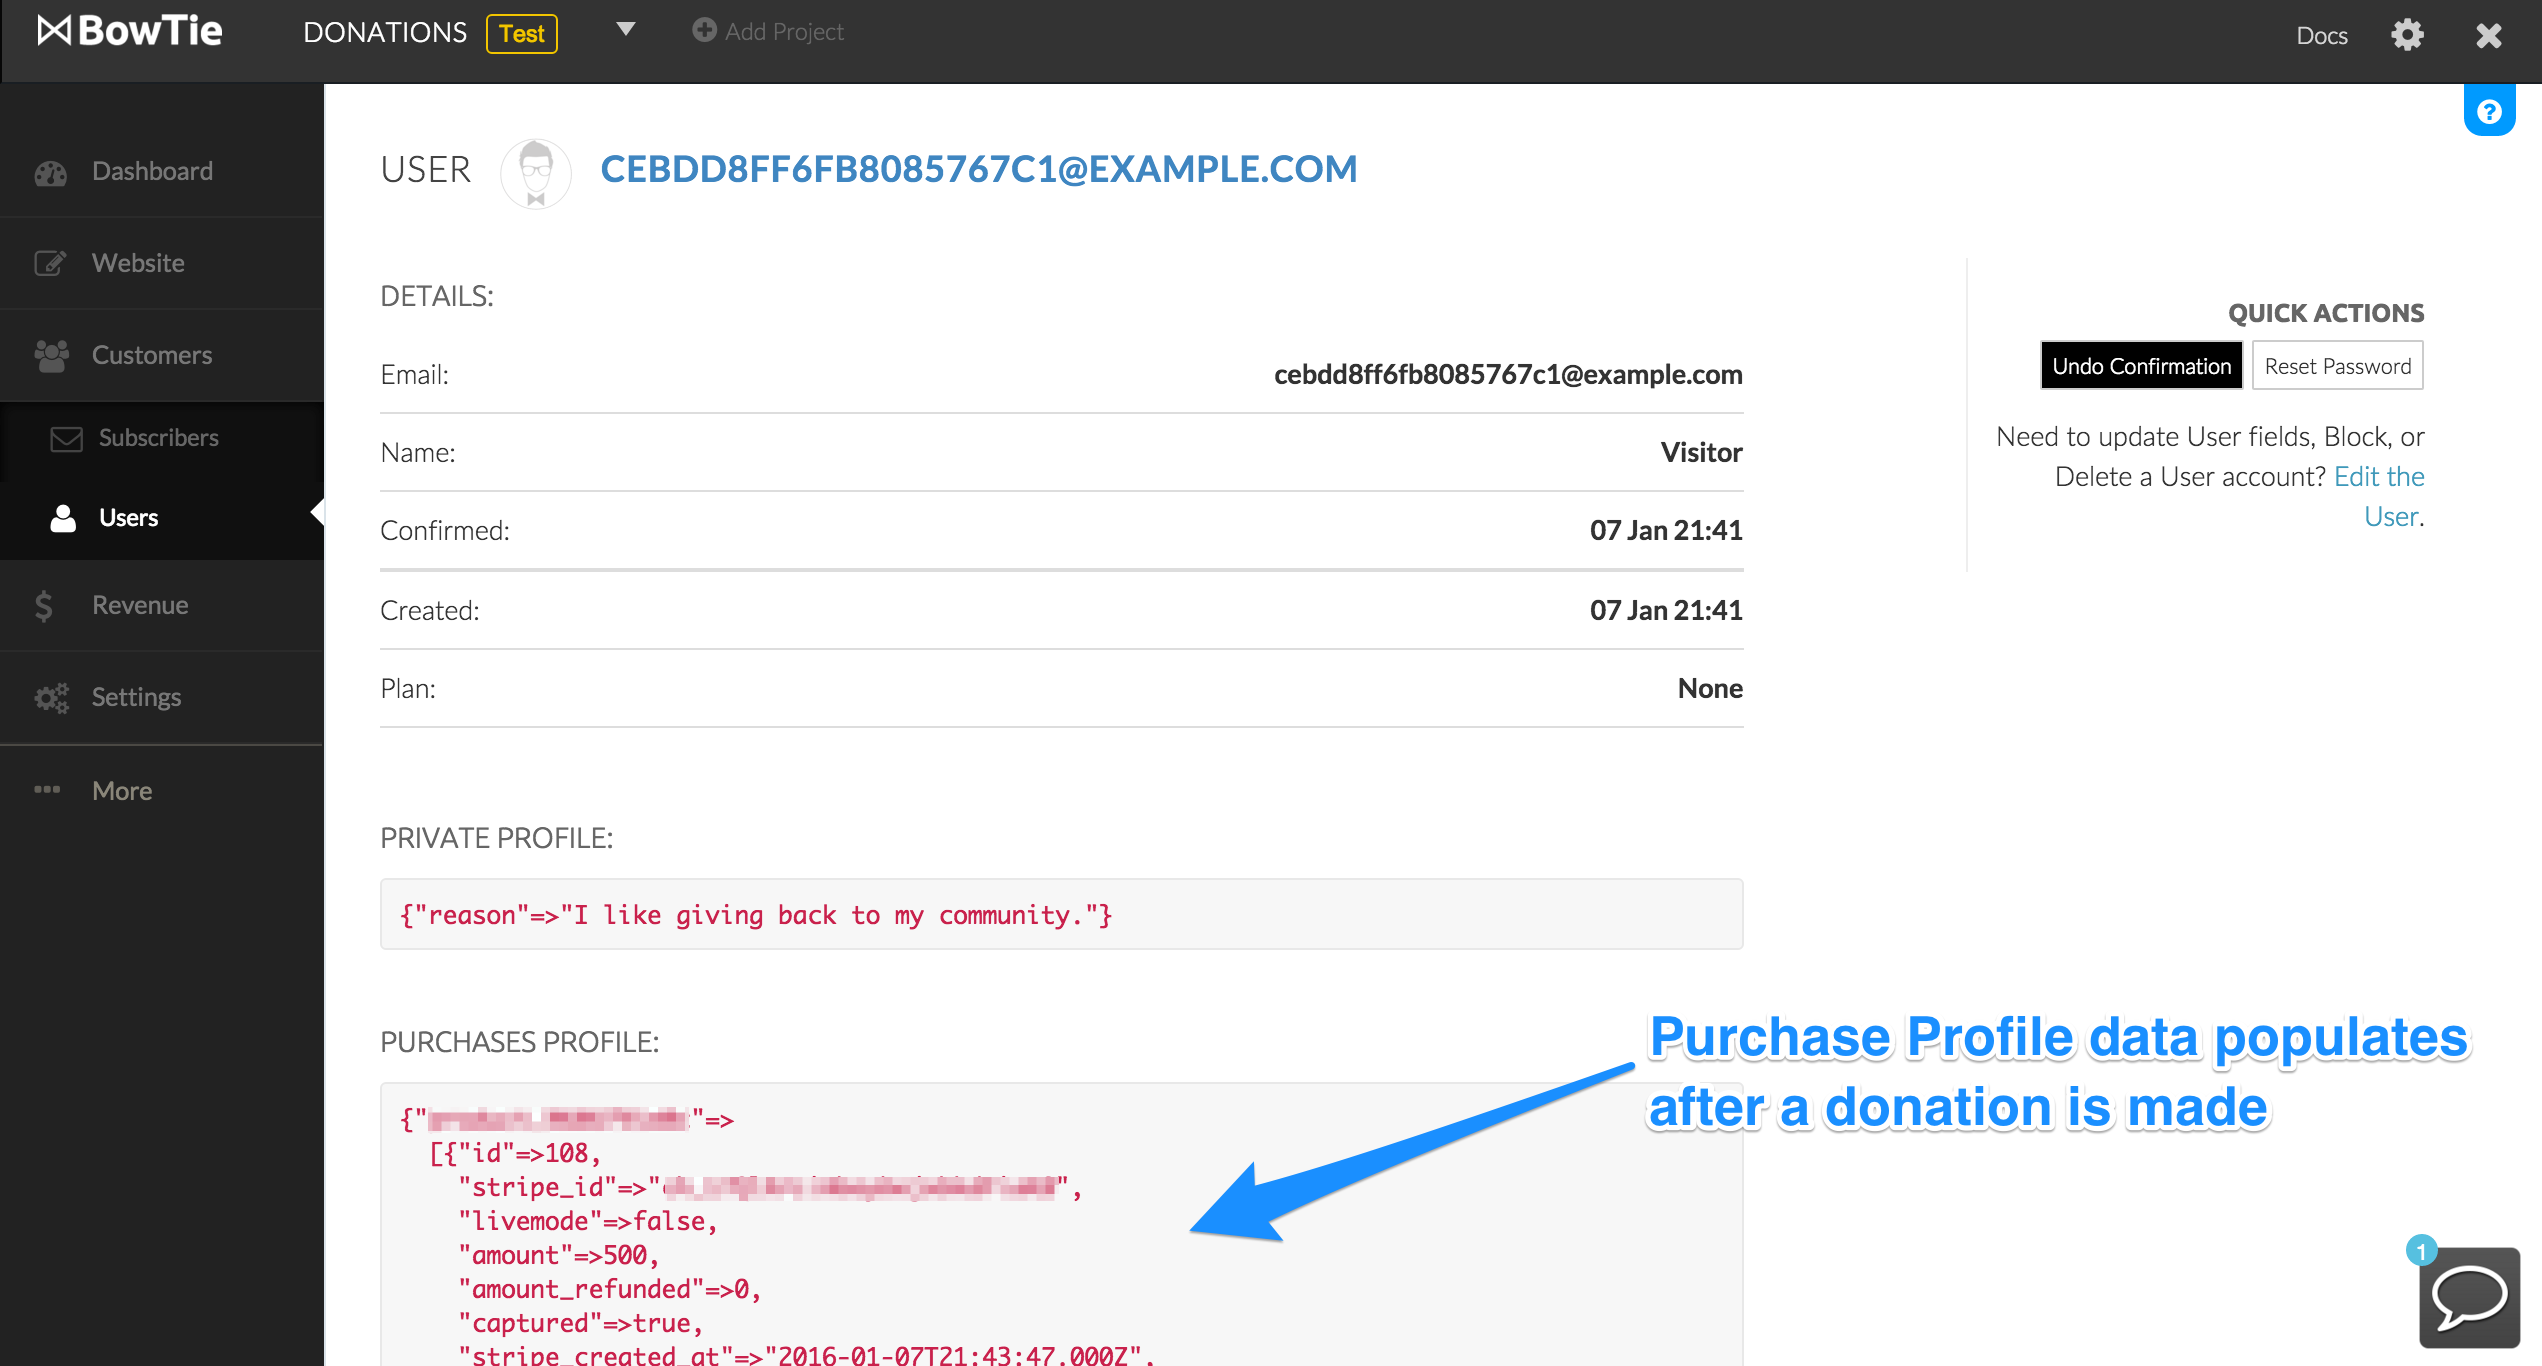
Any payments made to you via Stripe will populate here. In this case it is our donation “product” we created - if you’d like a walk through on how to charge people via Stripe, read this user guide.
If you’d like a more technical explanation of our Javascript API, reference our technical docs.
HTTP API
Our HTTP API is a secure way to read or write attributes for any BowTie user. In most cases, you will be utilizing this API in a backend application that is linked to your BowTie project. This server side authenticity provides secure data to your application.
To use the HTTP API, you will make GET and POST requests with different pieces of information to access different user attributes. If you aren’t familiar with RESTful practices, I would familiarize yourself first.
The domain you will be making requests to is https://:{secret}@{domain}/bowtie/api/users/[:user_id]/profile.json, with replacing the secret, domain, and user ID.
We’ll be putting together a user guide on the HTTP API in the future. For a more technical dive into how to utilize this today, refer to our technical docs.
Access Control
User Profiles interact with BowTie’s policy management system to create access restrictions based on profile attributes. Every BowTie project is created with an example yaml file in the root directory. This file contains the syntax to set restrictions that either allow or deny access to your users, depending on the profile attributes you define.
You can also create your own .bowtie.yml files in any directory you wish to limit access to. Note: The content you want to restrict access to will respond to the yaml file it is closest to in your project.
If you want to familiarize yourself with our policies at a basic level, read this post.
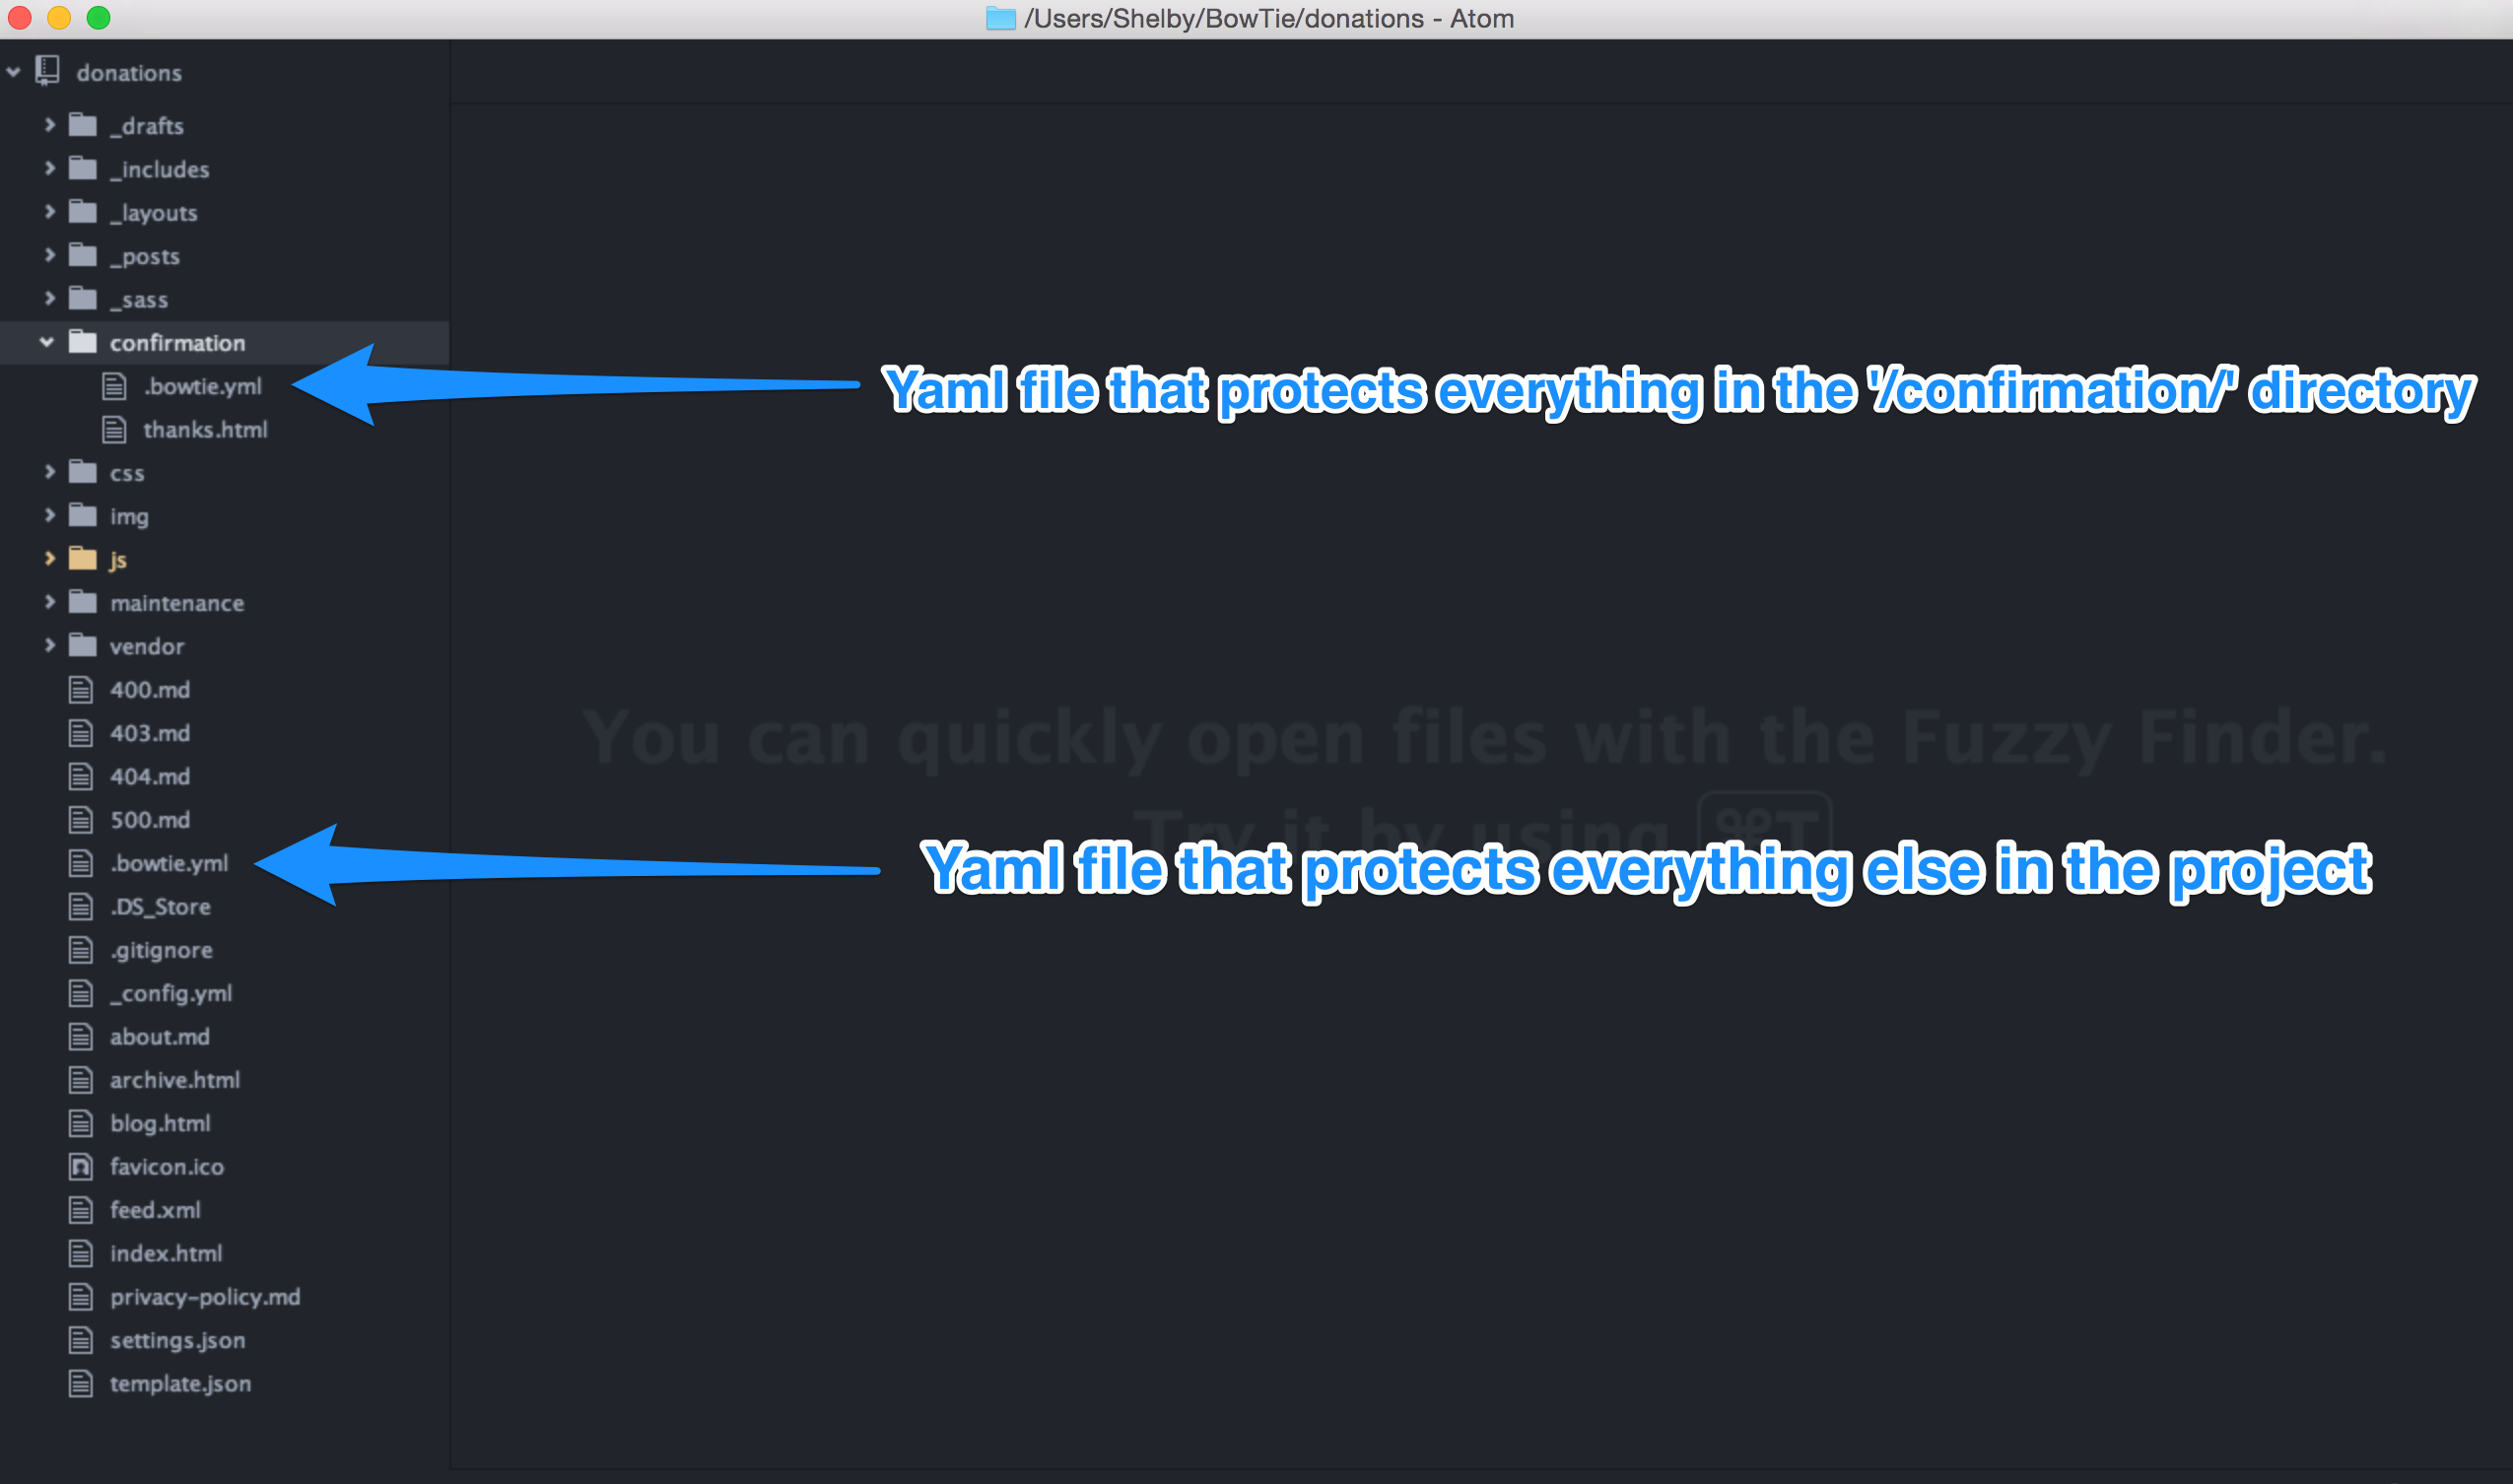
In the case of the Donations example app, there are two .bowtie.yml files. One in the root of the directory and one in the confirmation directory. Everything at /donations/confirmation/ will respond to the accessibility set in the yaml file at /donations/confirmation/.bowtie.yml, while every other piece of content in this project will respond to the file located at donations/.bowtie.yml.
If you’d like to see how I set up the initial Donation site, incorporated Stripe payments, and limited access to users, read the Donation Site User Guide.
Congrats! You now know about User Profiles in BowTie. Read our other getting started guides further familiarize yourself with BowTie.
If you’d like to see our pre-built templates on GitHub, check them out here. For even more options, read our Getting Started series:
If you are new to BowTie, check out our other Getting Started guides.
Getting Started with BowTie:
- Build a Landing Page in 5 minutes
- Using the BowTie Collection Editor
- Initial Configuration
- Setting Up Custom Domains
- Customizing and Styling BowTie frontend content
- Build a website with a pay wall
- Blogging with BowTie
- Launch a simple donation site
- Using BowTie’s User Profile system
- Build a Daily Deal Site with Jekyll Collections
- Using Jekyll Data to extend your site
- Adding BowTie users to MailChimp with Zapier
To keep up to date, follow us on twitter at @bowtie_io
Questions? Please comment! Thanks for your support and feedback.