BowTie’s user management system makes it easy to store and use oAuth2 tokens from our integrated social accounts. This gives your BowTie application access to your users’ account information from each provider, and allows both user registration and login. At the moment, we have both Google and Twitter oAuth2 functionality.
You can use BowTie’s oAuth2 functionality with both static frontend applications and backend applications. This example will demonstrate an in-depth Google oAuth implementation with a backend Rails application.
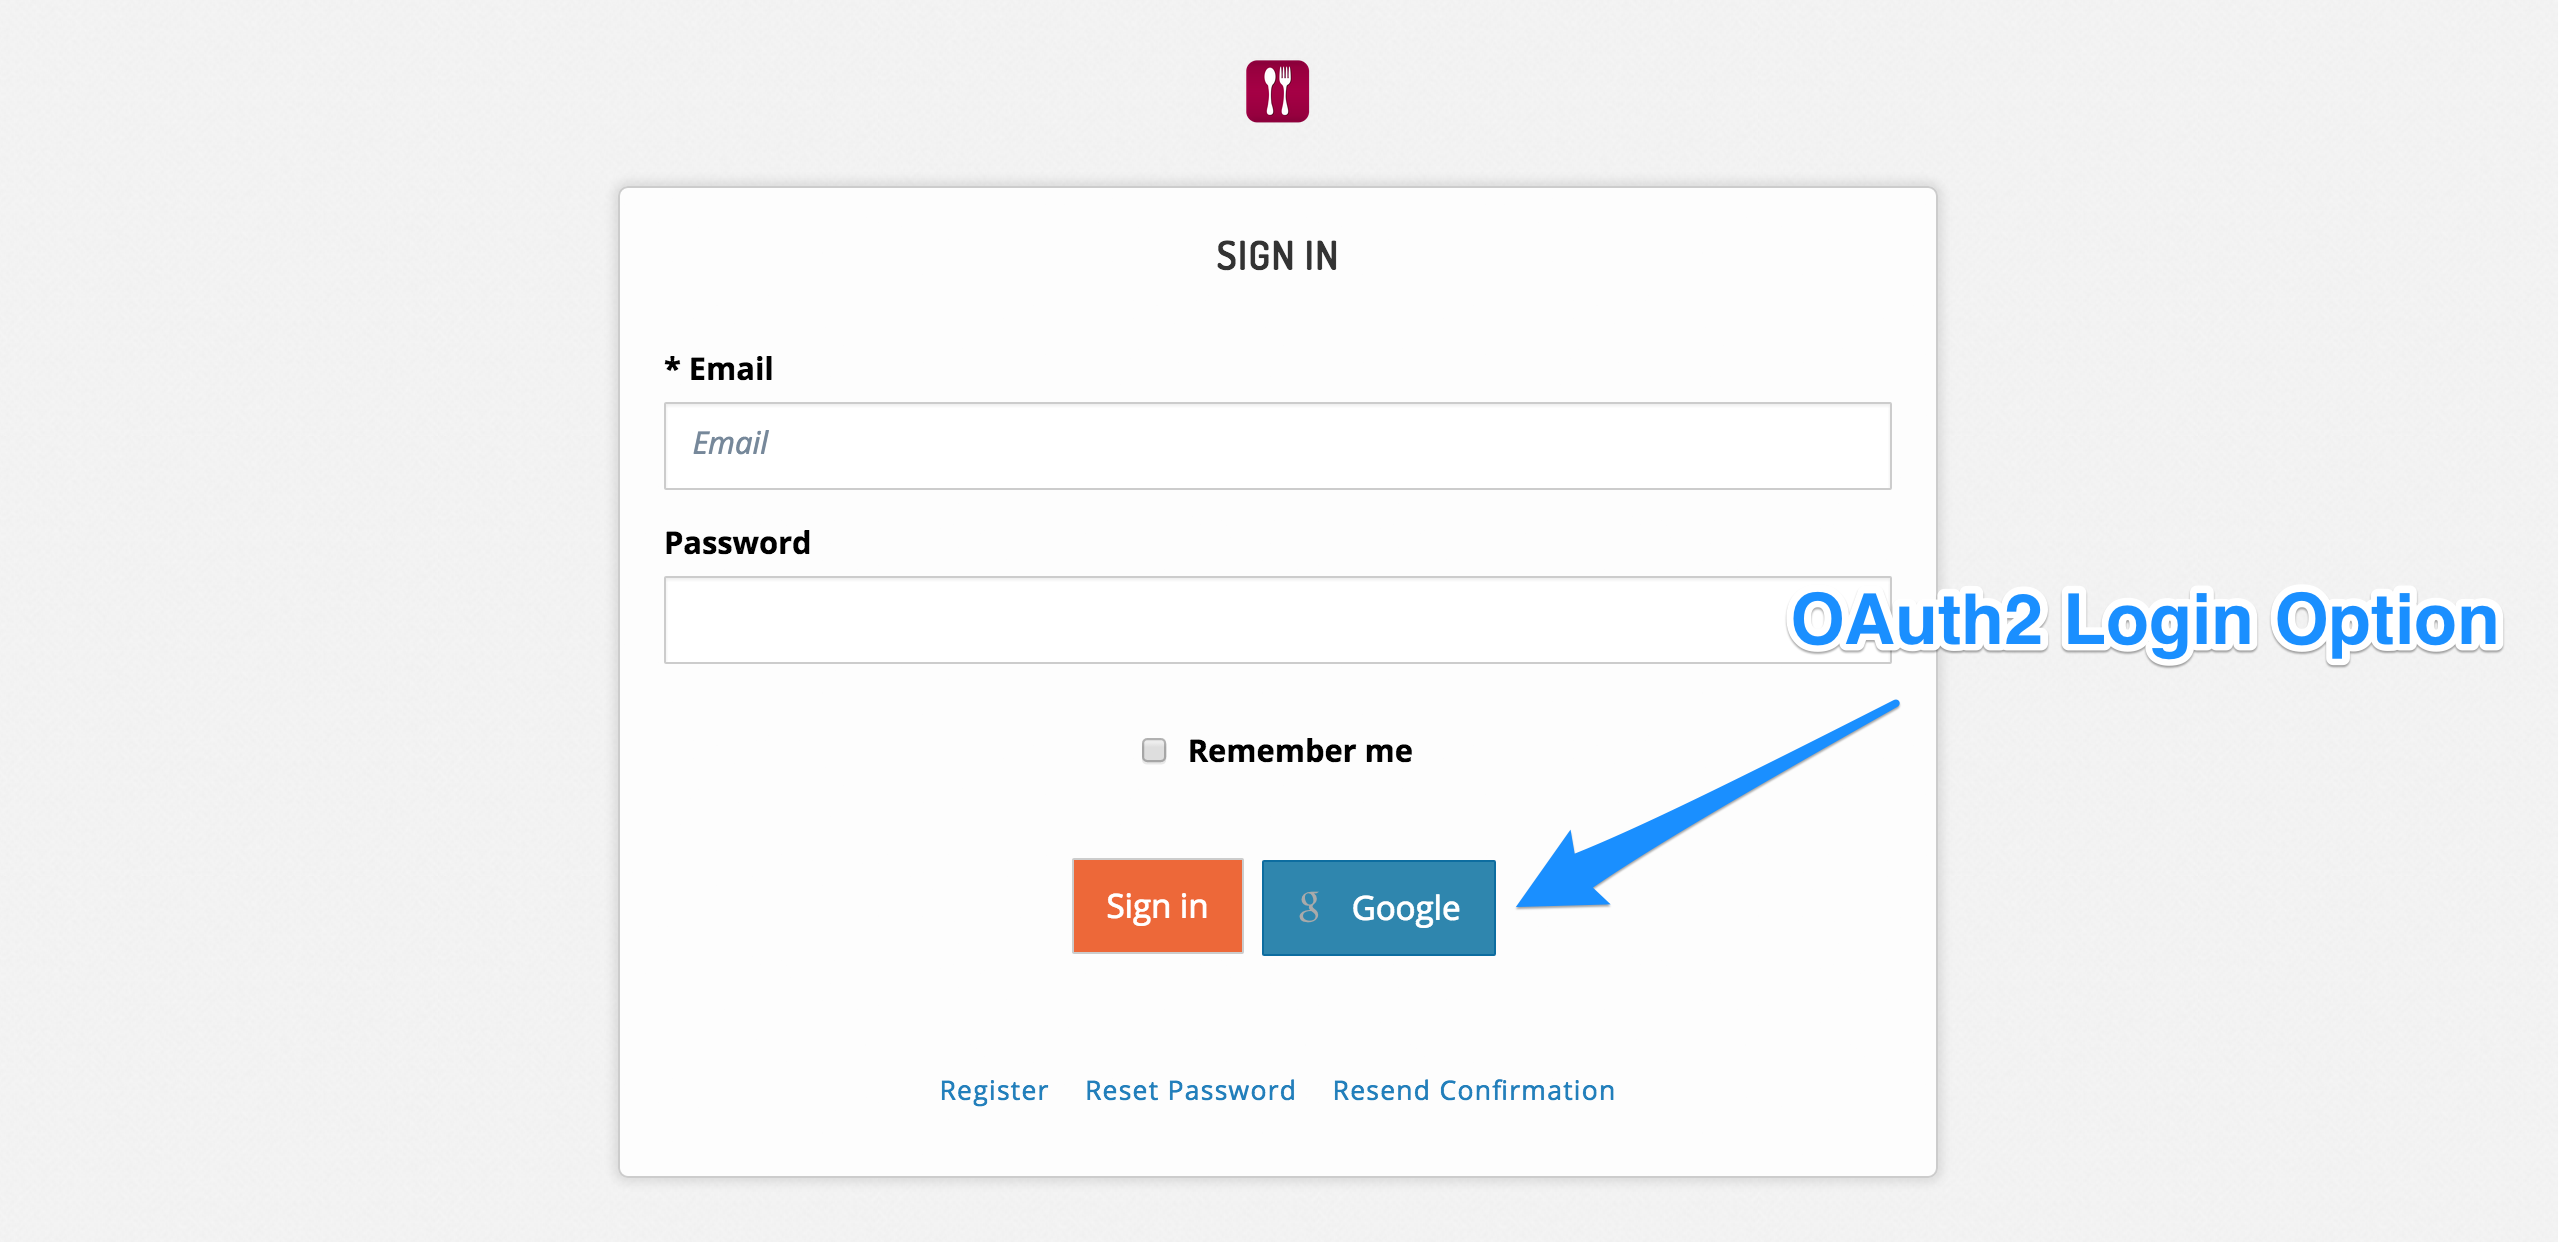
Note: If you haven’t yet created a project with BowTie, you’ll want to do that first. If you want some help building your first project, take a look at this post.
A Google oAuth Example - Getting Started
Setting Up Your Google Developers Console
Before you configure your BowTie project to function with Google oAuth2, you’re going to need to register your app on the Google Developers Console.
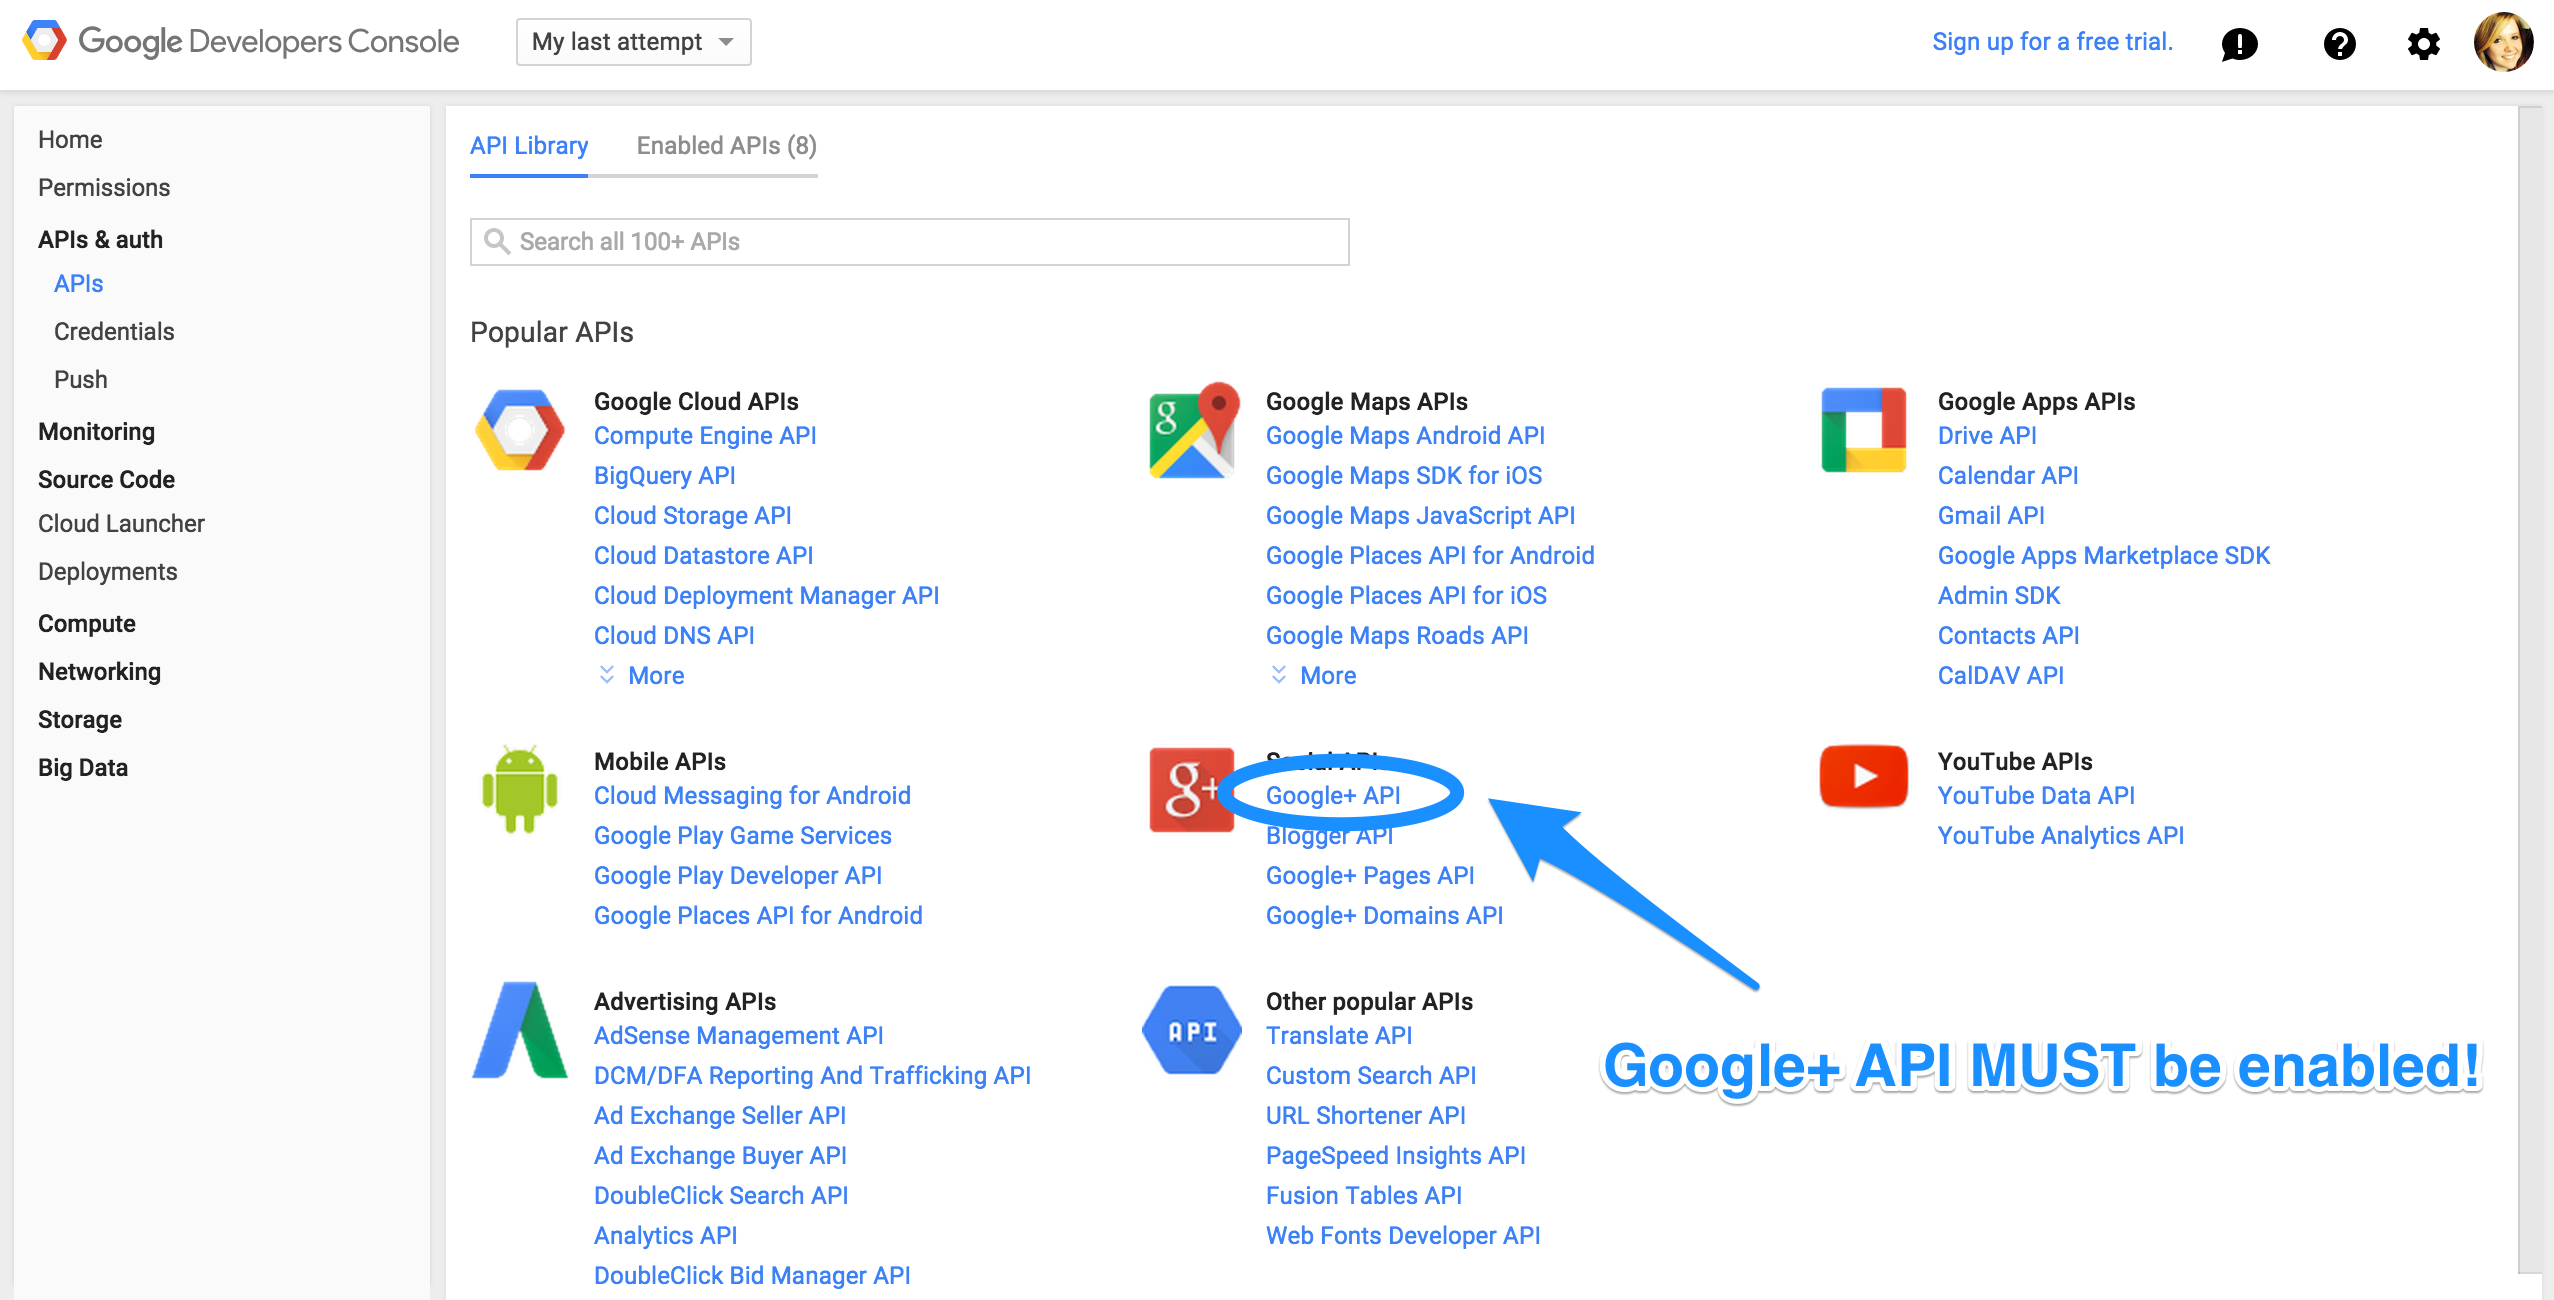
After you login, create a new project and enable the APIs you would like to use with your BowTie application under the ‘APIs & auth’ > ‘APIs’ tab on the left hand navigation menu. These will be things like Google+ or Google Calendar.
Please note - you MUST enable the Google+ API to make Google oAuth 2 work!
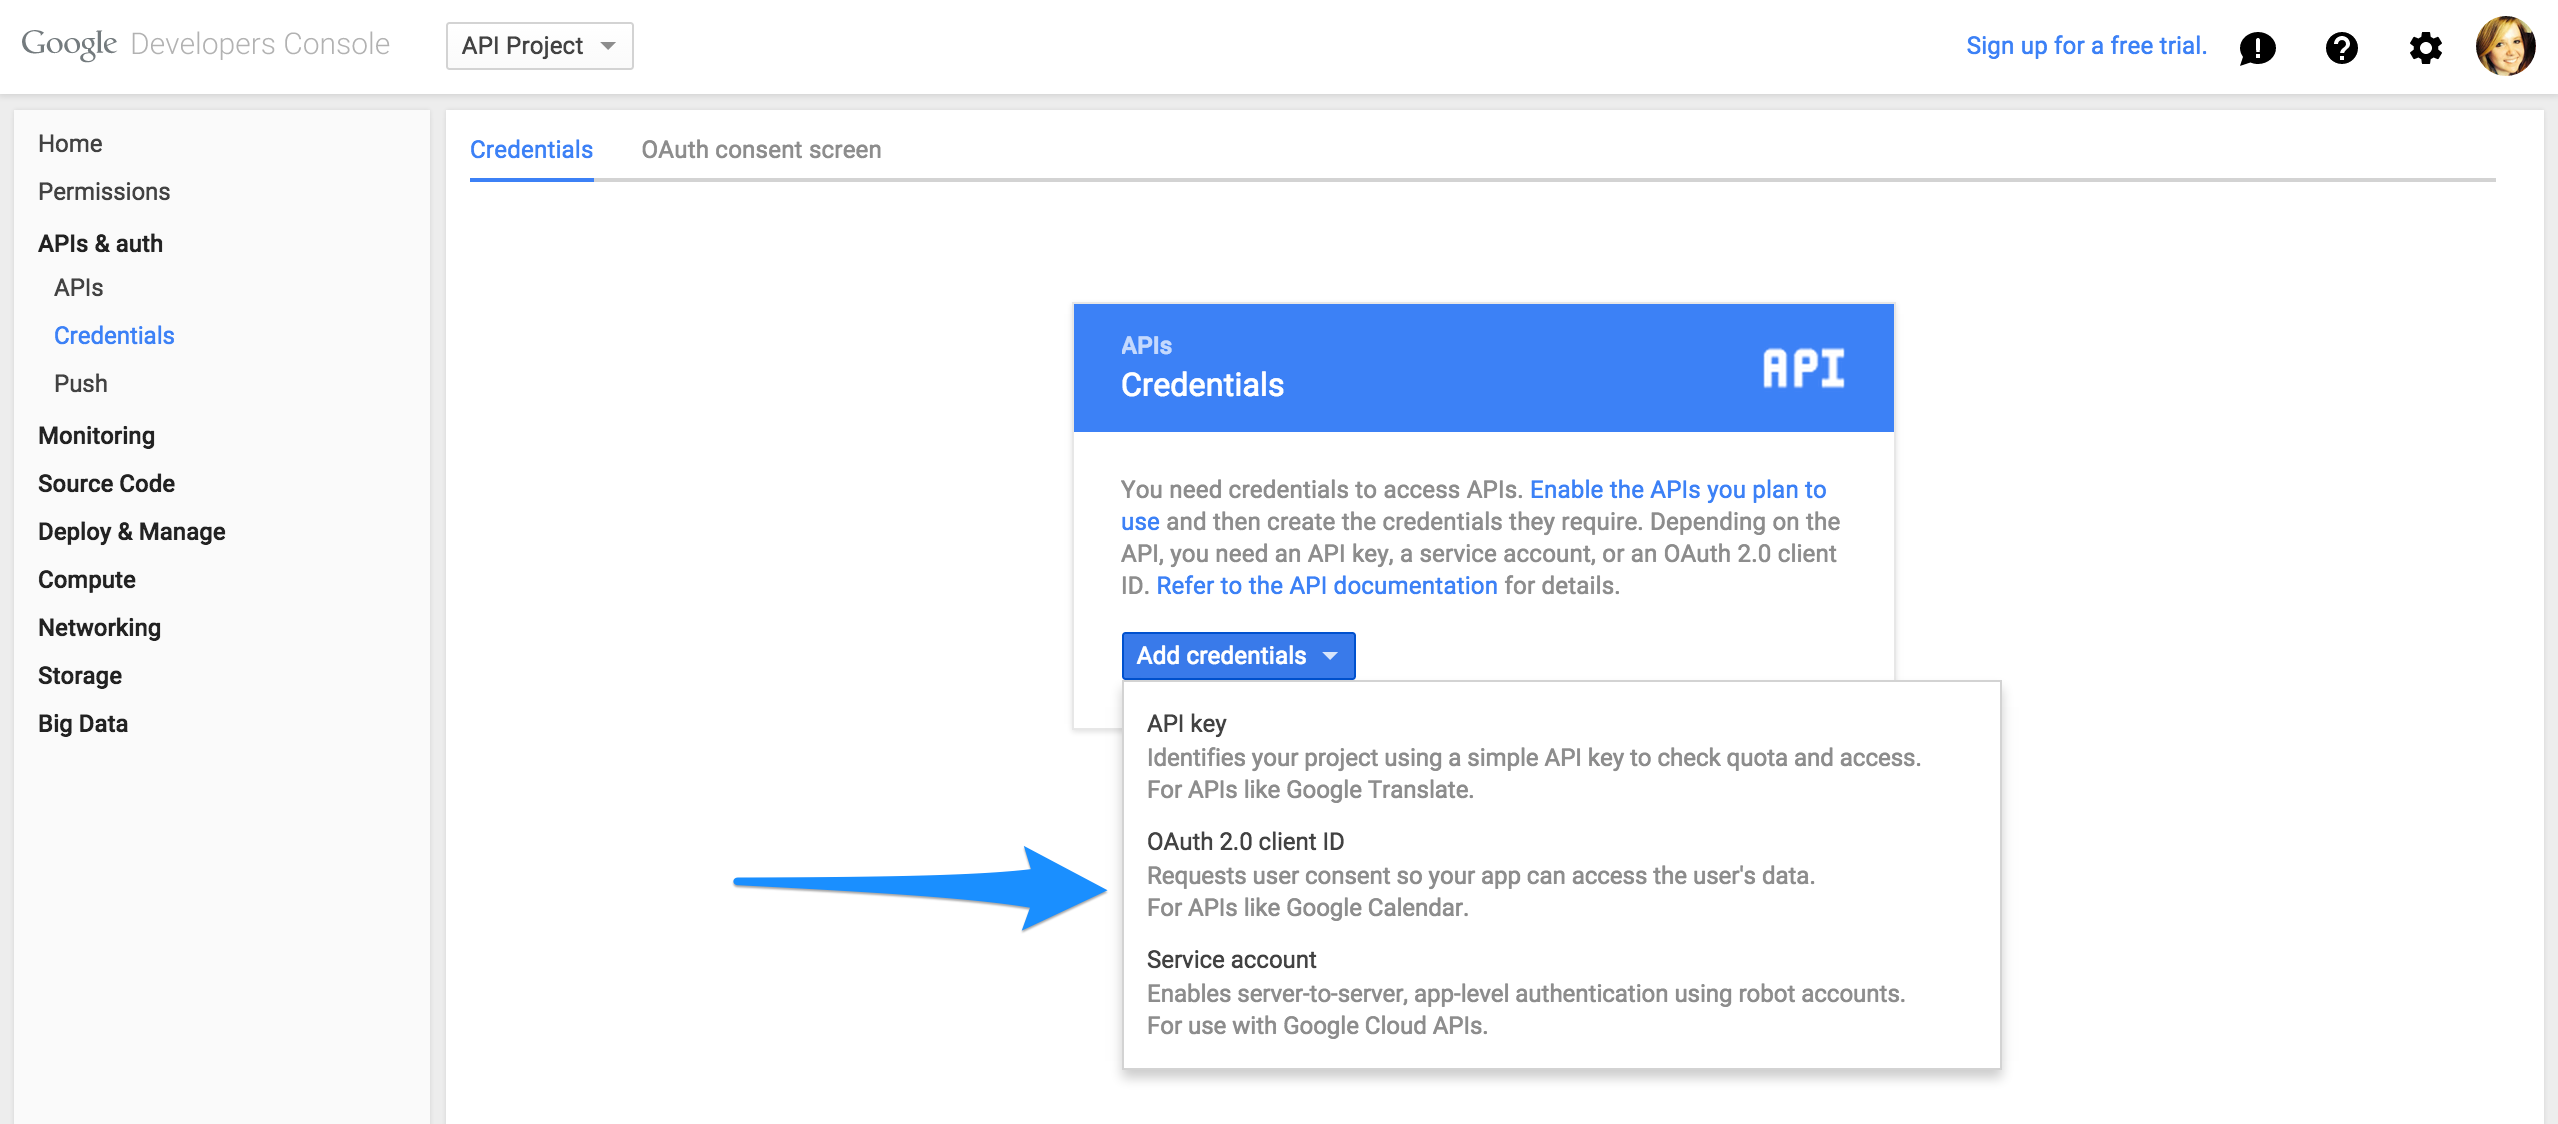
Next, click on ‘Credentials’, then ‘Add Credentials’ > ‘oAuth 2.0 client ID’ and select a web application.
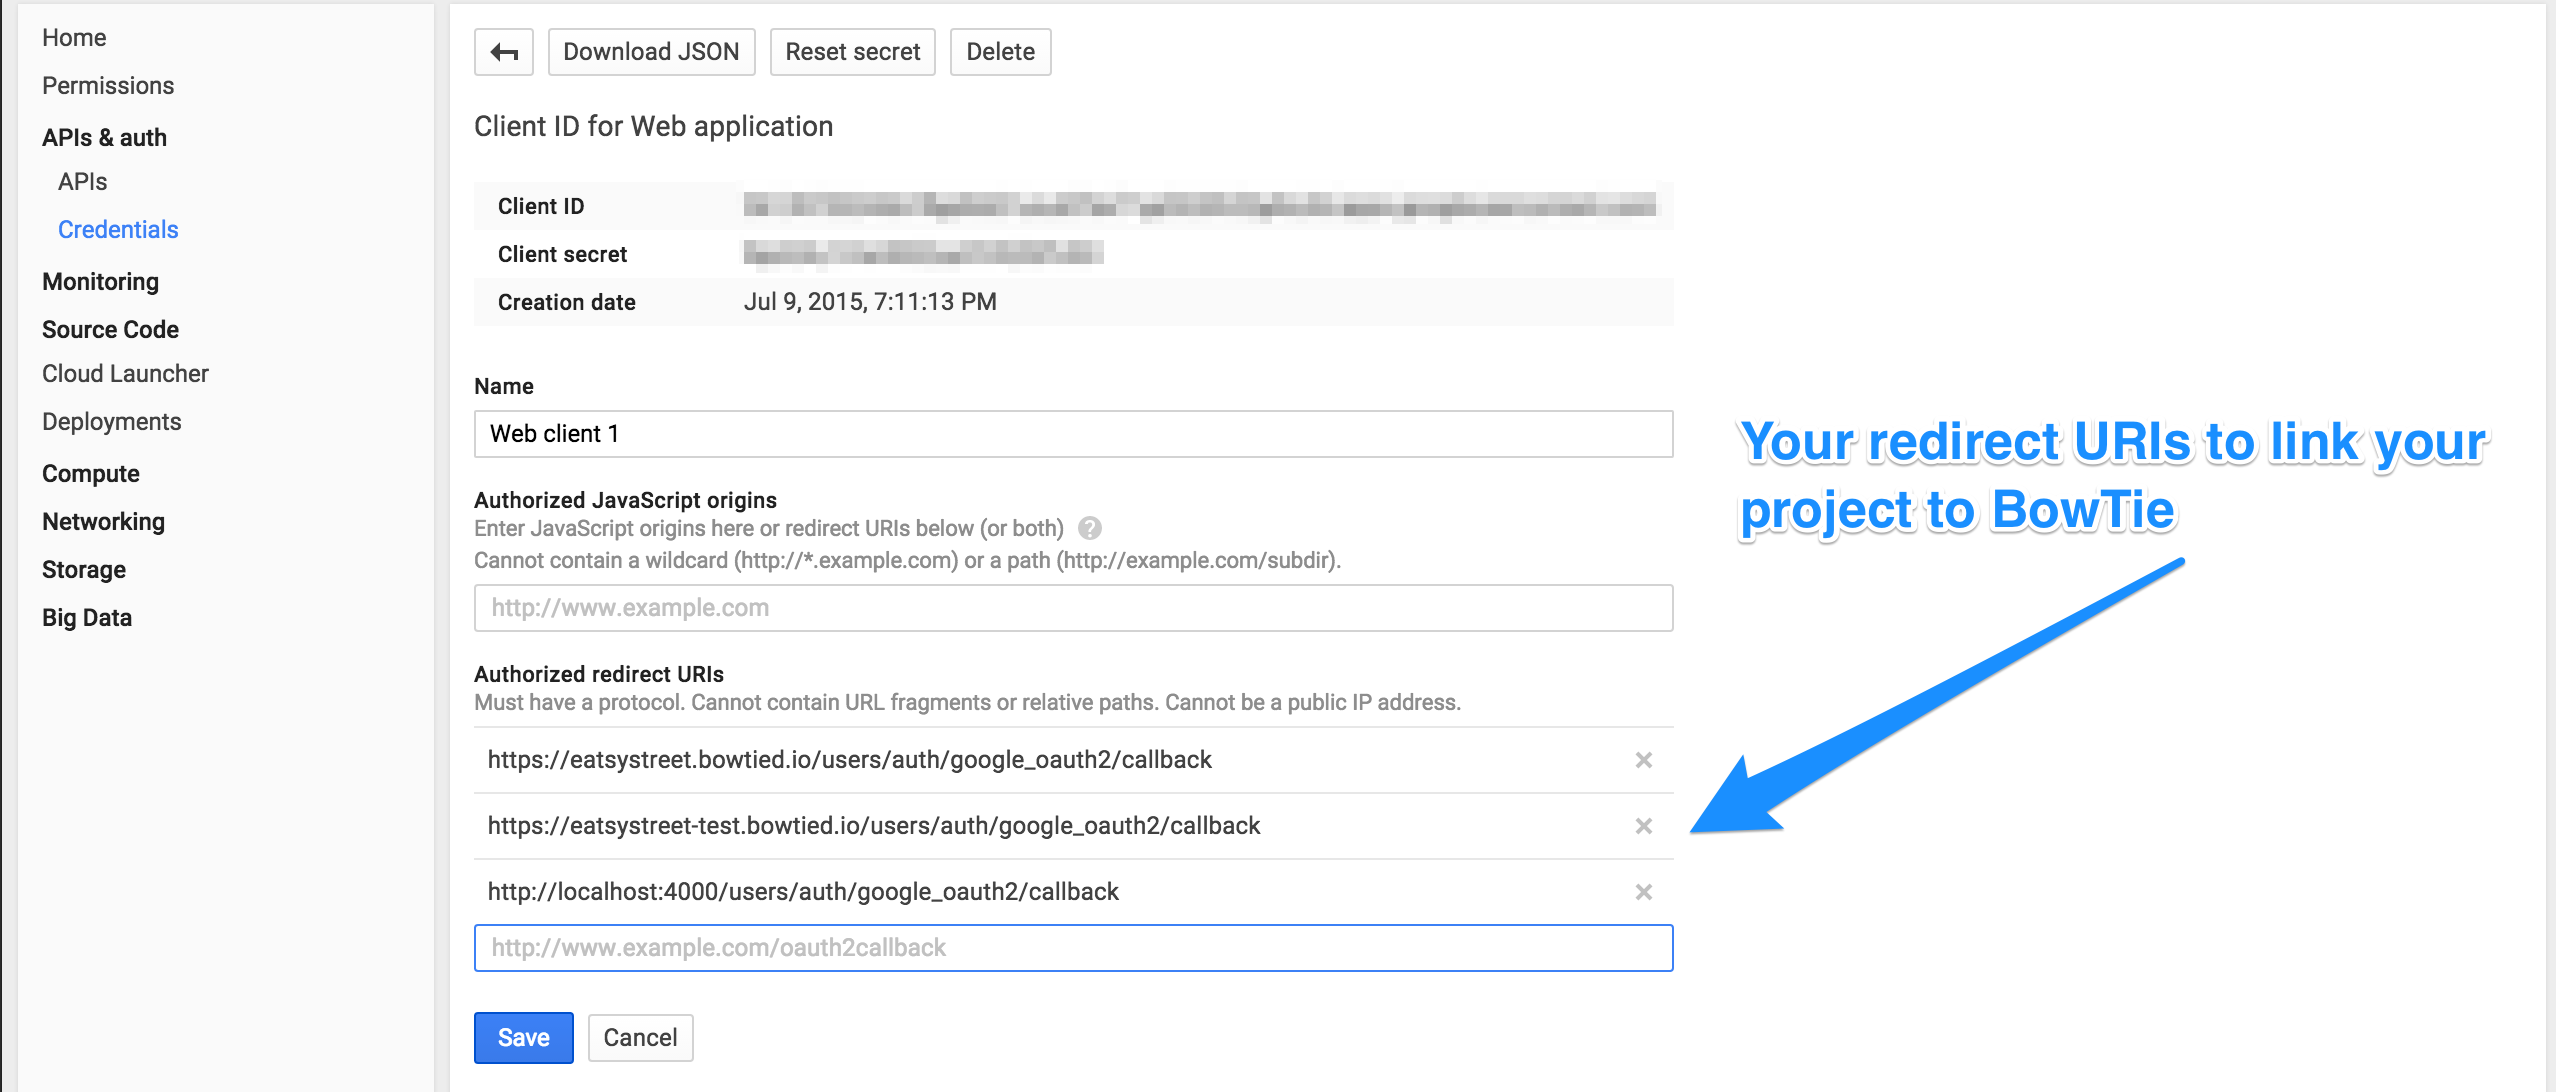
Here, you will be prompted to enter redirect URIs. This is how Google and your BowTie project will be linked together. There will be a redirect URI for each environment you have, and your local host. Every Bowtie project has two environments - Test and Live.
You can obtain these urls on your BowTie dashboard by navigating to /projects/PROJECTNAME/domains. At the end of each url, add /users/auth/google_oauth2/callback to make it a redirect URI Google recognizes. You will also want to add your local development url; in most cases, it will be http://localhost:4000 (the address served by the BowTie client).
For EatsyStreet, my rails backend application, there are three linked redirect URIs that were used throughout the build process (local, test, and live).
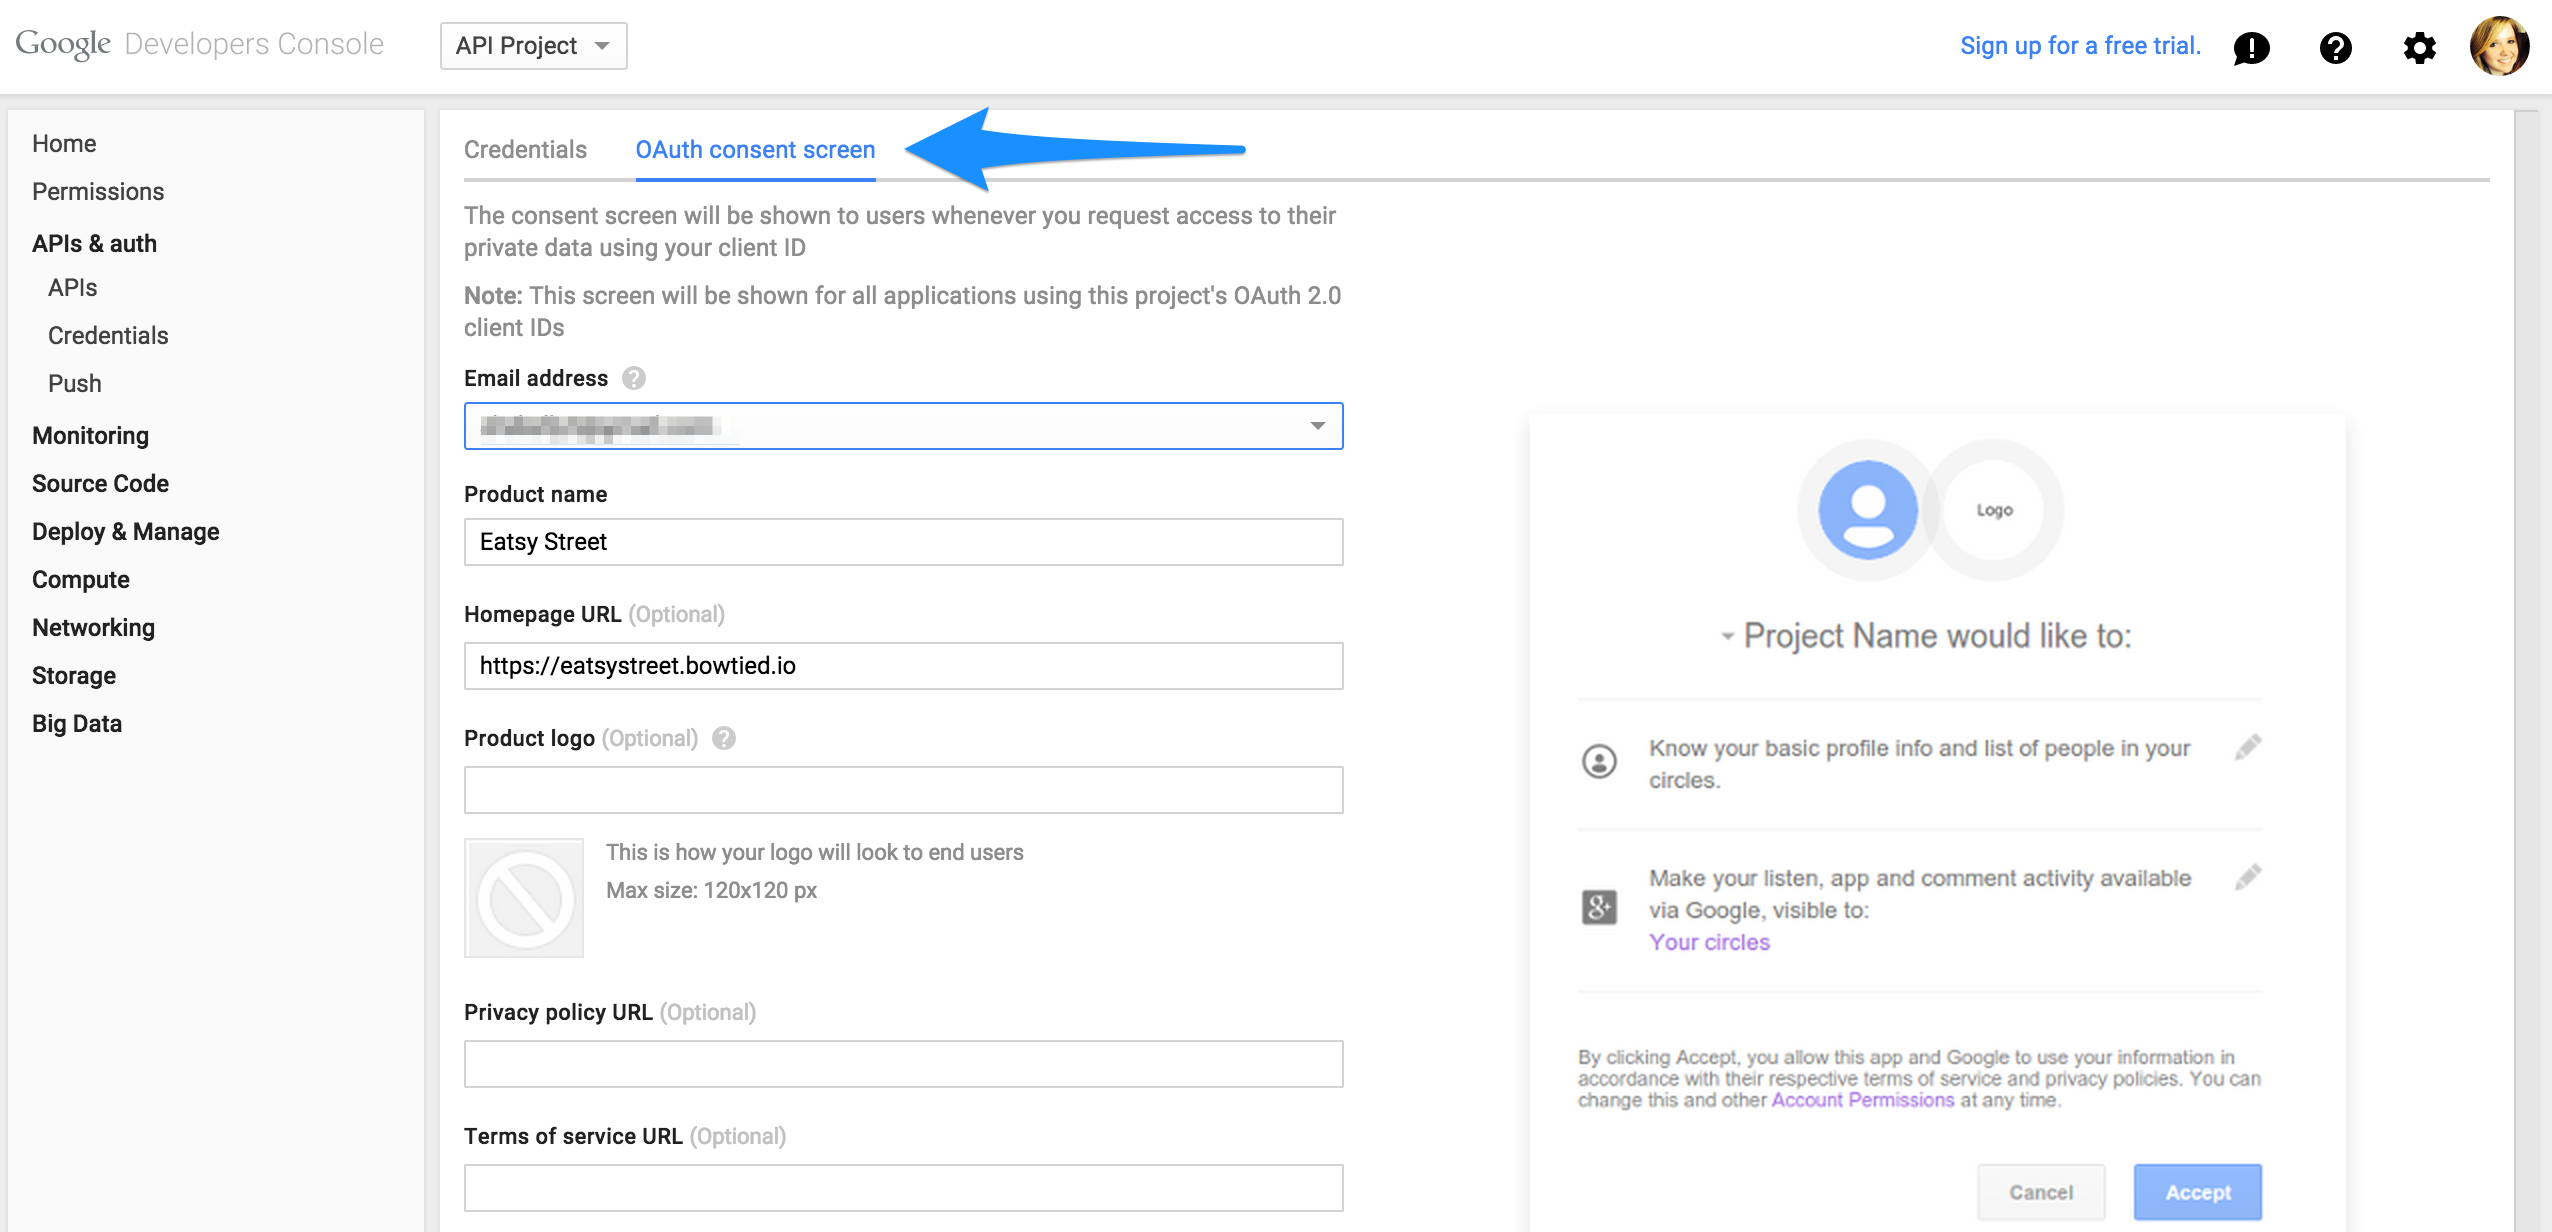
The last step in setting up your Google Developers Console is creating your consent screen. At the top of your console, you will see a ‘oAuth consent screen’ tab. Use this to enter the information required to set up your consent screen, then save.
Configuring Your BowTie Application
When you have finished setting up your project in the developer’s console, come back to your BowTie Dashboard. Here you will navigate to ‘Settings’ > ‘oAuth’ and click on the Google tab. Enter in your Google client ID, client secret, and the scope of your project.
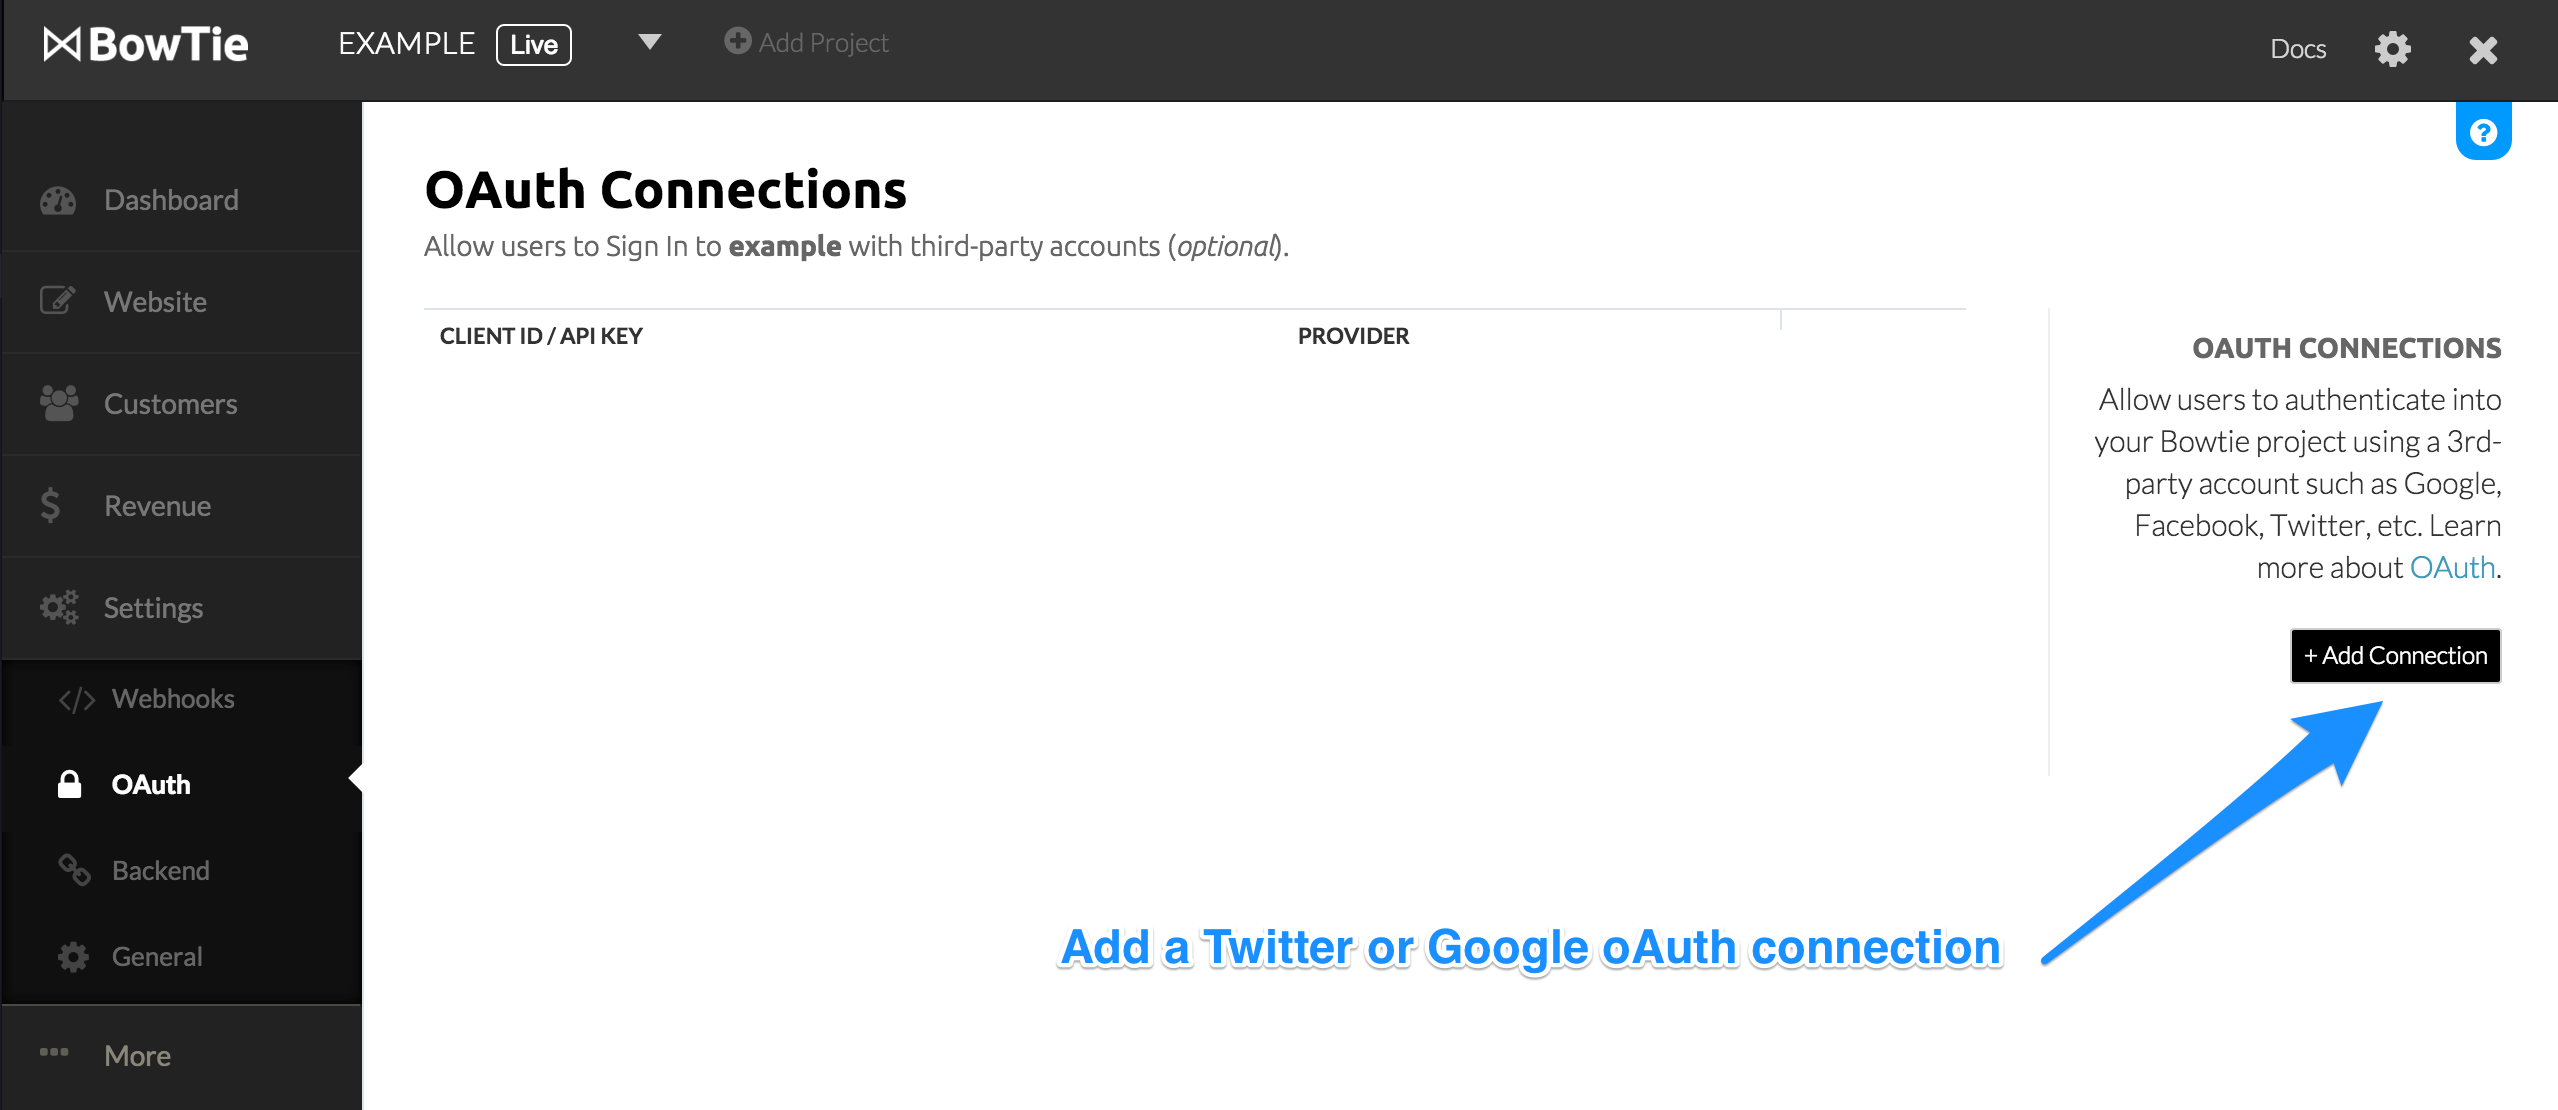
The scope is necessary to pass along in the request so Google can gain access to certain user data - such as their email addresses. What scopes you need to include depend on what APIs you have enabled. Documentation surrounding making this decision can be found in Google’s Docs.
oAuth2 Google Token Access In Your Application
There are two ways to pass an oAuth2 token to your BowTie application, depending on if you are building a backend or frontend app.
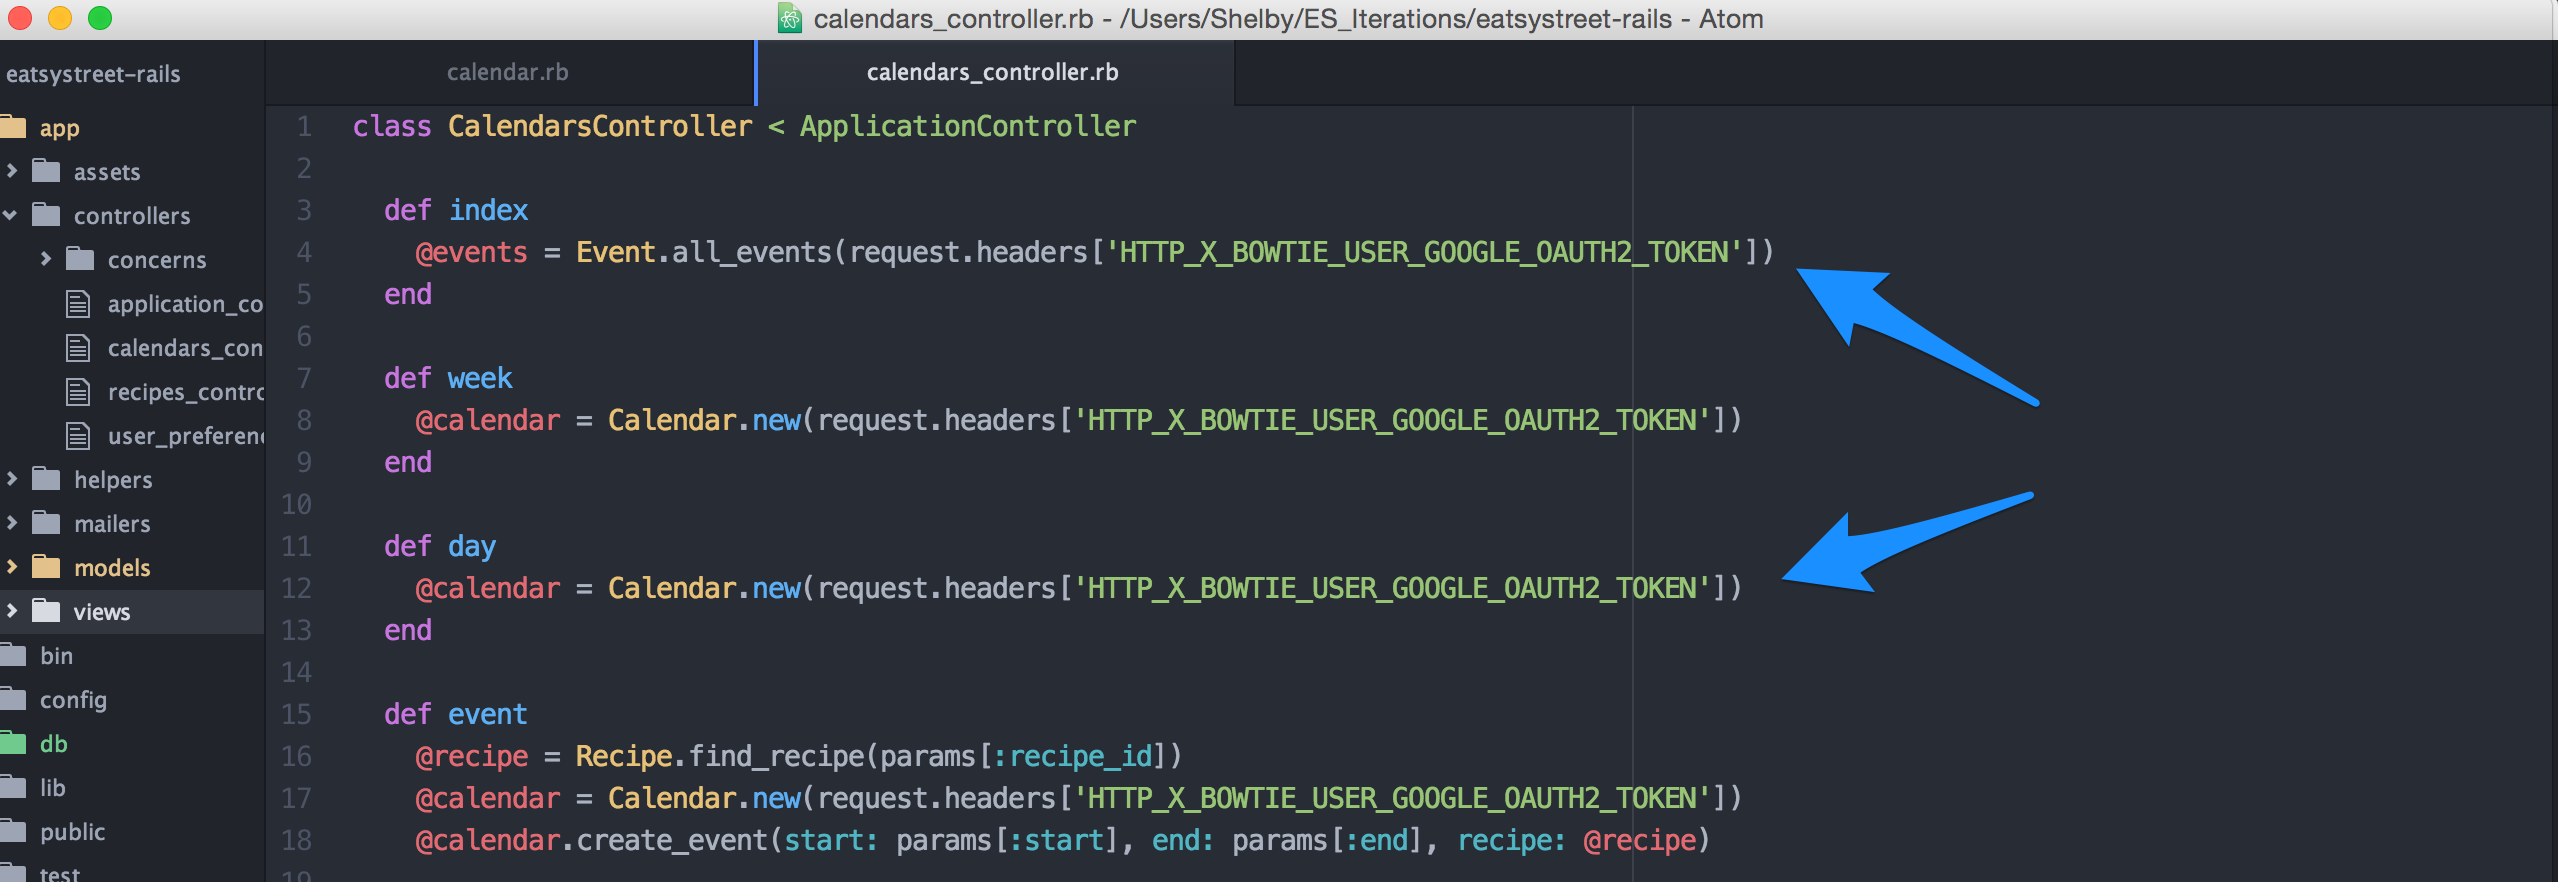
For backend applications, BowTie stores the oAuth2 token in a request header. When your backend application makes a request for user information, BowTie passes back a collection of request headers that contain information about the user. One of these is the HTTP_X_BOWTIE_USER_GOOGLE_OAUTH2_TOKEN that provides access to your API integration.
In the case of EatsyStreet, the Google oAuth2 token is used when accessing the user’s Google Calendar. In the rails backend application, the token is passed as an argument inside the CalendarsController to get all events in a user’s Google Calendar, and to create a new calendar object.
This is a basic example of the token’s implementation inside the app. You can also use the token as an argument for methods you write yourself to gain access to user’s Google information, following Google’s documentation.
To learn what other information BowTie can pass to your backend application, read our request header documentation.
If you are not using a backend application, you will need to access your token inside the BowTie user object. This is done by using the google_oauth2_token or twitter_token method on the BowTie user object.

For more info, read our Docs on the BowTie user object.
Additional oAuth Connections
To implement oAuth2 with Twitter, you will need to register your BowTie application on the Twitter Developers Console. Create a new project there, and head back to your BowTie Dashboard. Navigate to /projects/PROJECTNAME/oauth_accounts and click ‘+Add Connection’. Click the Twitter tab, and enter your API Key and Consumer Secret from your Twitter account dashboard.
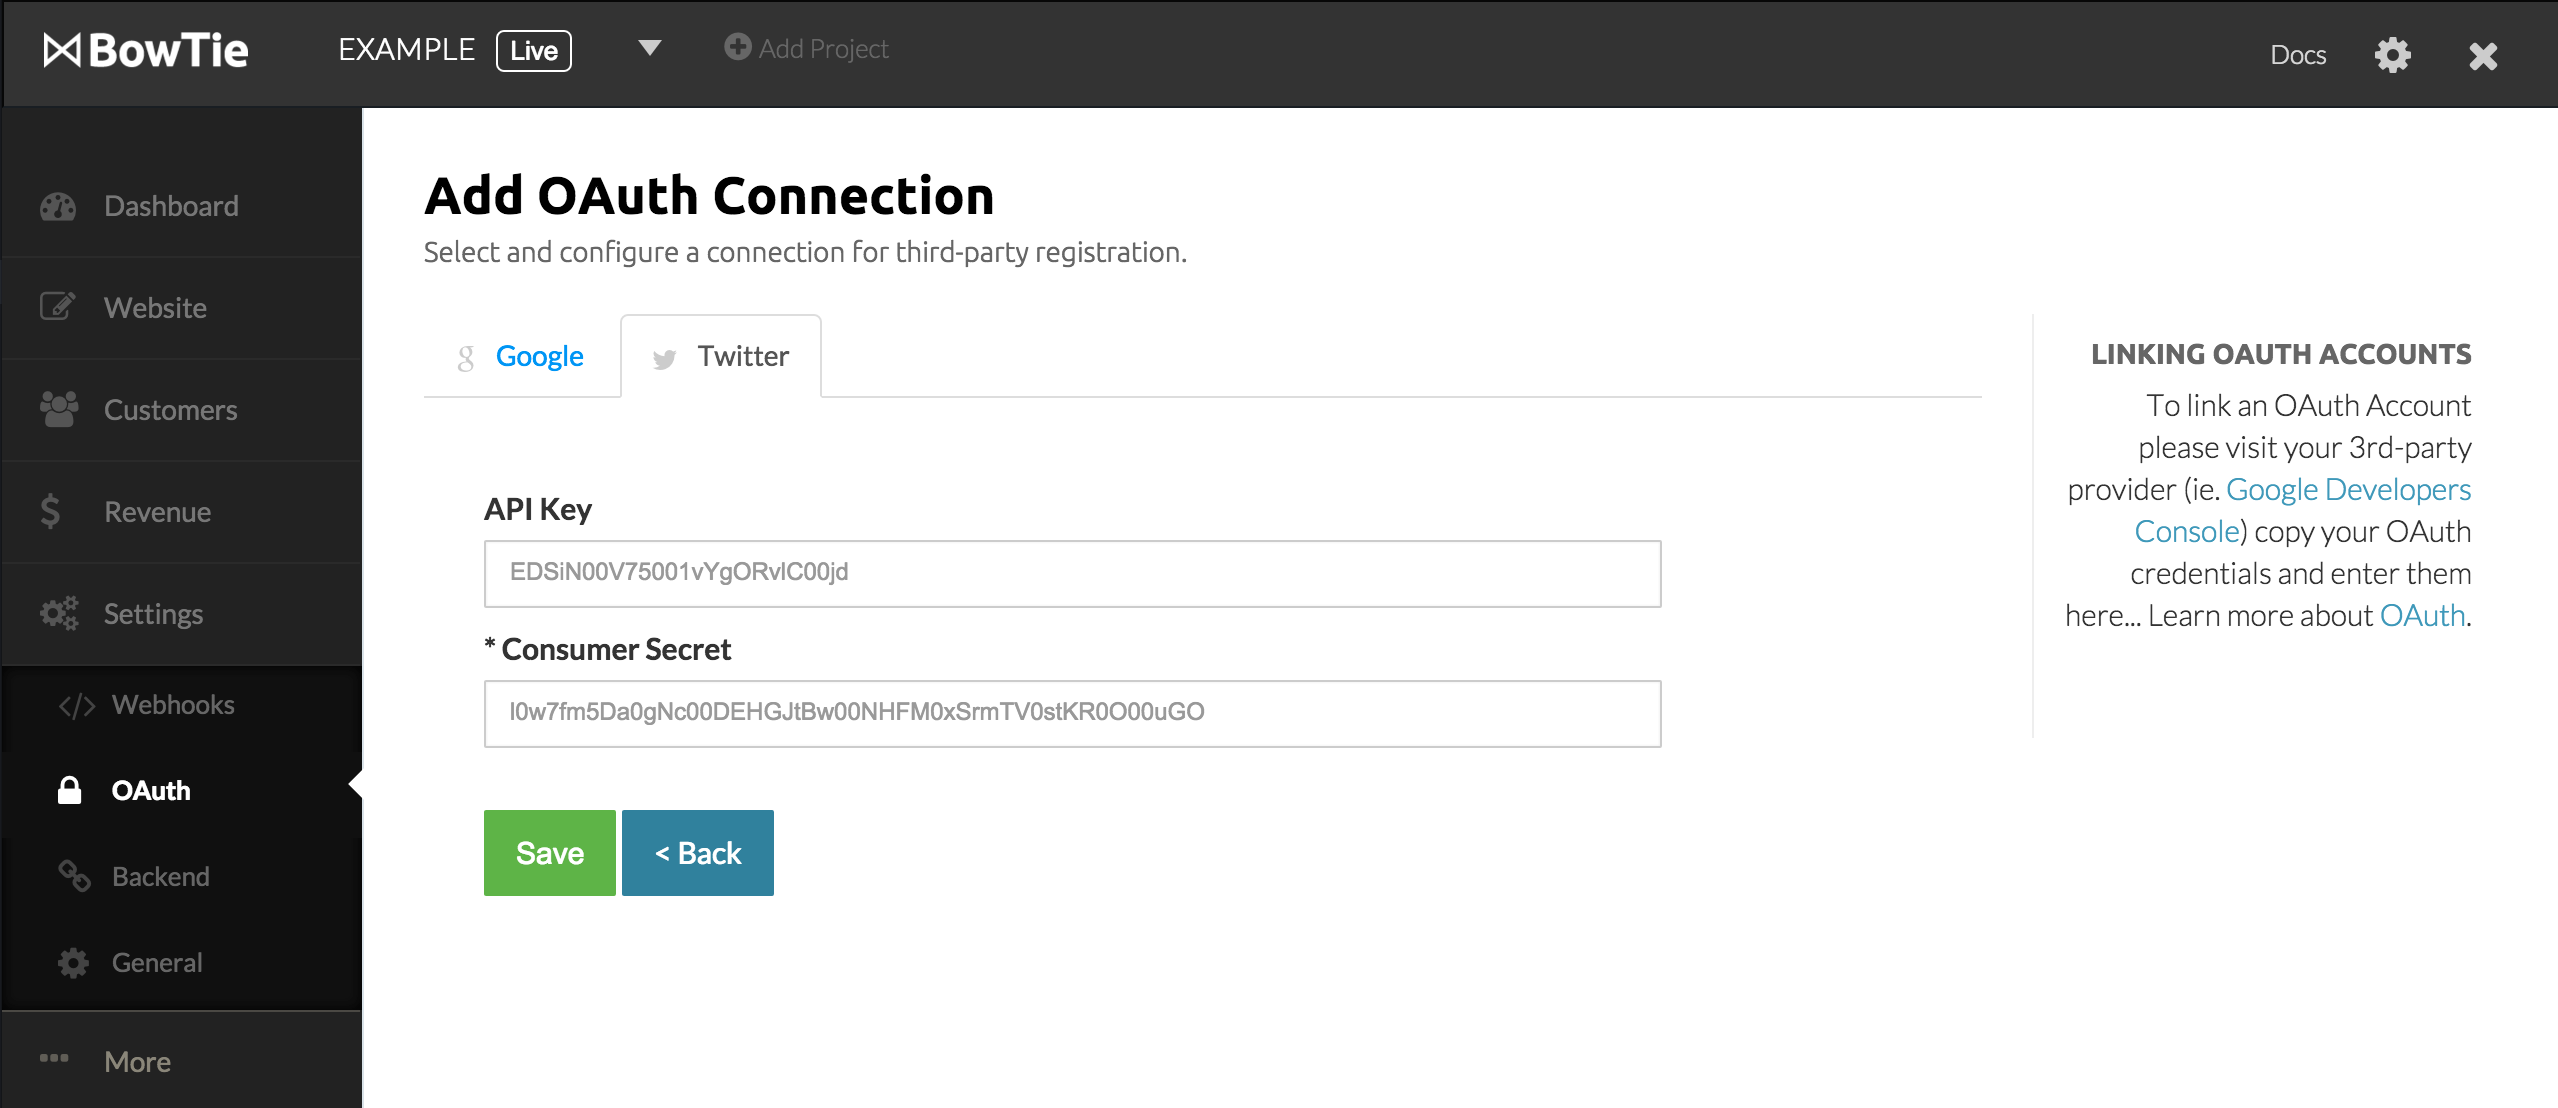
Important to note - BowTie requires an email address to be associated with each user that signs up, however Twitter oAuth does not. BowTie creates a random email address for each user that signs up with Twitter oAuth, which you are able to change in your BowTie dashboard under the ‘Users’ tab. Users can also update their email address on the hosted ‘Account’ page when visiting your BowTie site, or you can prompt your users to update their email address at the following link (/PROJECTNAME/users/edit).
Now your users will be able to register or login with Twitter!
BowTie User Management Options
Implementing user sign up and login through BowTie’s oAuth2 feature is a great way to streamline user management while also gaining access to a user’s social account information. You’ll have access to users registered via oAuth in your BowTie dashboard, where you can view, edit, and delete accounts.
The BowTie user management system stores every user that logs in with either Google or Twitter in it’s database, providing that information to your application. Backend applications access the information through a bowtie_user_id found in the request headers, and frontend applications access it through the id field in the user object. If you want to read more about BowTie users, visit these docs.
Additionally, you can set access restrictions based on subscriptions, payments, or profiles using the BowTie policy system. To learn how to use our User profile and policy management system, read this post. For an example of subscription based policies, read this post.
If you’d like to fire off events inside your application when a user performs an action, you can use our Zapier integration to tie your BowTie project to hundreds of other services. Read this blog post if you’re interested in that enhancement.
Curious? View the source on Github.
If you’d like to see our pre-built templates on GitHub, check them out here. For even more options, read our Getting Started series:
If you are new to BowTie, check out our other Getting Started guides.
Getting Started with BowTie:
- Build a Landing Page in 5 minutes
- Using the BowTie Collection Editor
- Initial Configuration
- Setting Up Custom Domains
- Customizing and Styling BowTie frontend content
- Build a website with a pay wall
- Blogging with BowTie
- Launch a simple donation site
- Using BowTie’s User Profile system
- Build a Daily Deal Site with Jekyll Collections
- Using Jekyll Data to extend your site
- Adding BowTie users to MailChimp with Zapier
To keep up to date, follow us on twitter at @bowtie_io
Questions? Please comment! Thanks for your support and feedback.