One of the most basic and important tools for any business is your landing page. When you’re building a new product, this page is likely your first and only point of contact with a prospective user, partner, or investor. It allows you to test and validate your idea before you even begin building. Your landing page should be lightweight, responsive, and easy to update.
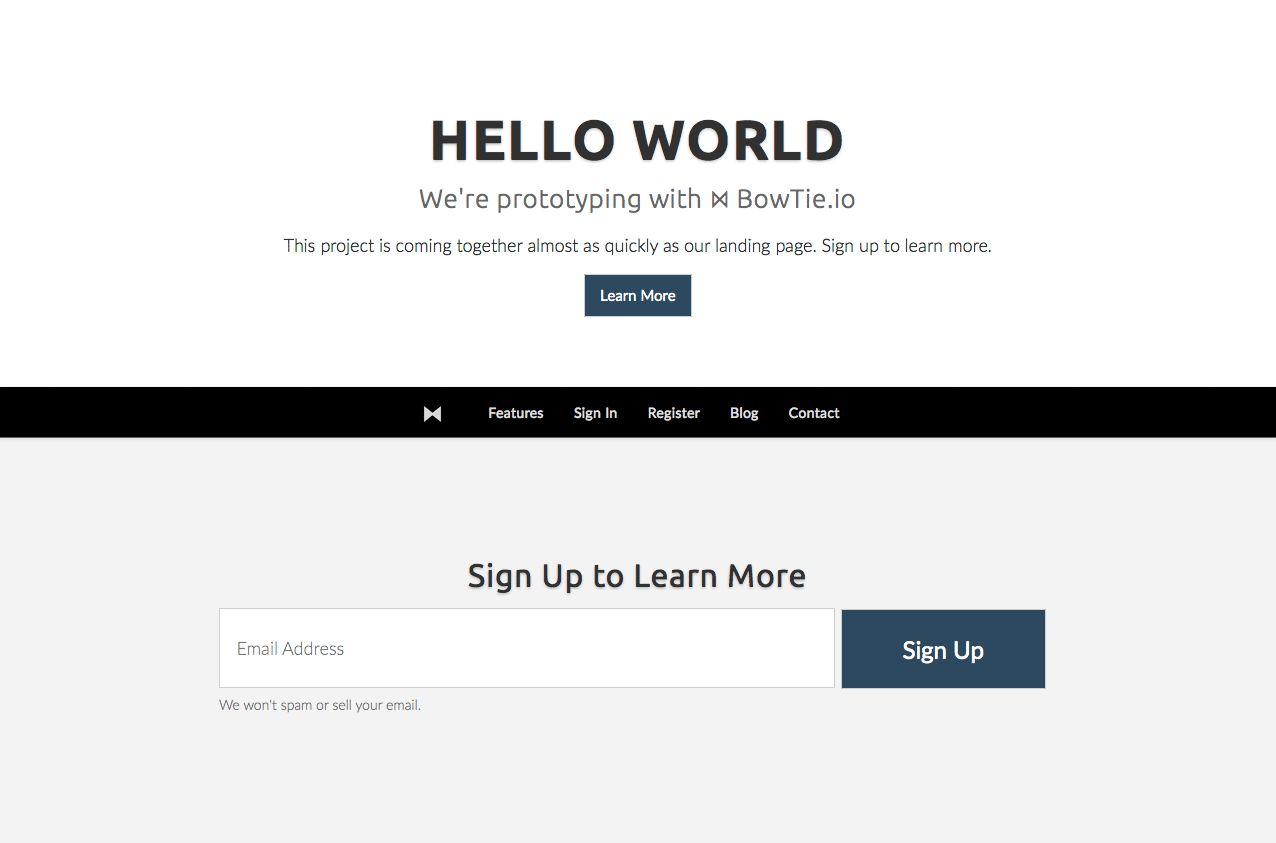
This post will show you how to use BowTie to set up a simple landing page using our default template.
Example Landing Page
Creating a BowTie Project
BowTie provides dozens of responsive HTML 5 templates to get your next site or web app up and running quickly. Select your components, edit content and settings, and push your changes to production. Behind the scenes, we build database-free static pages from your content.
And, because we built BowTie with tools you are already using (like Jekyll, Bootstrap, and Zapier), you won’t waste time getting up to speed and extending your site.
For the purpose of this project we will select the ‘Blog + Landing Page’ template. This will install a subset of our templates designed to build a simple landing page, with an integrated blog, email collection, and analytics. Additionally, every project includes hosted error pages, and a standalone maintenance page.
Template Selector
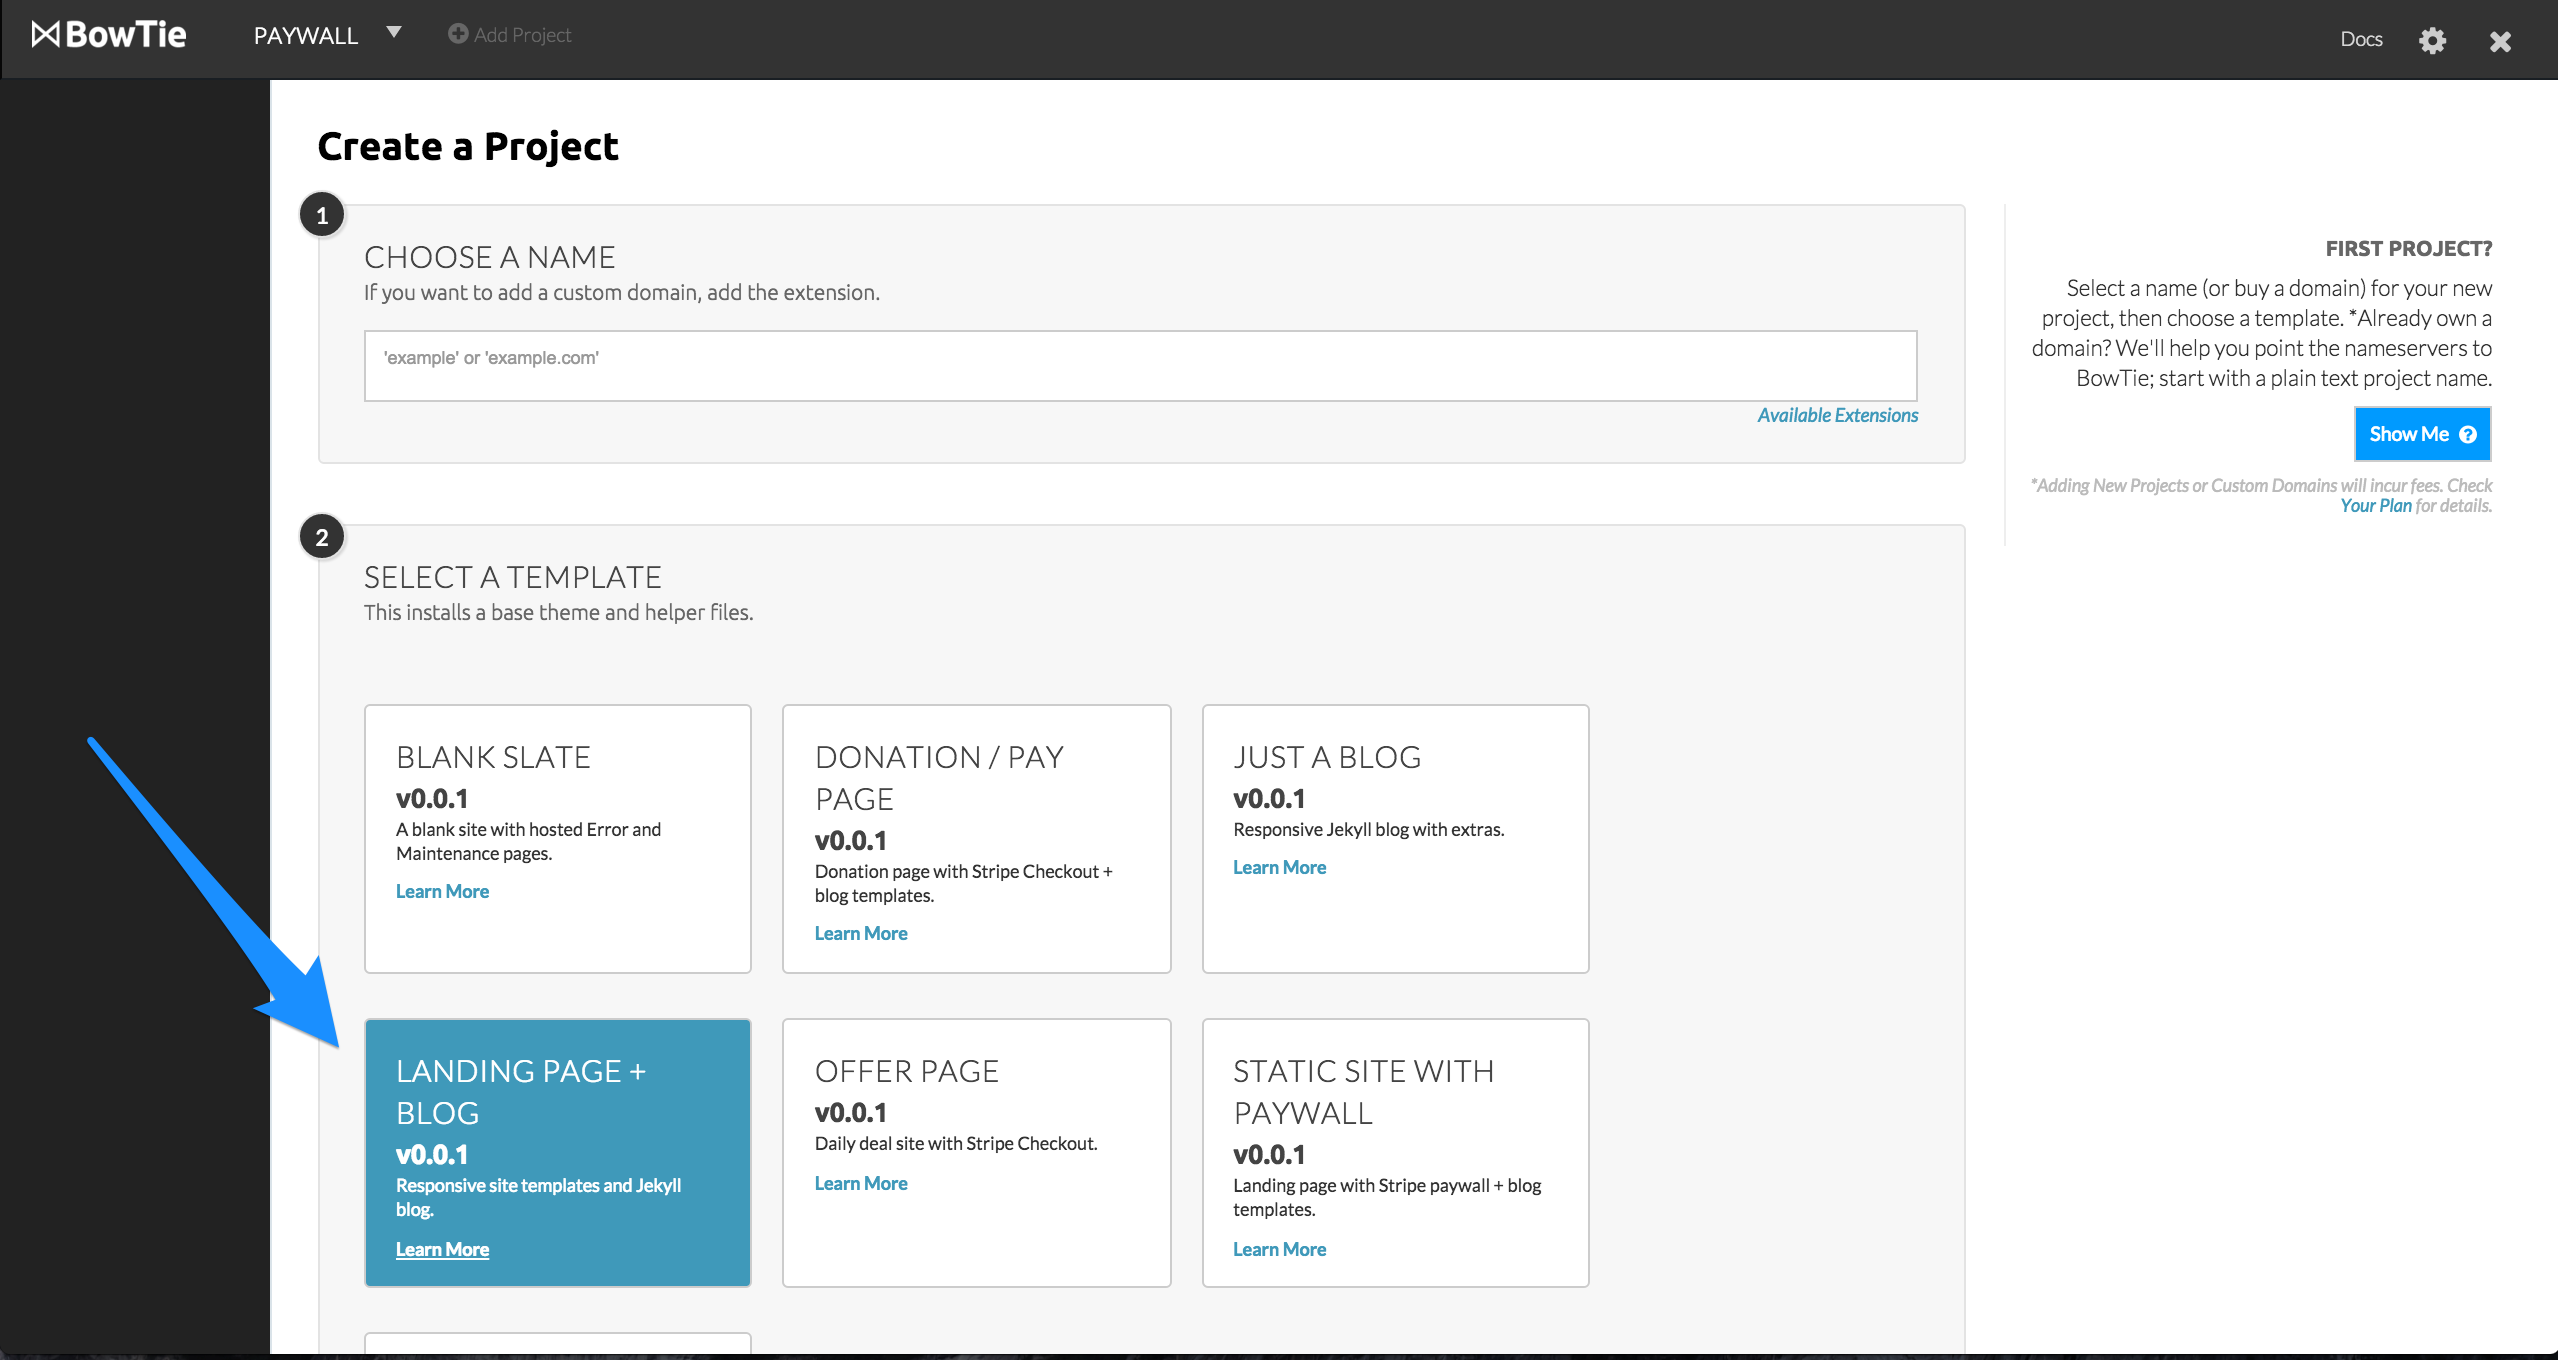
Choose a plain text name for your project, or identify and purchase a new domain by adding a TLD (e.g. ‘.com, .org, .io’), then hit ‘Build Project.’
When you build a project, we automatically setup and configure your frontend hosting environment. In about 5 minutes, we will acquire your domain, install and configure SSL, forward your domain email, and install your templates into a version-controlled private git repository.
Project Creation
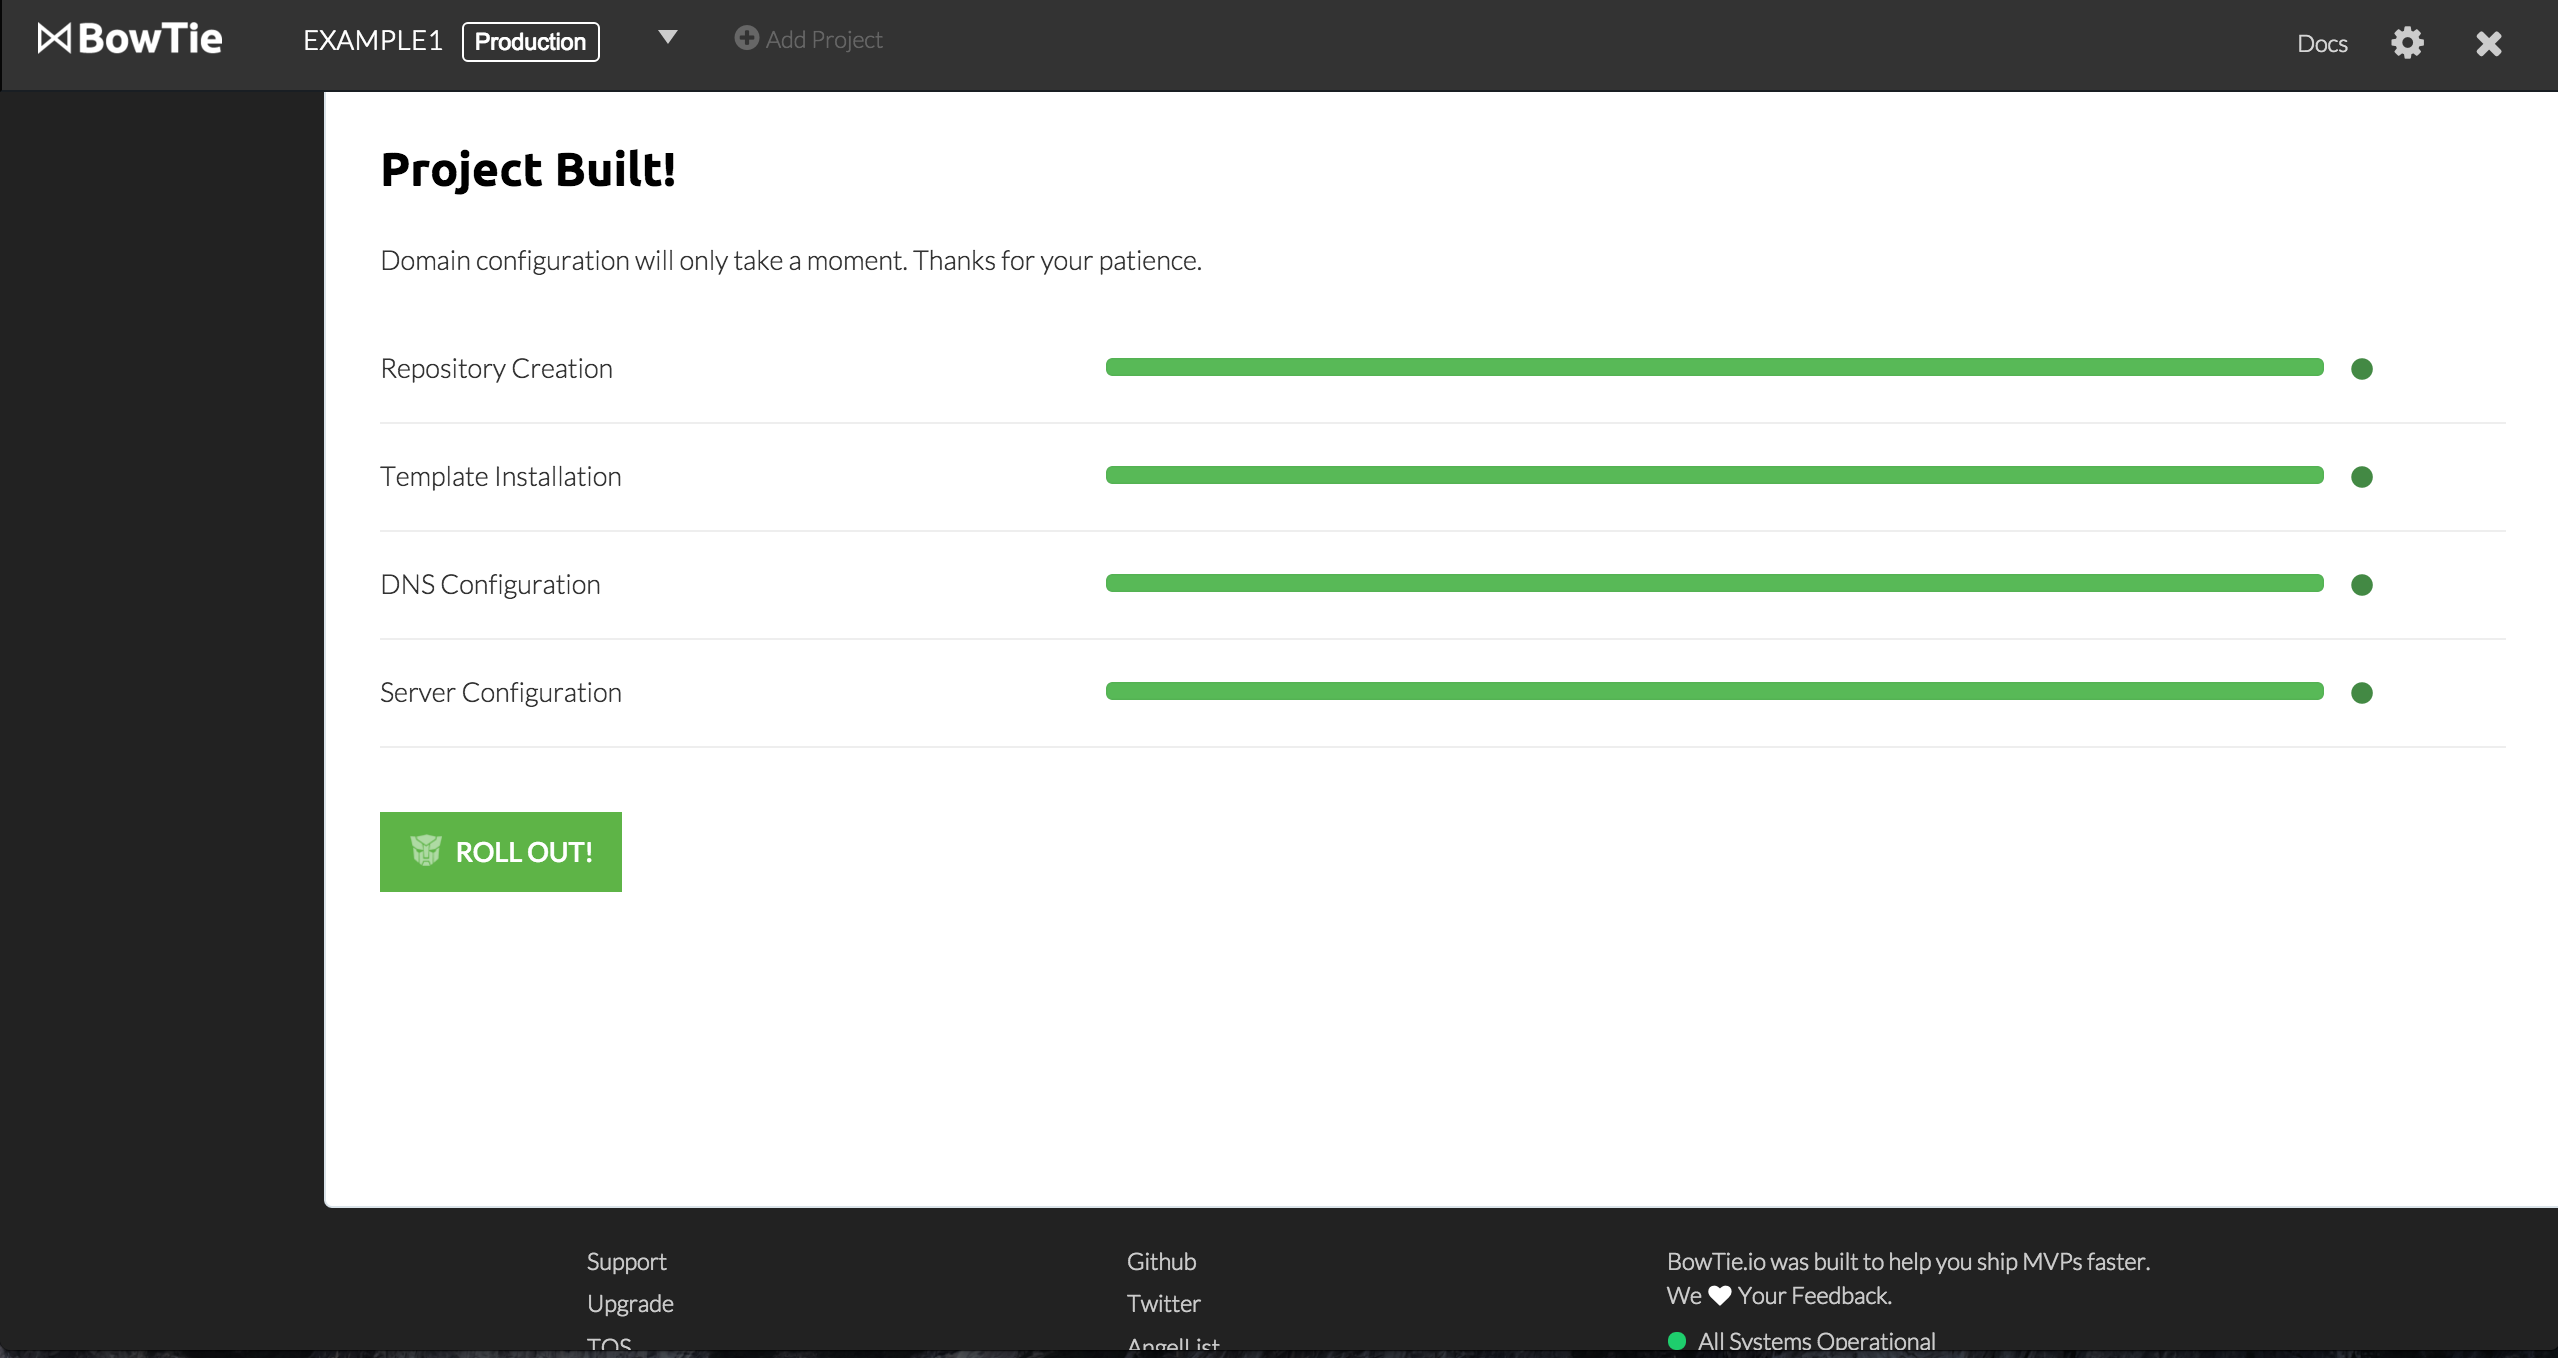
When your project completes, click the ‘Roll Out’ button to land on your BowTie Dashboard. The Dashboard displays core stats and allows you to manage content and settings for each of your projects. We recommend you start with the tour to get a feel for what you can do.
BowTie Dashboard
Each Bowtie project has two environments in which you can work in - Live and Test. To switch between the two environments, click the environment to the right of your project name and select your desired setting.
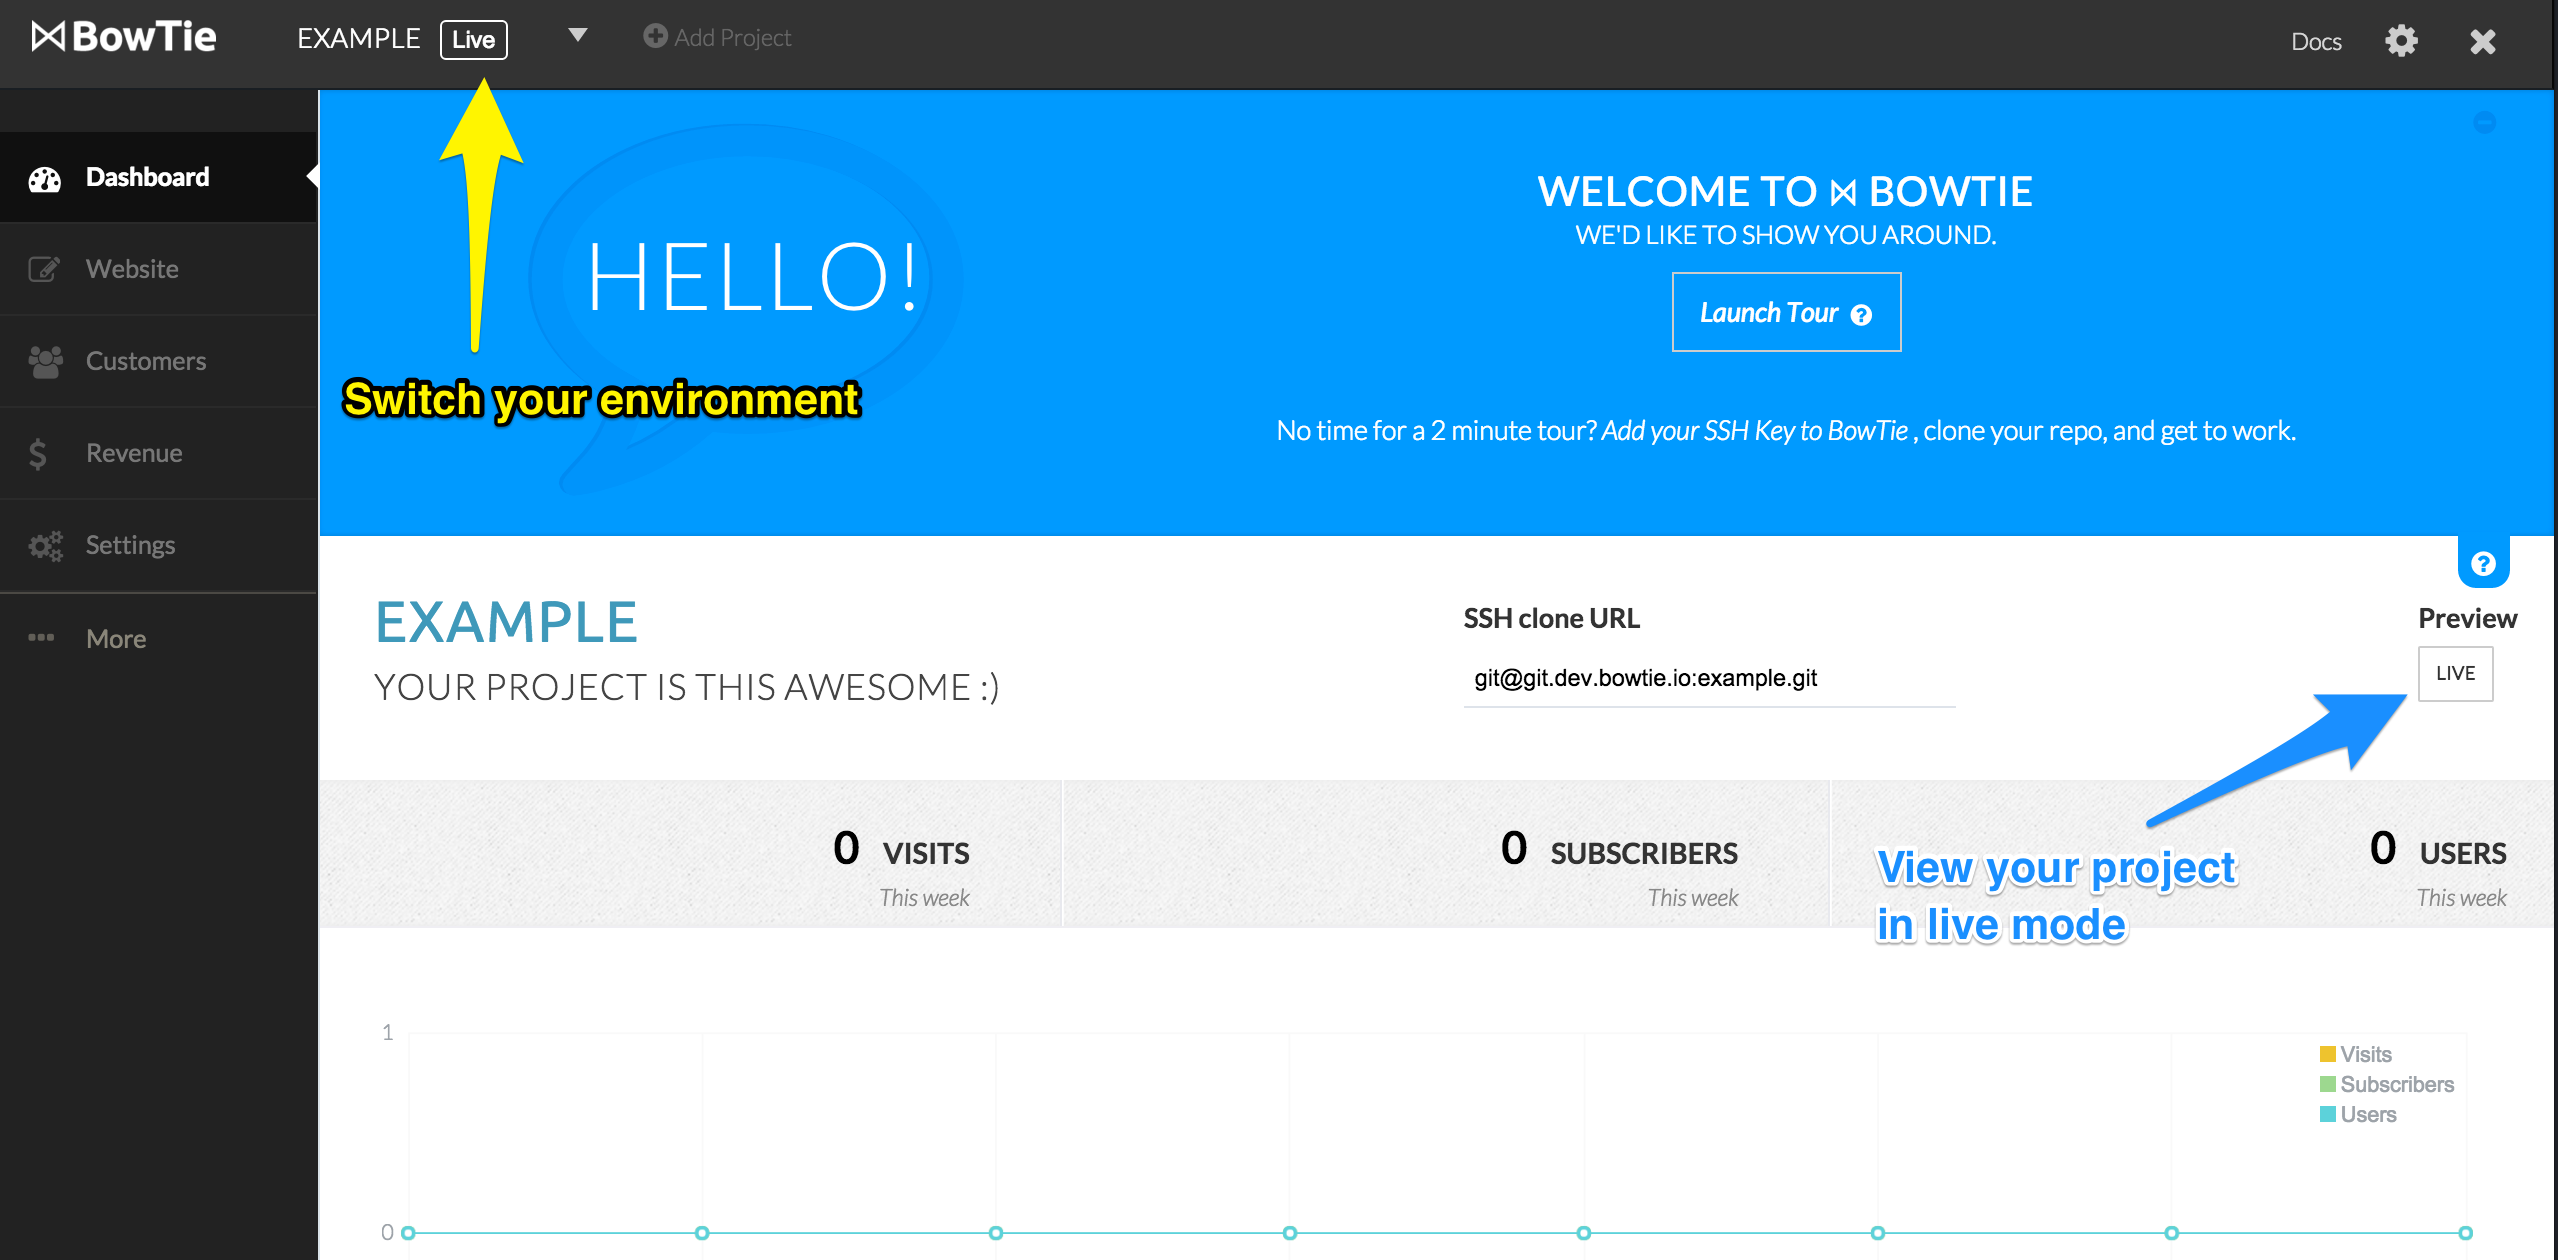
In the top right section, you will see a button linking to your Test or Live version of your project, depending on which environment you are currently in. Click the button to view the template we installed. If you are using a hosted domain, your site will appear at PROJECTNAME.bowtied.io.
At this point, you should be about 5 minutes in and you have a fully functioning landing page ready for updates and customization.
Blogging with BowTie
BowTie is a powerful publishing platform that allows you to author blog content, or static pages quickly and easily. If you installed a template that includes blog components, you can begin publishing blog posts immediately. Your BowTie blog is written in markdown and assembled with the same engine used by github pages. You can publish a simple blog, or build your next static web app with unparalleled ease and performance.
From the Dashboard of your new site, look for your ‘Blog’ link in the header. This will take you to your default blog index page (found at “/blog/“), a roll up of the content contained in your _posts directory. In fact, we published an example post for you. You can open this post in the BowTie editor, or your favorite offline editor, to get a feel for authoring content with BowTie.
For detailed instruction on how to use your BowTie blog, read this post. If you want to see a BowTie blog in action, you can take a look at our blog.
Granting Team Access
BowTie makes it easy to collaborate. You can invite any BowTie user to share access to your project from the Team settings page of your dashboard (/projects/PROJECTNAME/contributors). Simply add your collaborator’s email address into the ‘Add Team Member’ form and click the ‘+Add to Team’ button when it appears*. This will grant the contributor access to modify your project from their dashboard or via the command line.
Add a Contributor
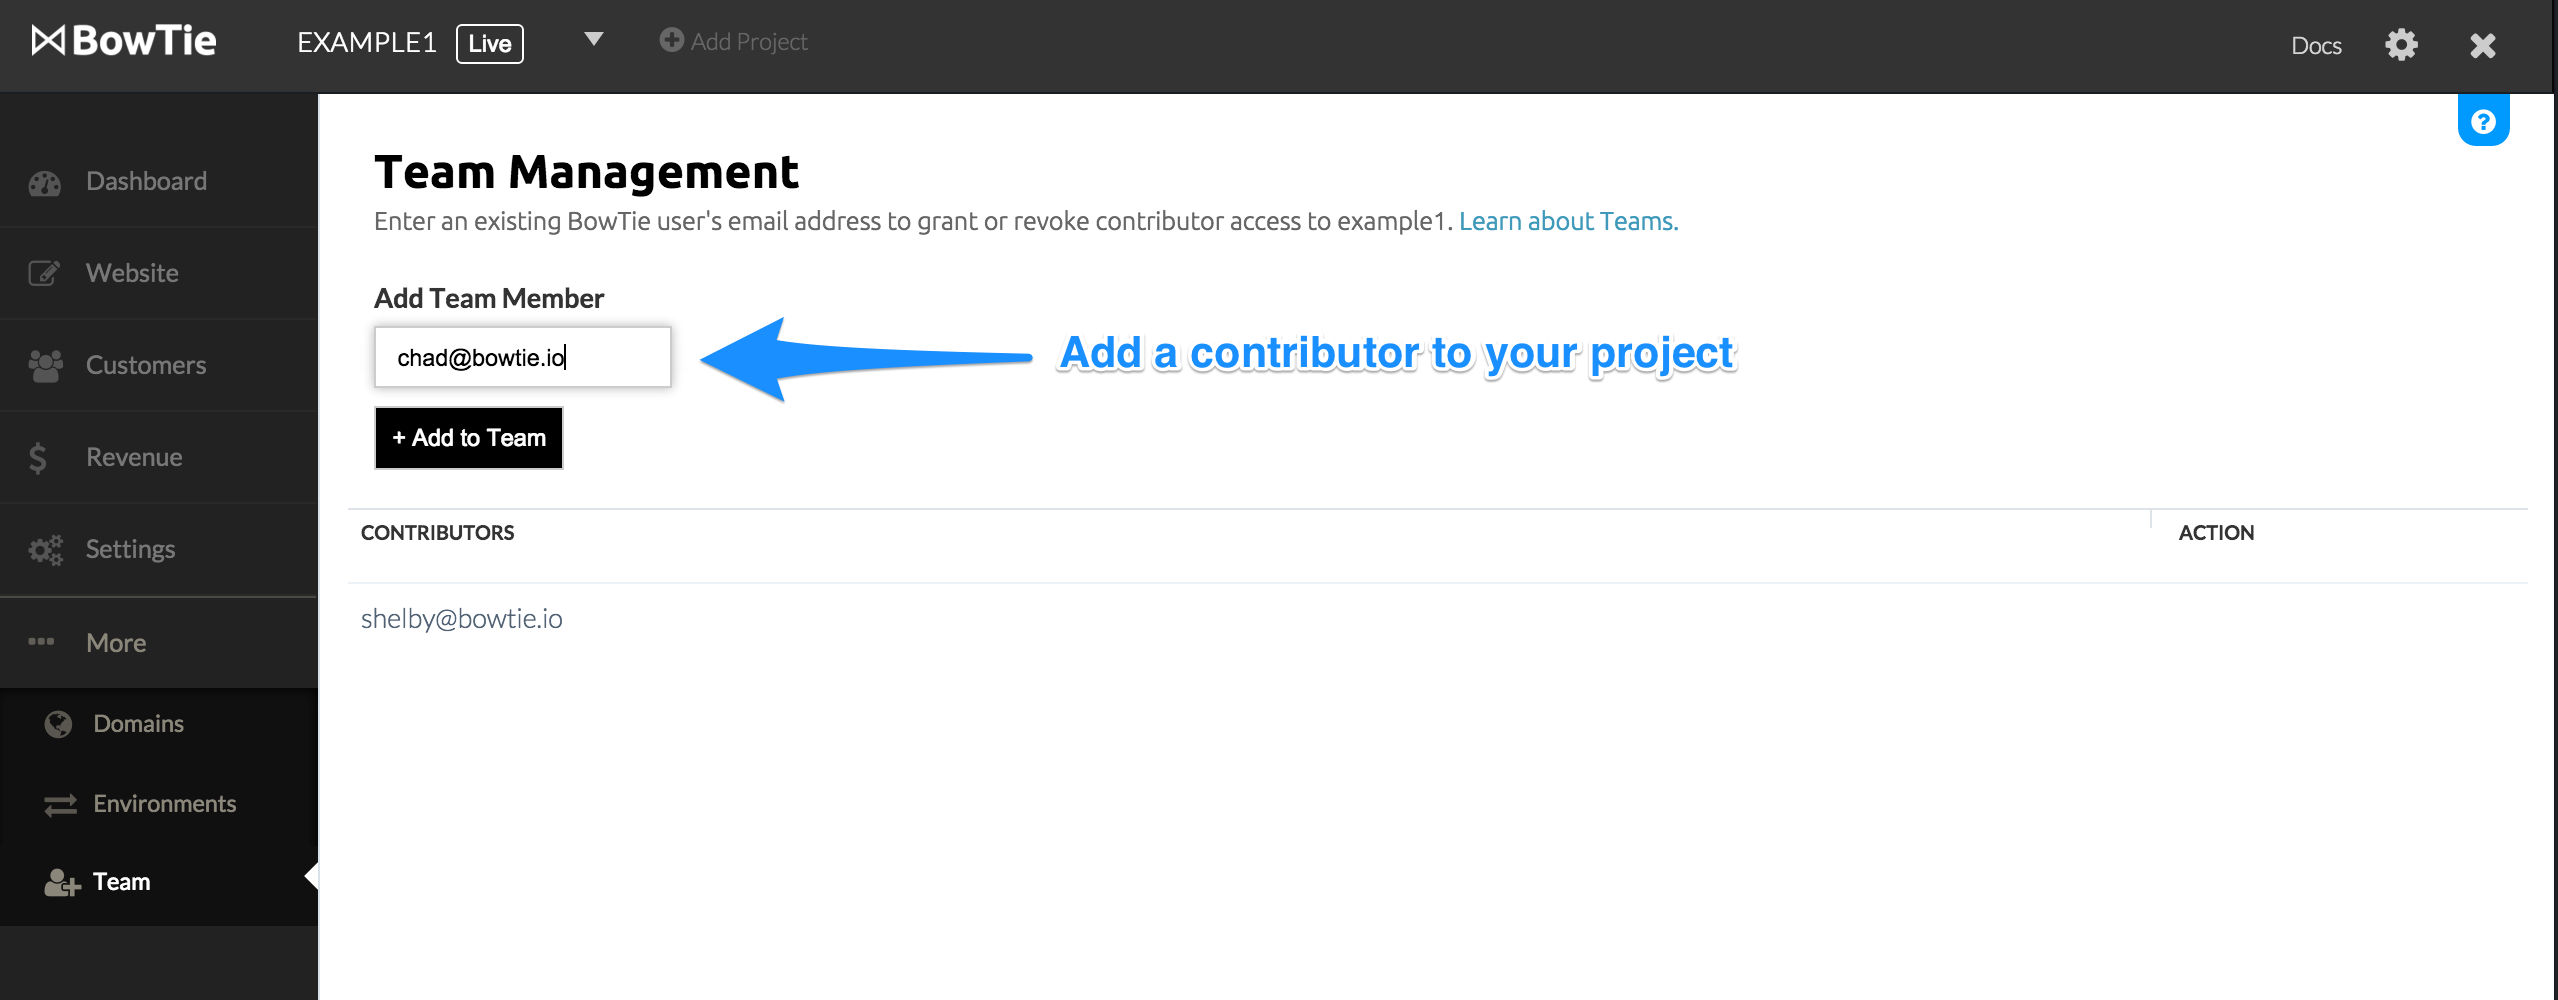
*Each team member will need a BowTie account. If the email address you attempt to share your project is not connected to an active BowTie project, the ‘Add User’ button will not appear. Shared projects do not count against your total available project count (set by your BowTie subscription plan).
More Options
Static landing pages and markdown blogs are just the beginning. BowTie’s user management and policy systems make it to prototype and launch almost any web application. Looking for the next step? Learn how to accept simple donations, or launch a site with a paywall using Stripe.
If you’d like to view the landing page template on GitHub, check it out here. For even more options, read the our Getting Started series.
If you are new to BowTie, check out our other Getting Started guides.
Getting Started with BowTie:
- Build a Landing Page in 5 minutes
- Using the BowTie Collection Editor
- Initial Configuration
- Setting Up Custom Domains
- Customizing and Styling BowTie frontend content
- Build a website with a pay wall
- Blogging with BowTie
- Launch a simple donation site
- Using BowTie’s User Profile system
- Build a Daily Deal Site with Jekyll Collections
- Using Jekyll Data to extend your site
- Adding BowTie users to MailChimp with Zapier
To keep up to date, follow us on twitter at @bowtie_io
Questions? Please comment! Thanks for your support and feedback.